1. What does it mean?
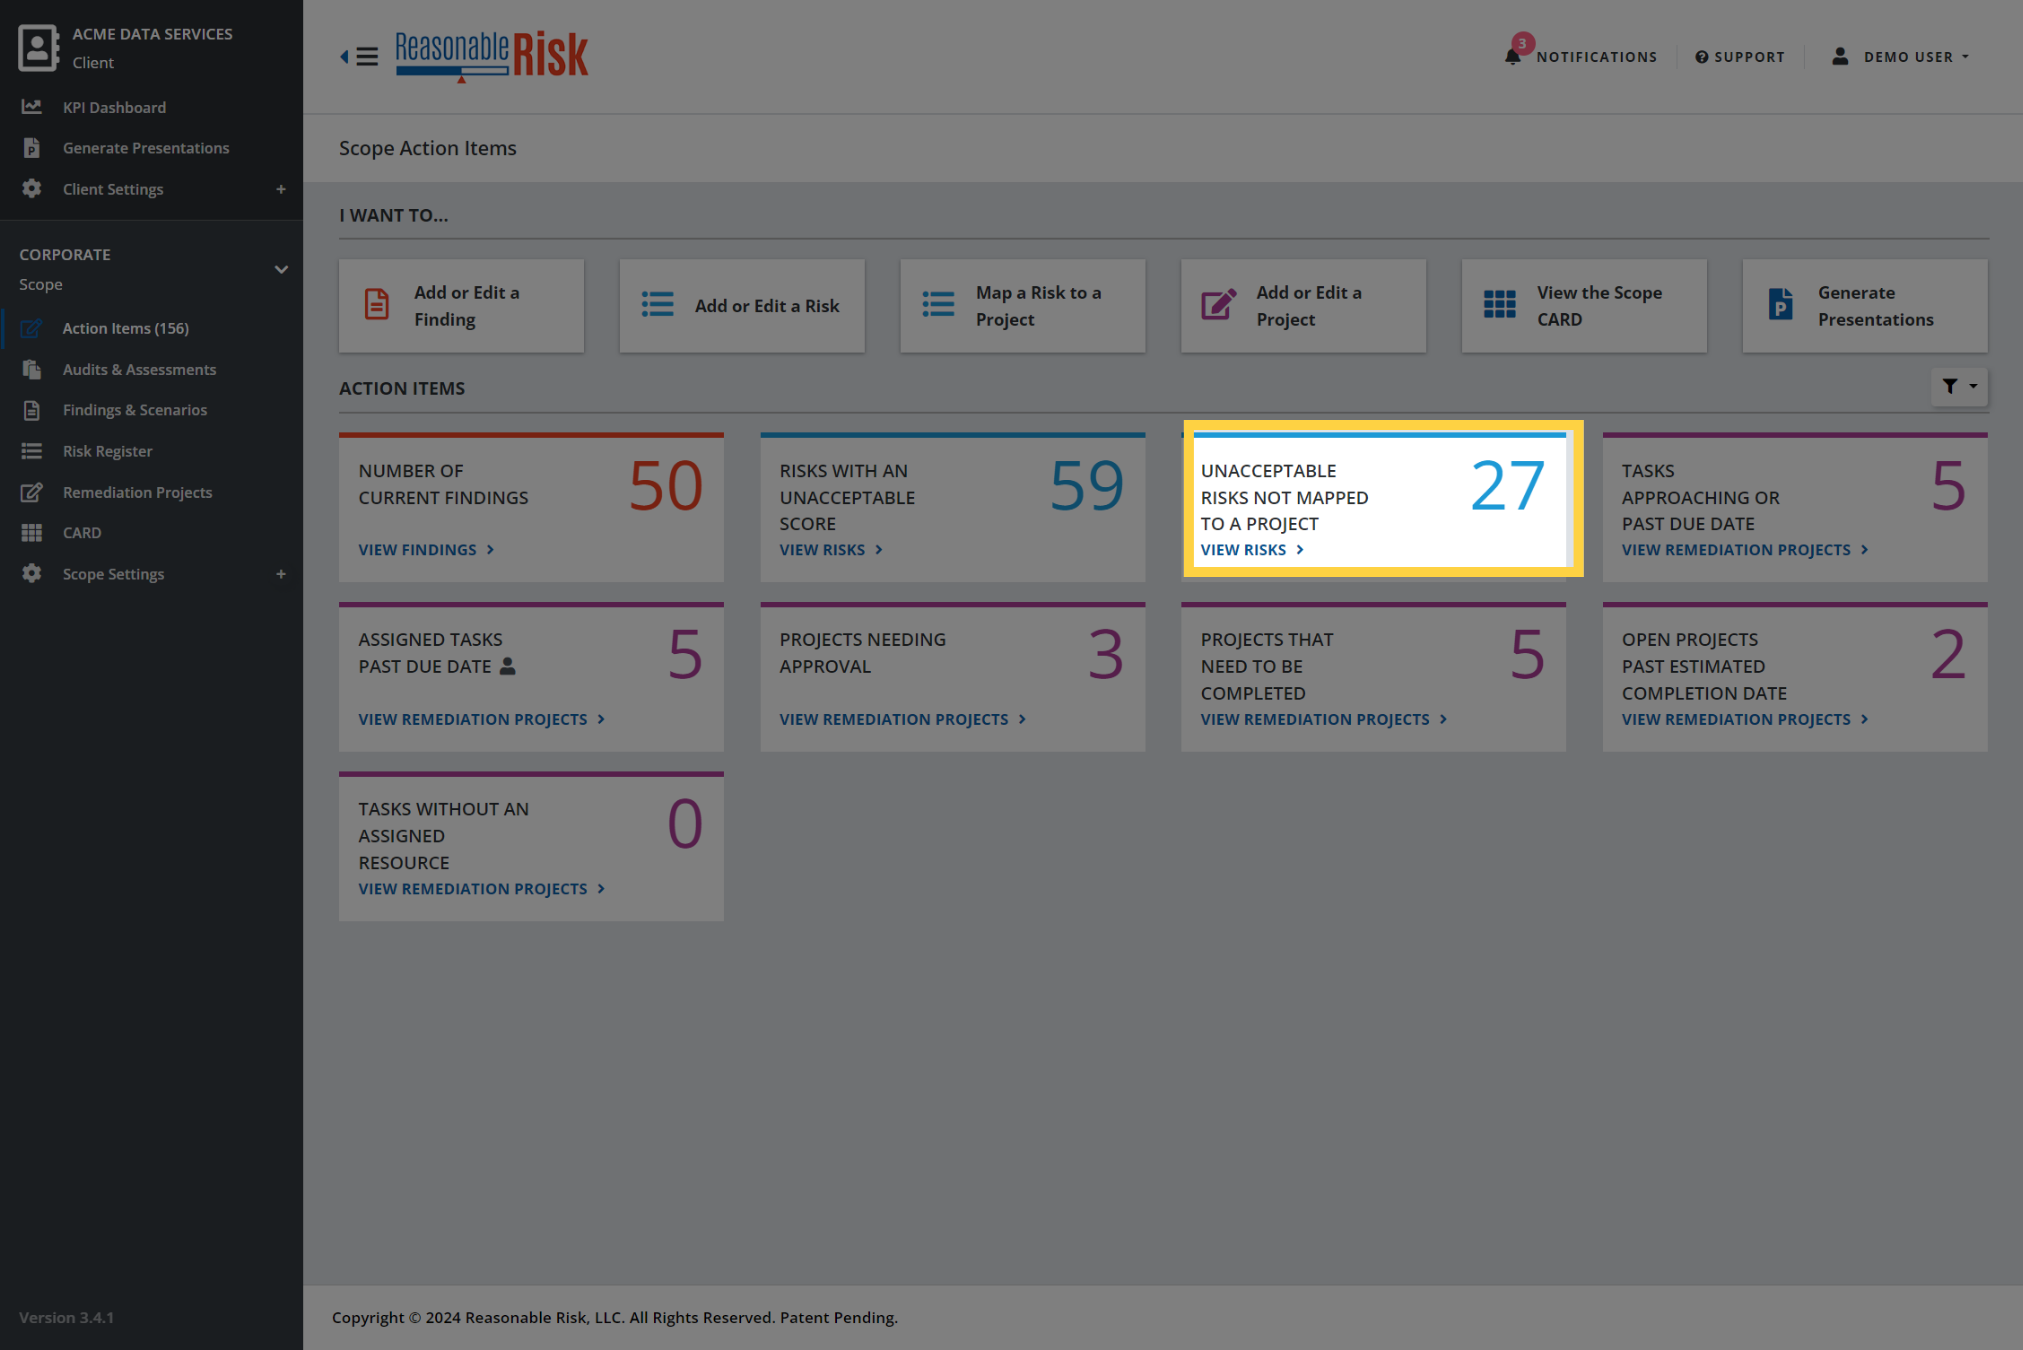
In the Action Items module, there is an Action Tile for "Unacceptable Risks not Mapped to a Project".
This Action Tile presents a count of unacceptable risks that have not been associated with a Remediation Project.
In order to effectively manage risk in your security program, we plan to reduce each risk to an acceptable level by adding the risk to a Remediation Project.
Unacceptable Risks that have not been added to a Remediation Project represent an outstanding liability without a plan for correction. Our goal is to drive this number to zero, ensuring that all unacceptable risks have been added to a Remediation Project.
Let's see how we can use this tile to help address this issue.
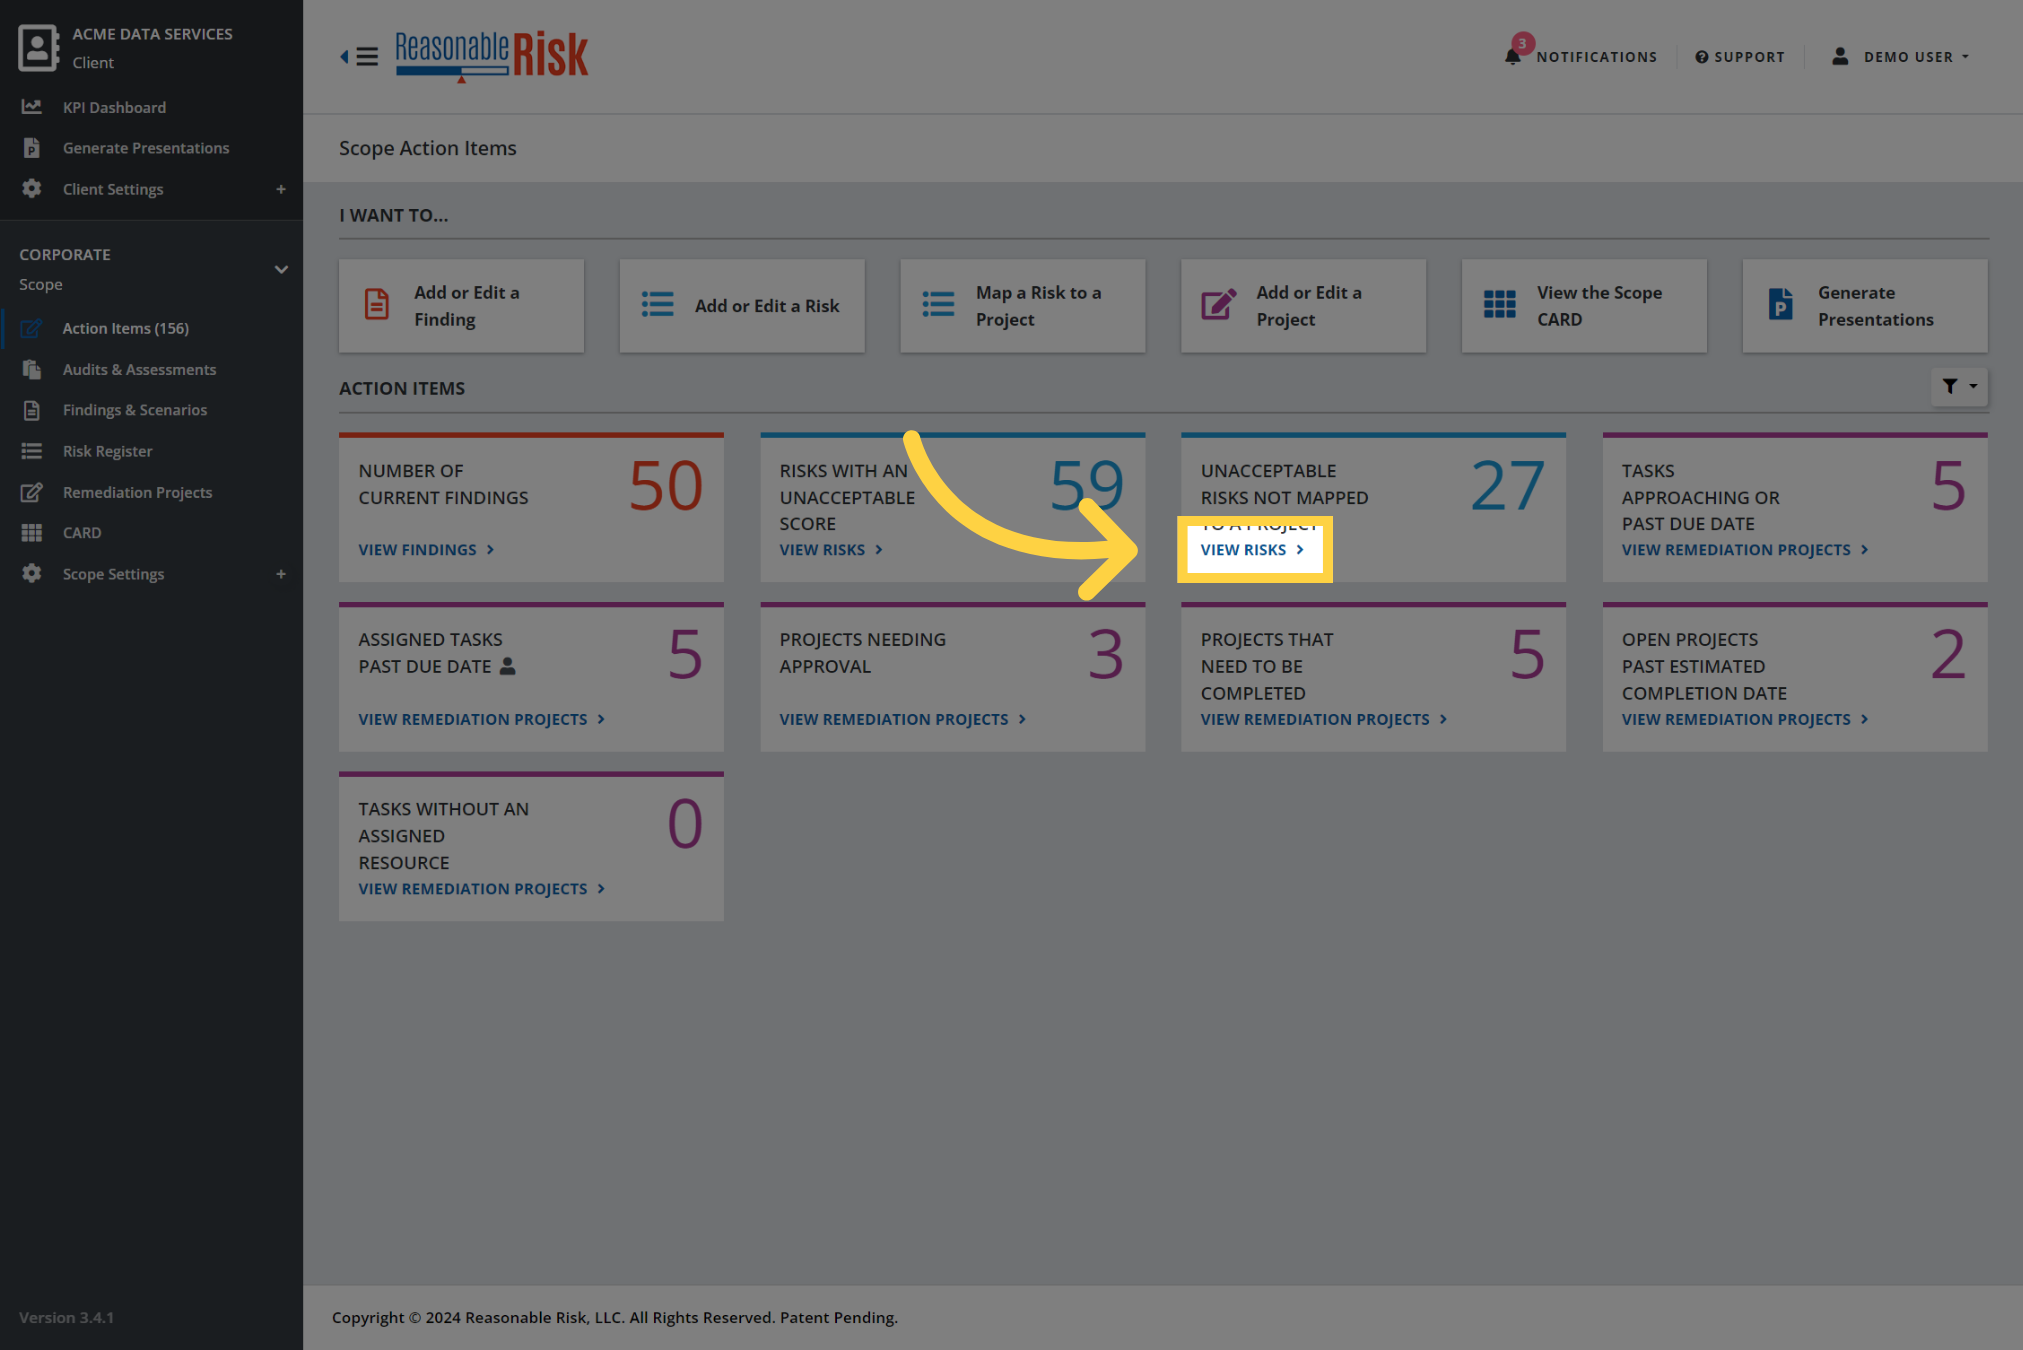
2. Click "View Risks"
Clicking on the "View Risks" link in the Action Tile, will open the Risk Register module and set a filter to show this specific group of risks.
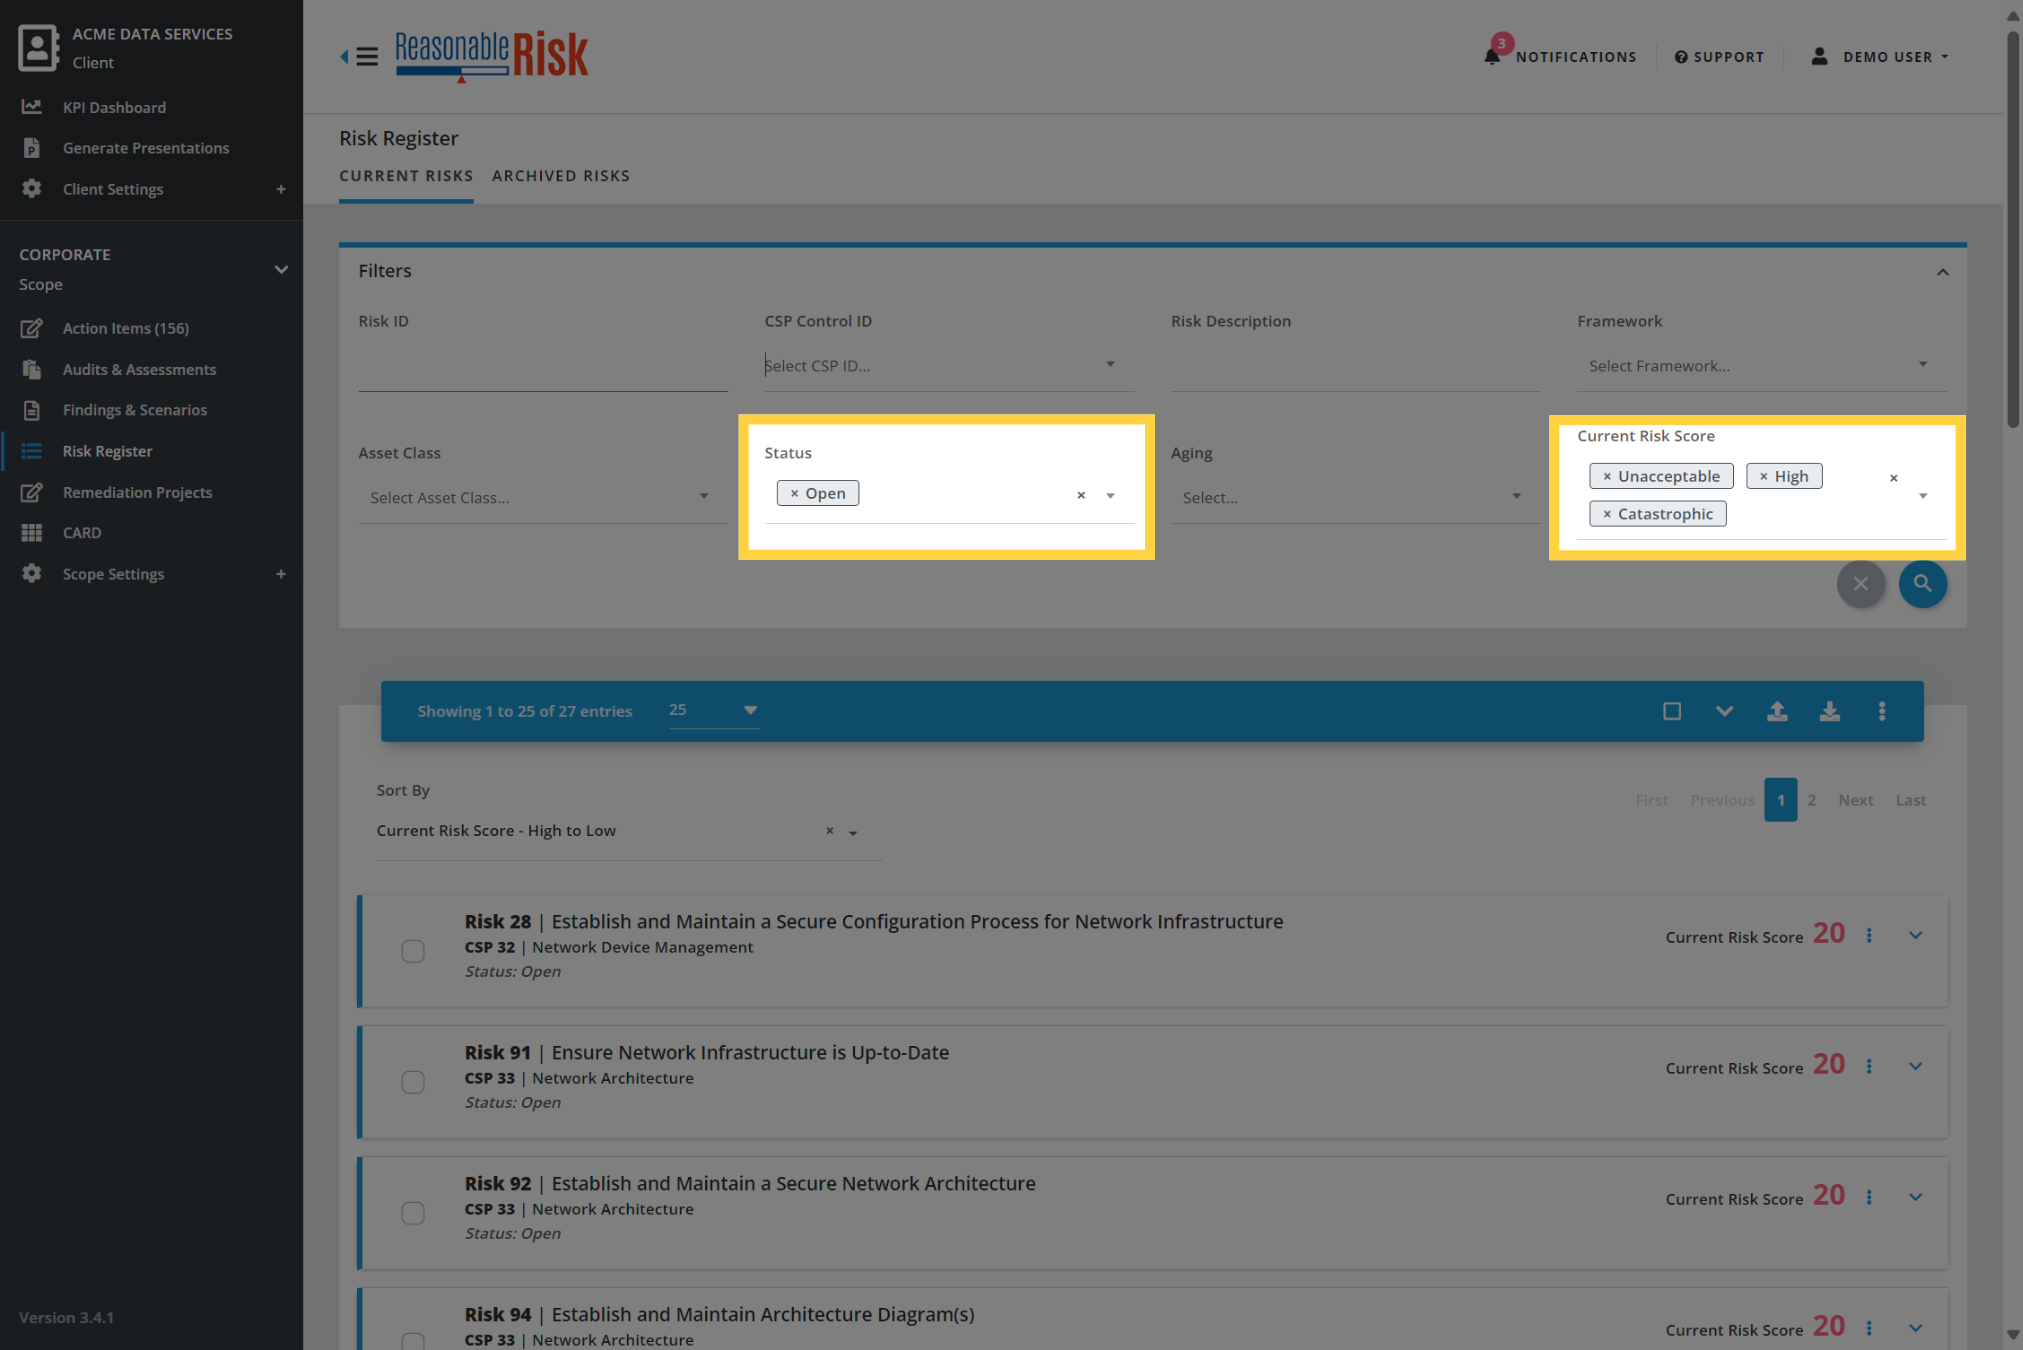
3. Applied filters
The Current Risk Score is filtered for values above your organization's Acceptable Risk Level as defined in your CARD.
The Status field is filtered to a value of "Open" which means that the risk is not associated to a Remediation Project.
4. Additional filter values
At this point, you may choose to apply additional filters to narrow down the list of risks. As an example, in order to select a group of risks that are related and could be worked together in one Remediation Project, you may choose to apply a CSP Control ID filter.
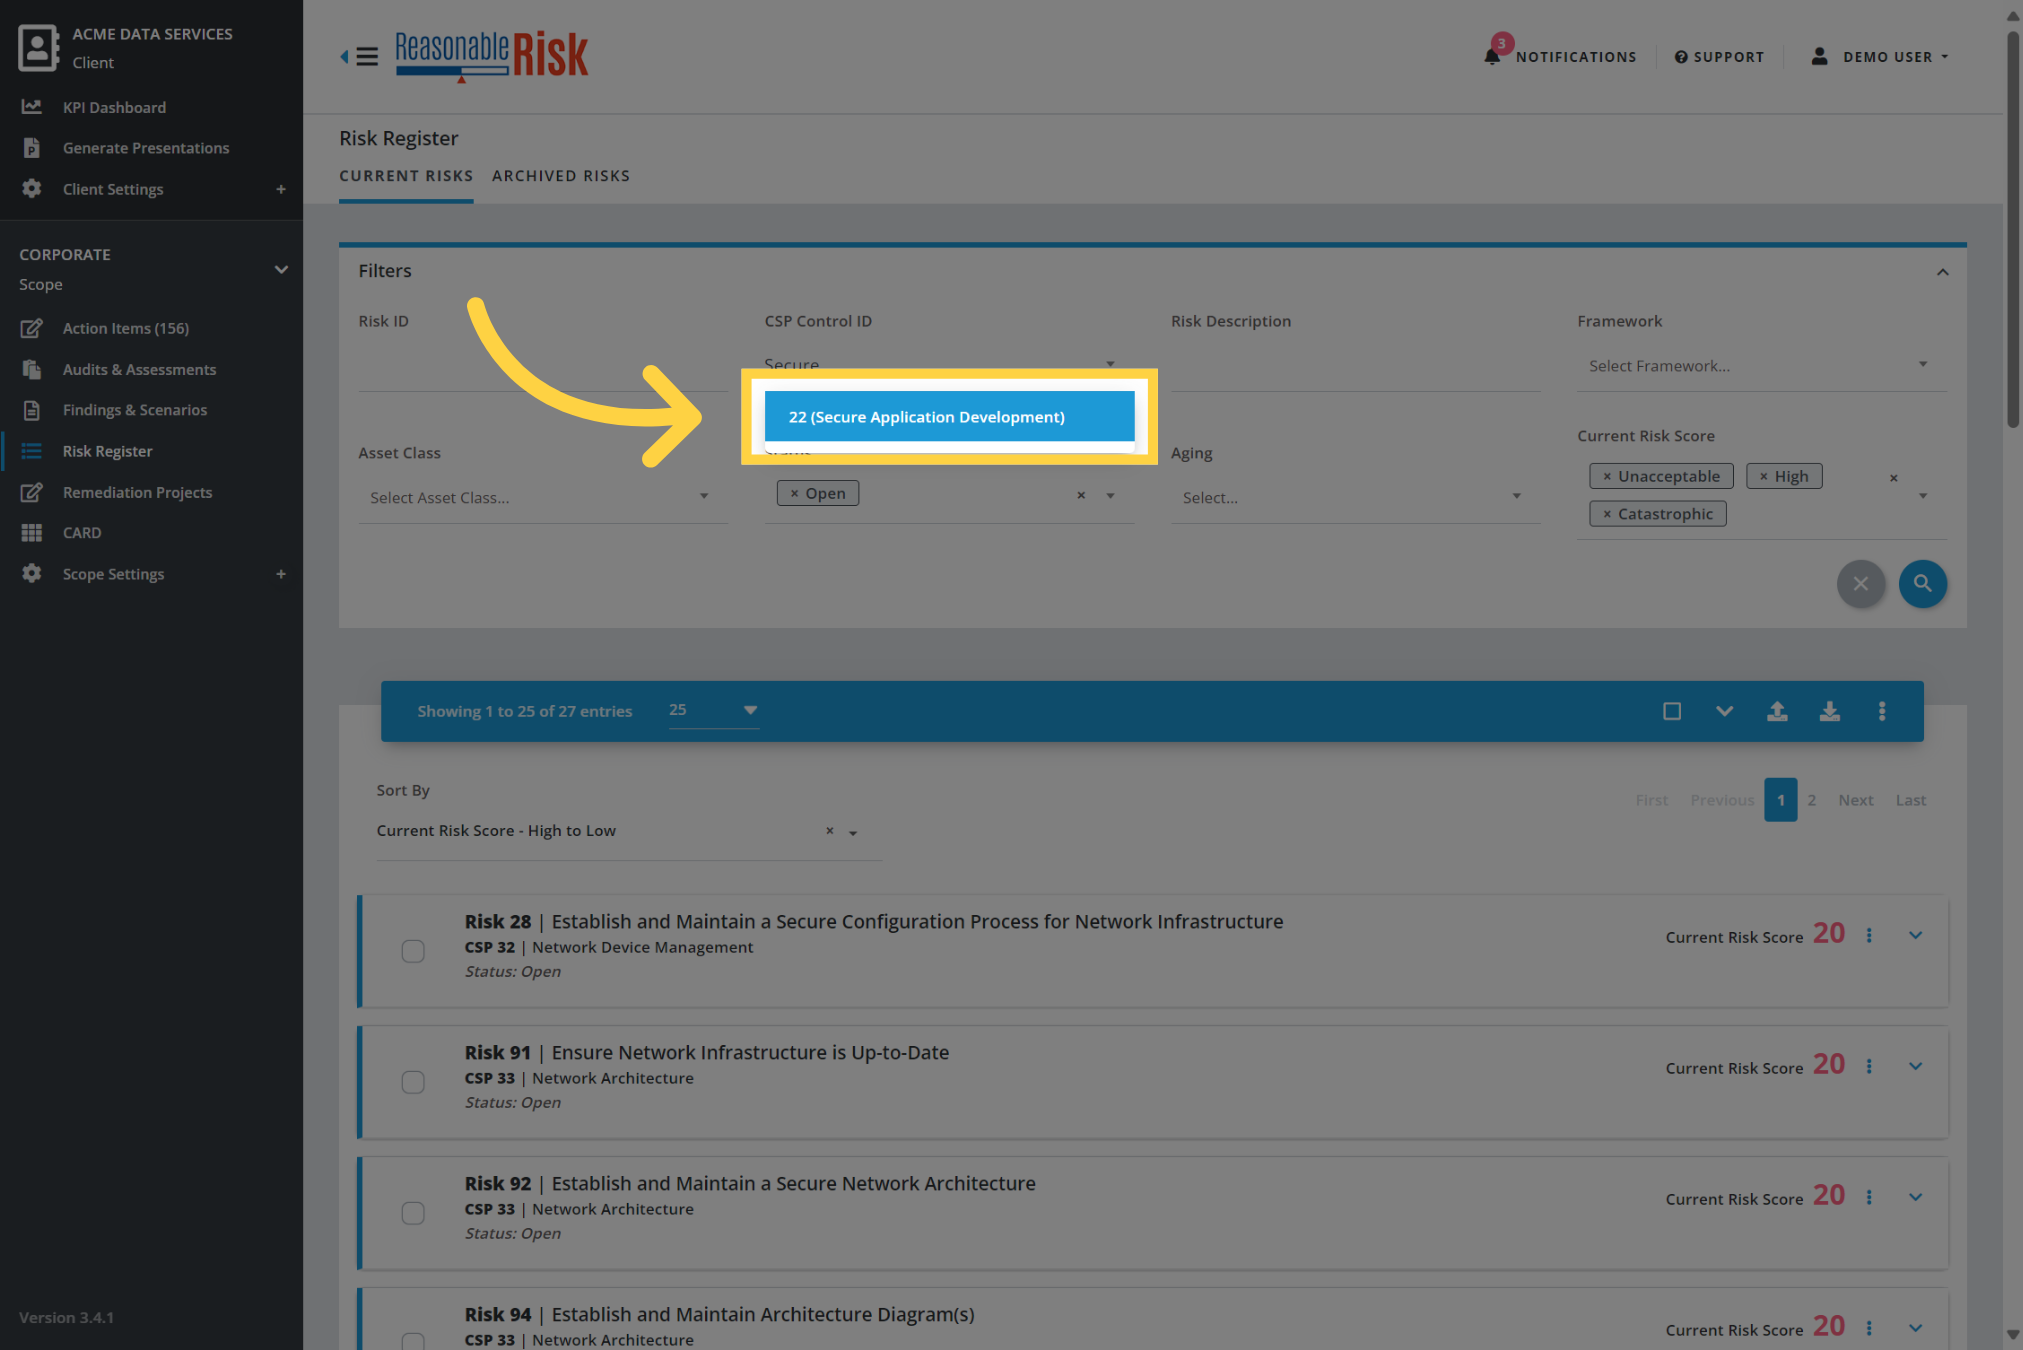
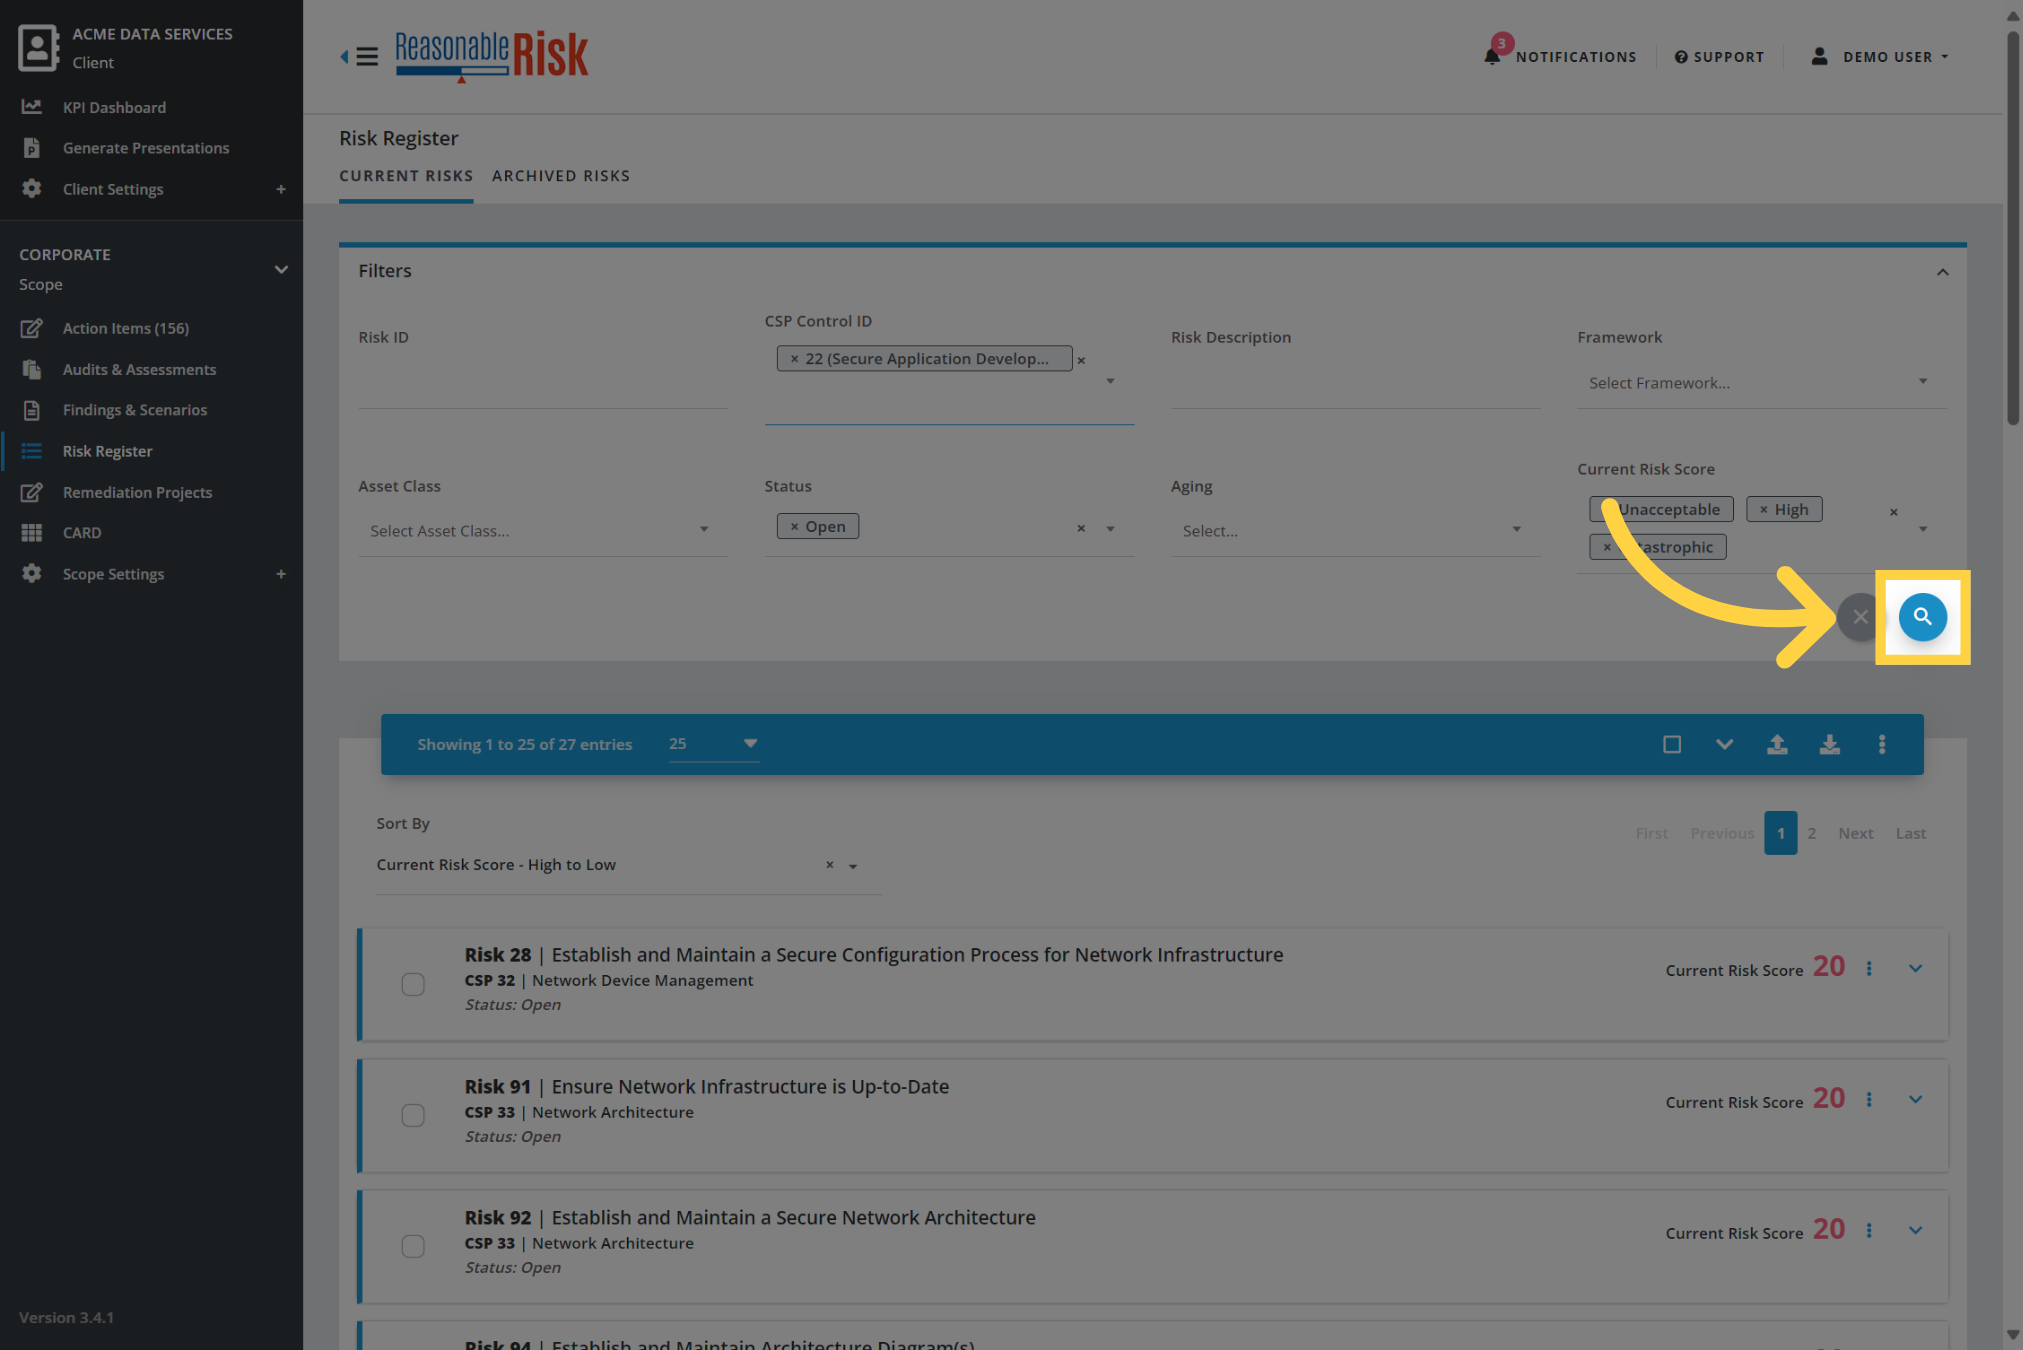
5. Click to apply the filter
Once you have identified all of the additional filters that you would like, click on the filter icon to apply your selection to the risk register list.
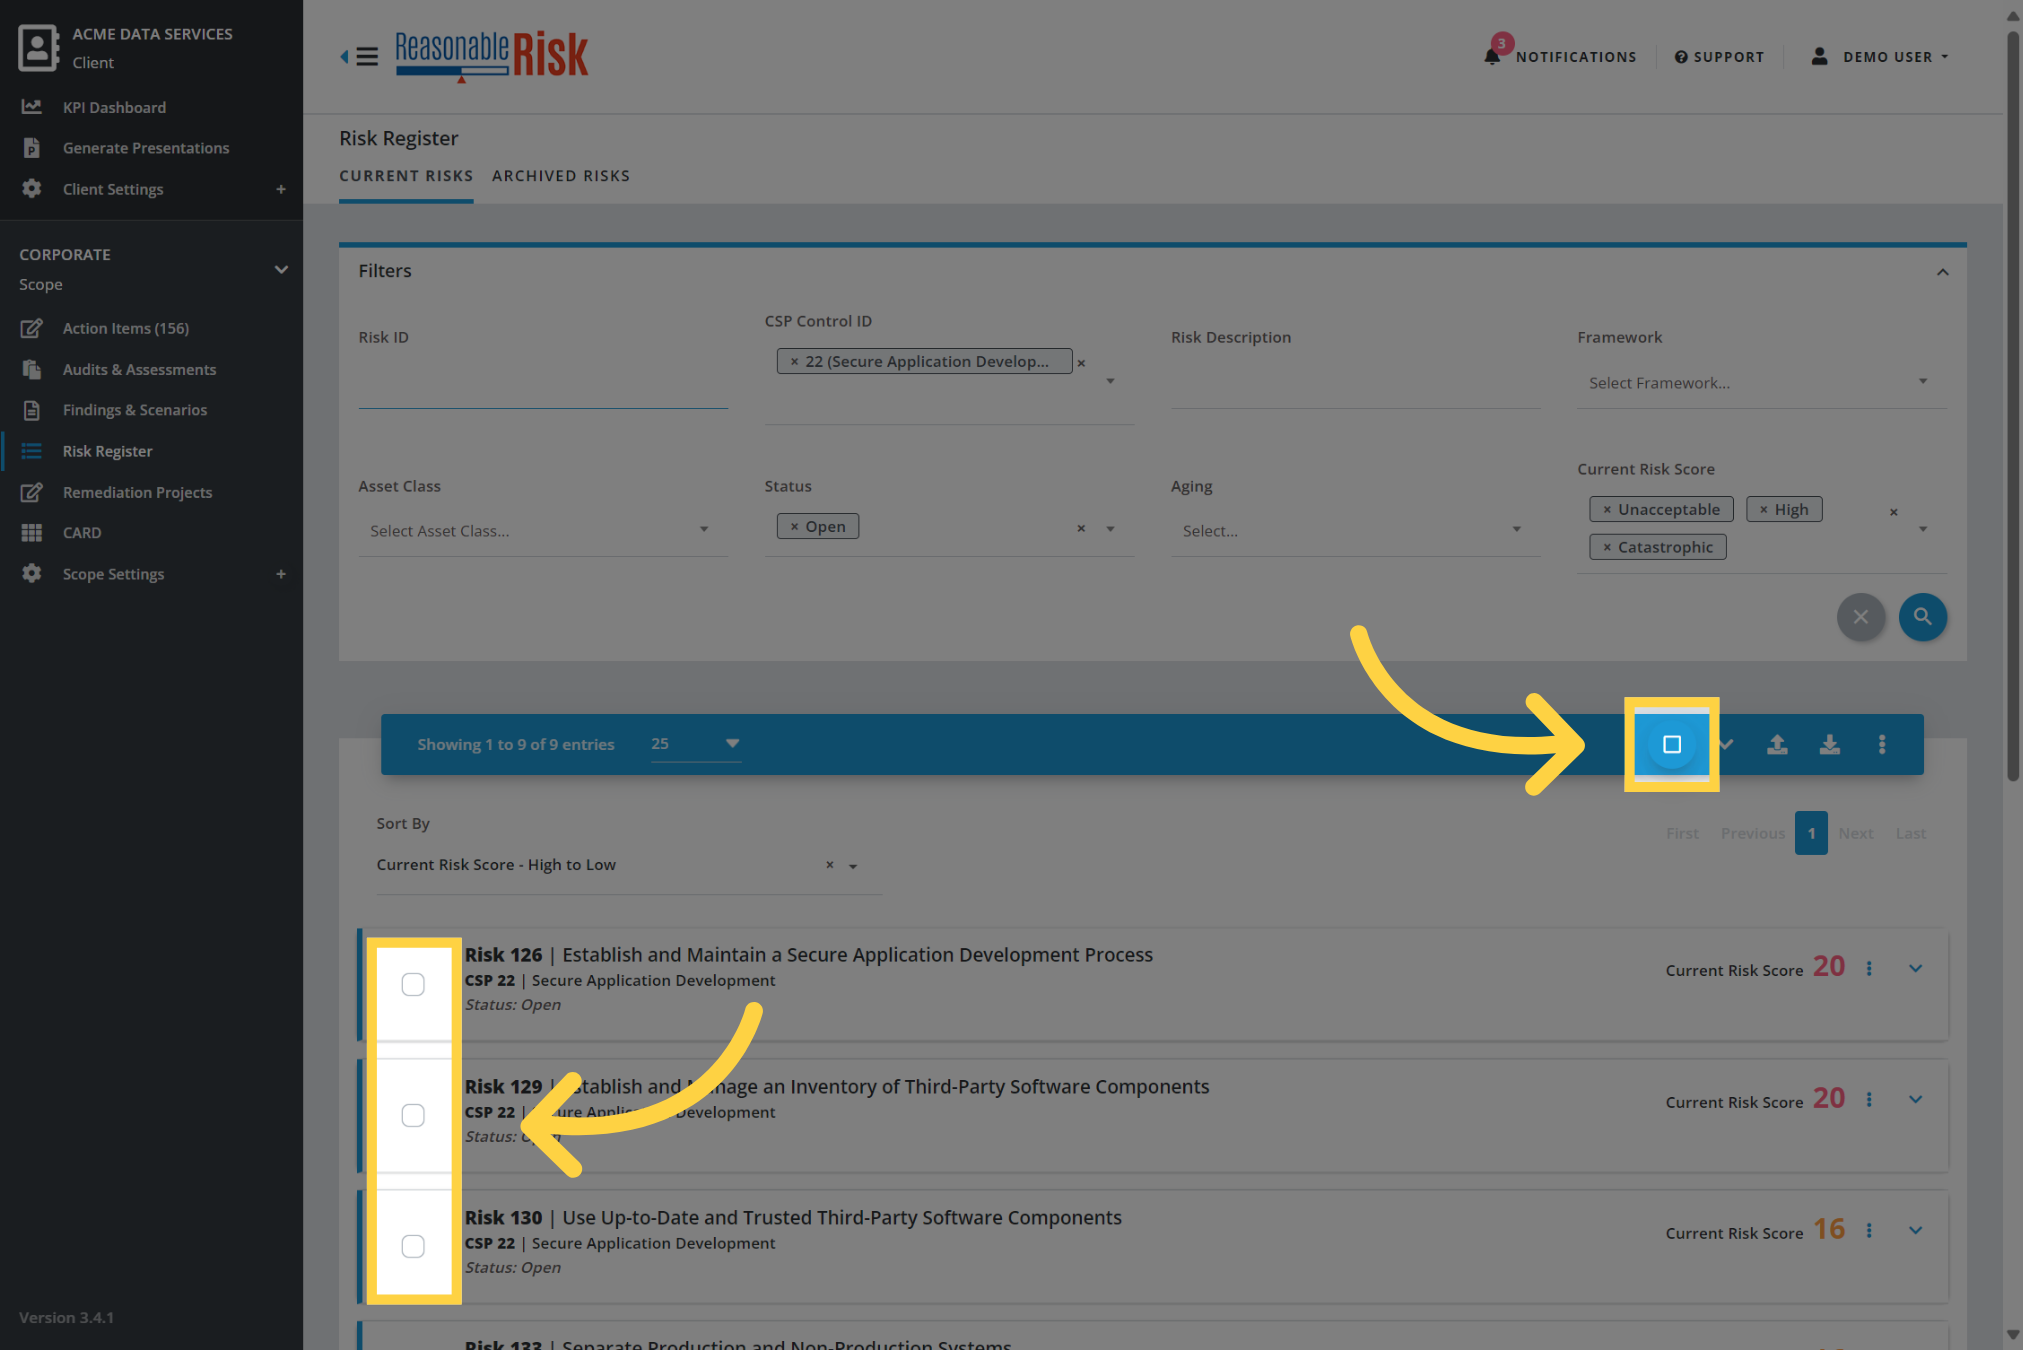
6. Select the risks
Now you have a list of risks that are related and need to be added to a Remediation Project.
Select the risks from the list that you want to map to a Remediation Project.
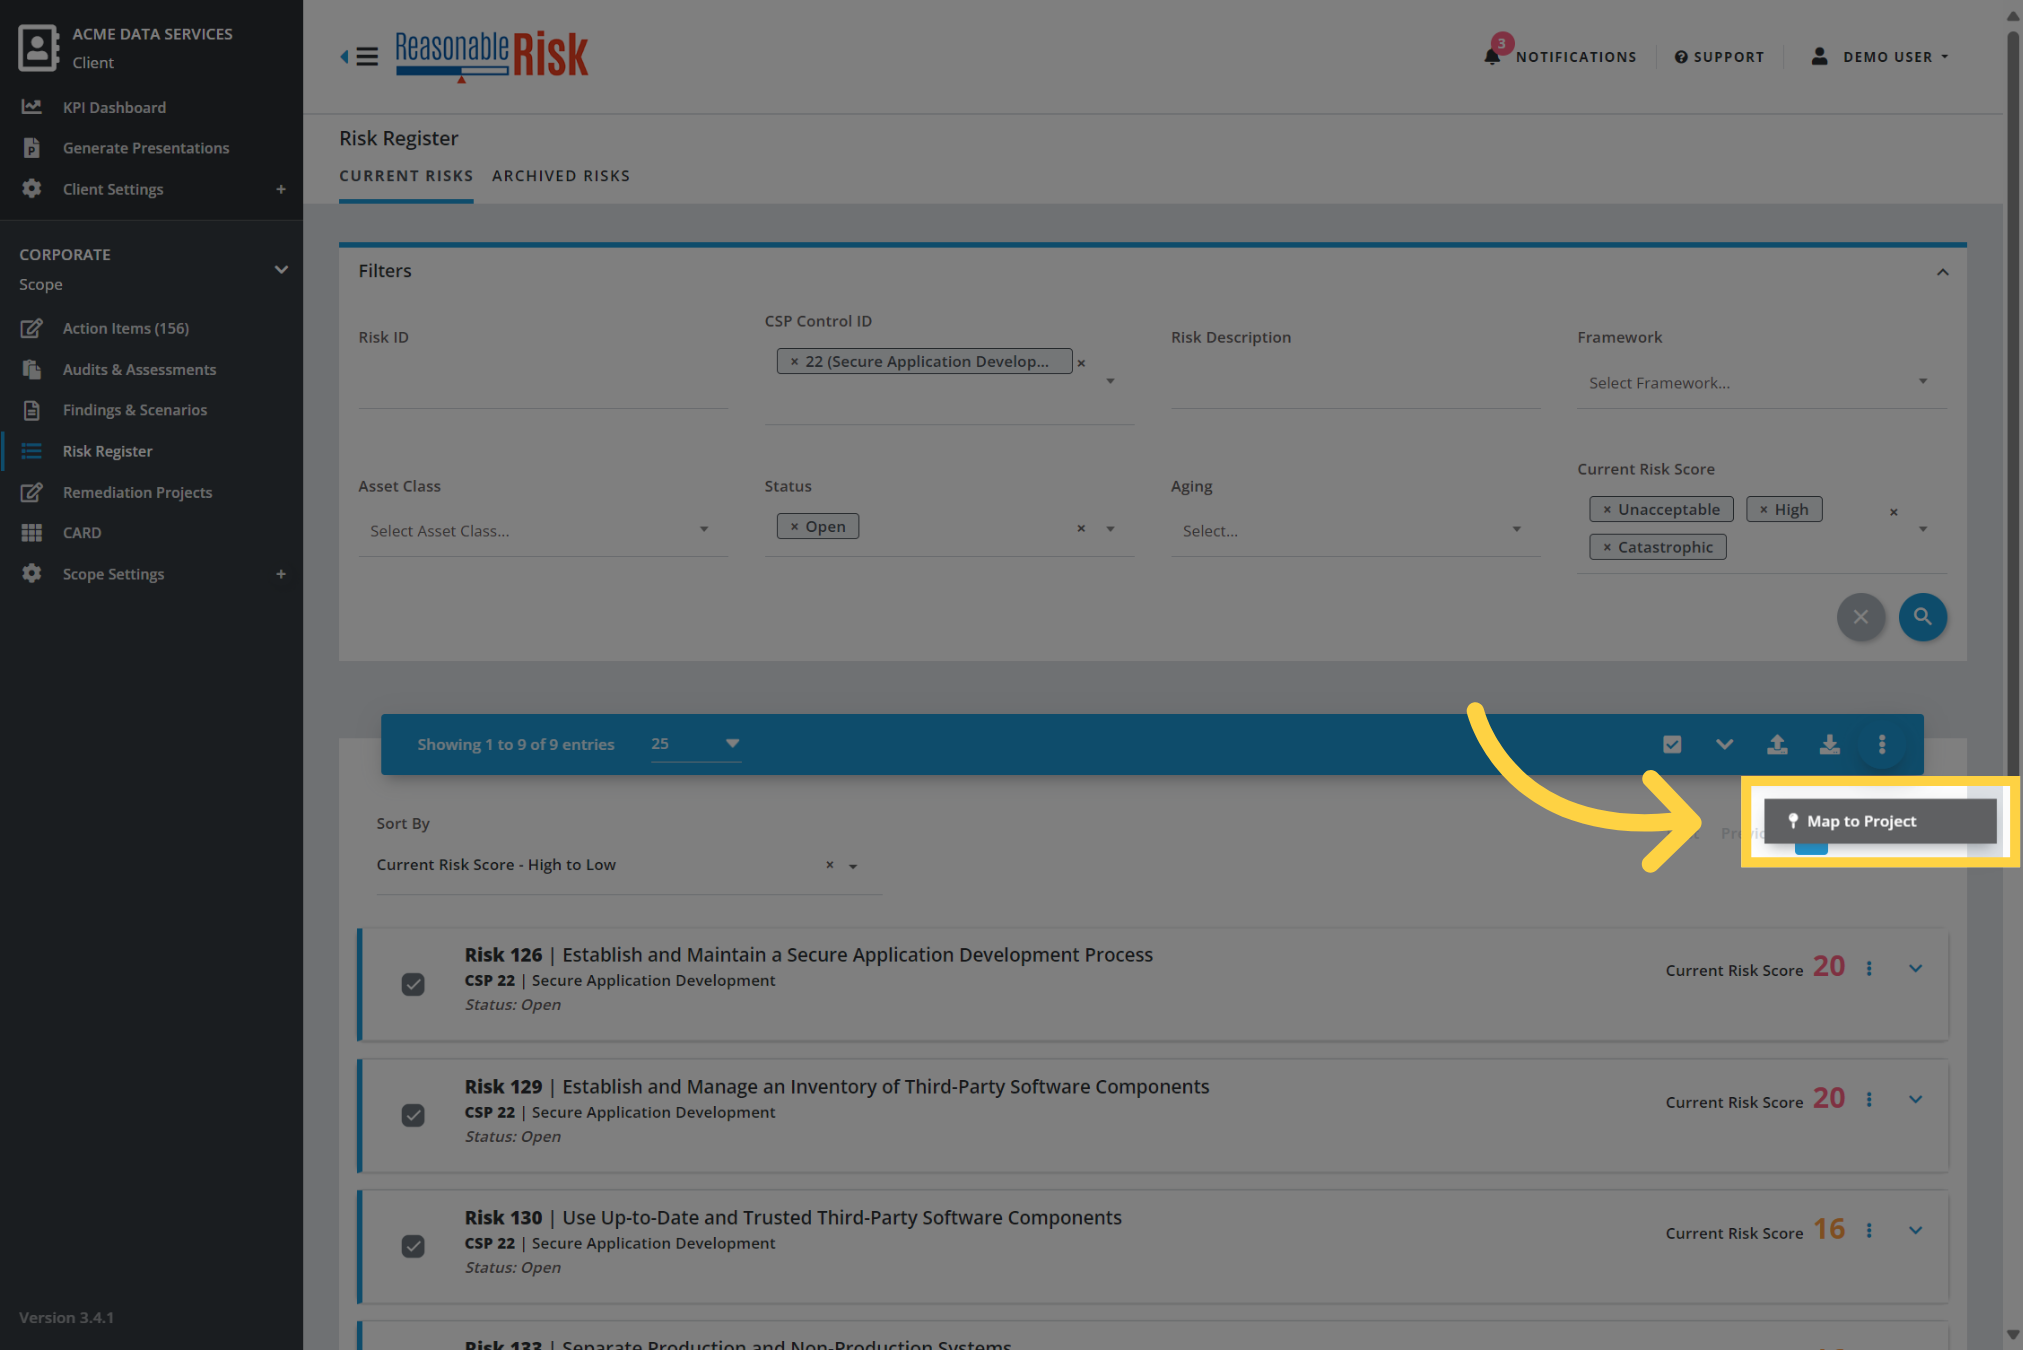
7. Click "Map to Project"
Once you have selected the risks that you want to add to a Remediation Project, use the three-dots menu and select "Map to Project".
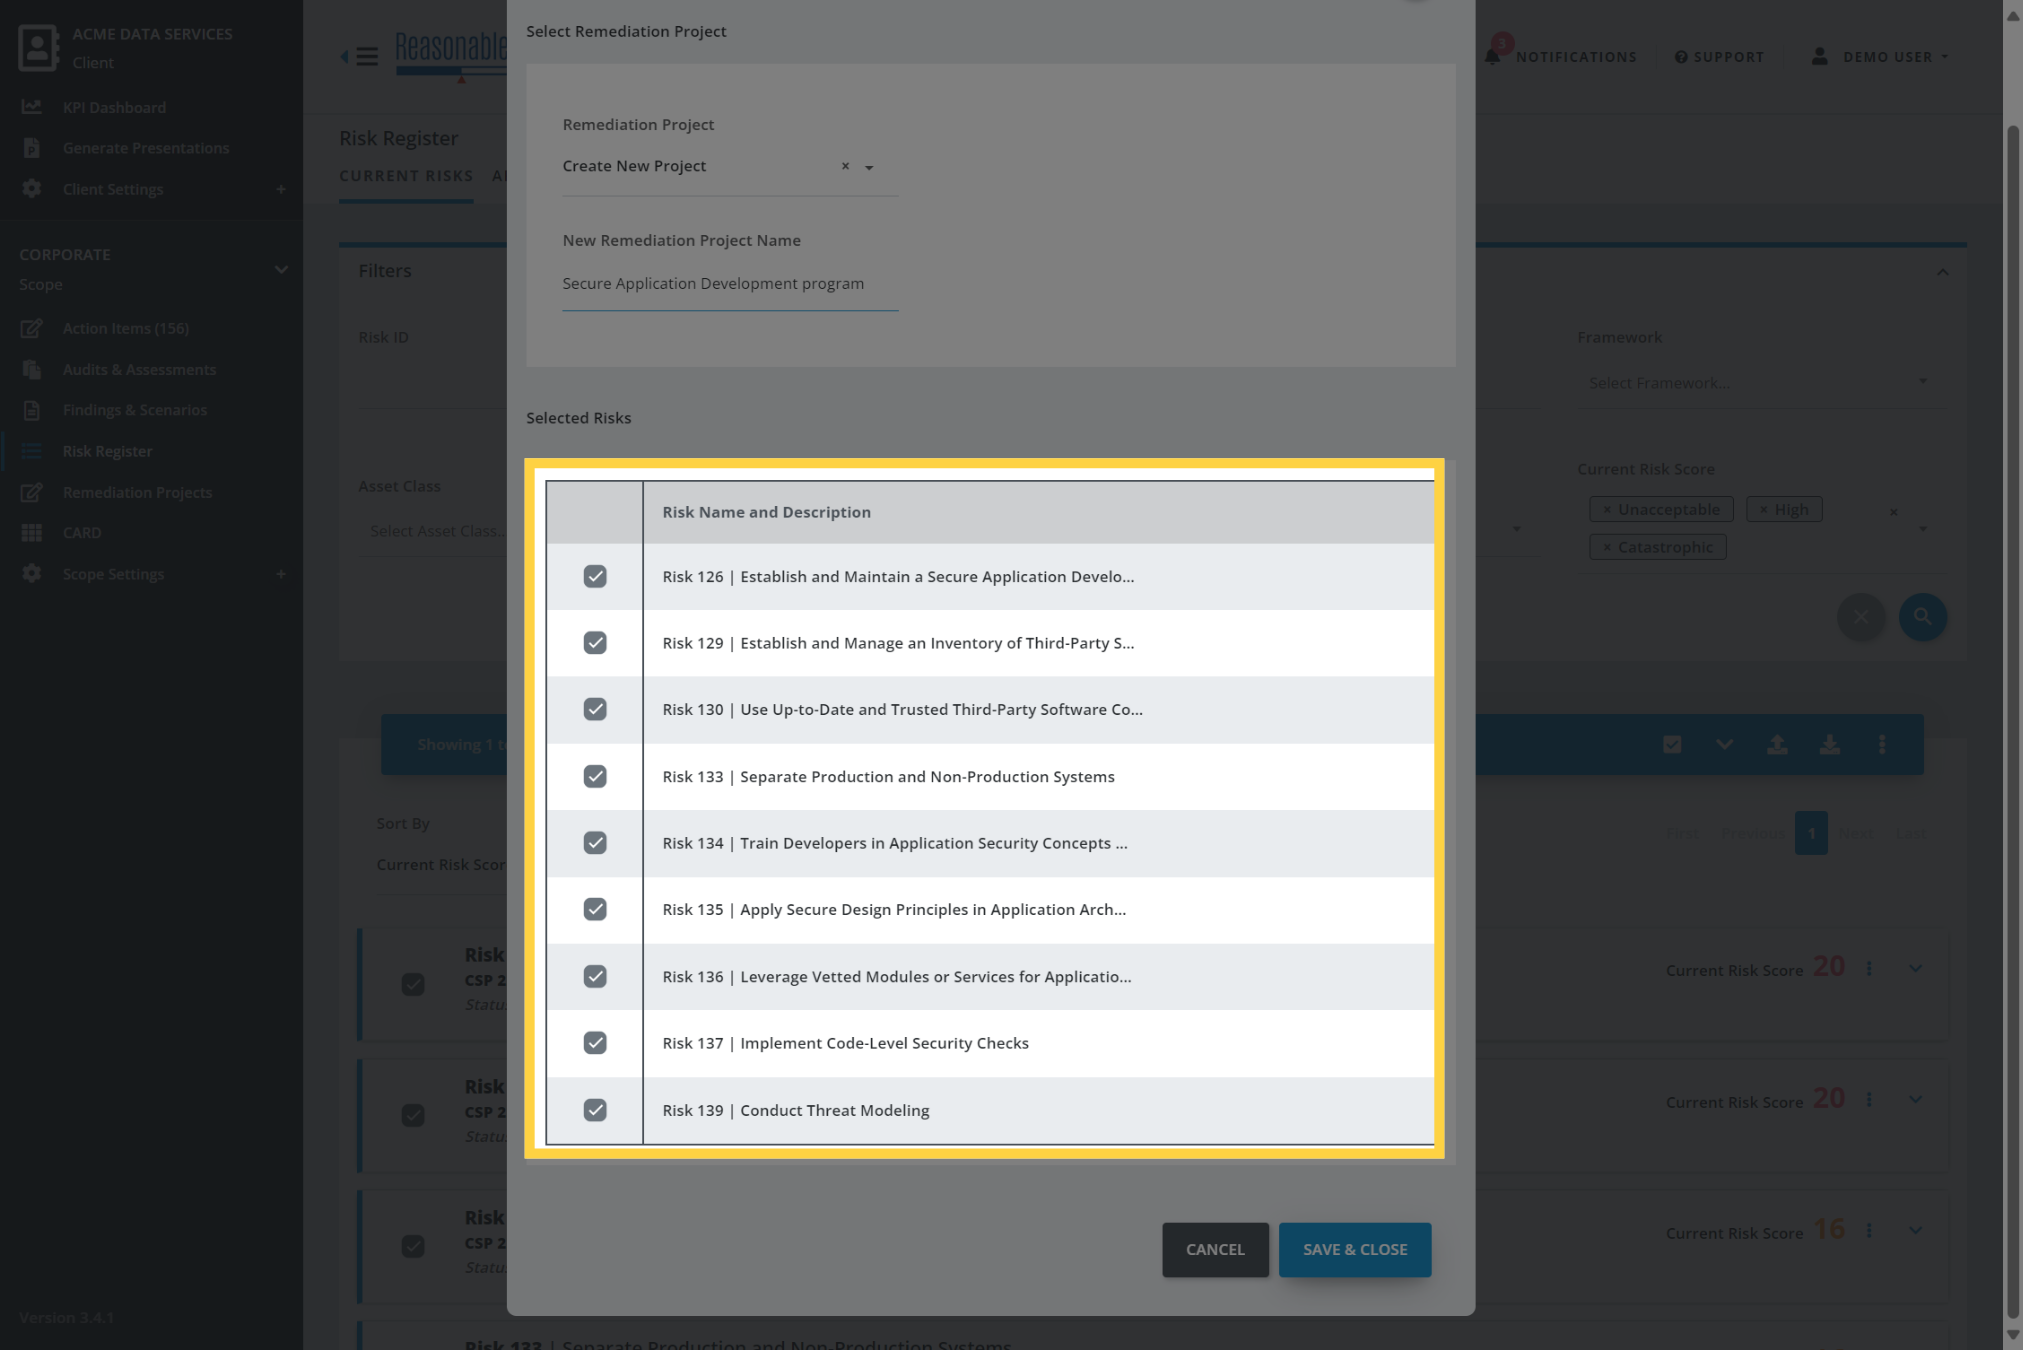
8. Select a project
Once the Map Risks to a Remediation Project window opens, use the Remediation Project drop down list to select the project that you wish to add the risks to. If an appropriate project does not exist, you may create a new project.
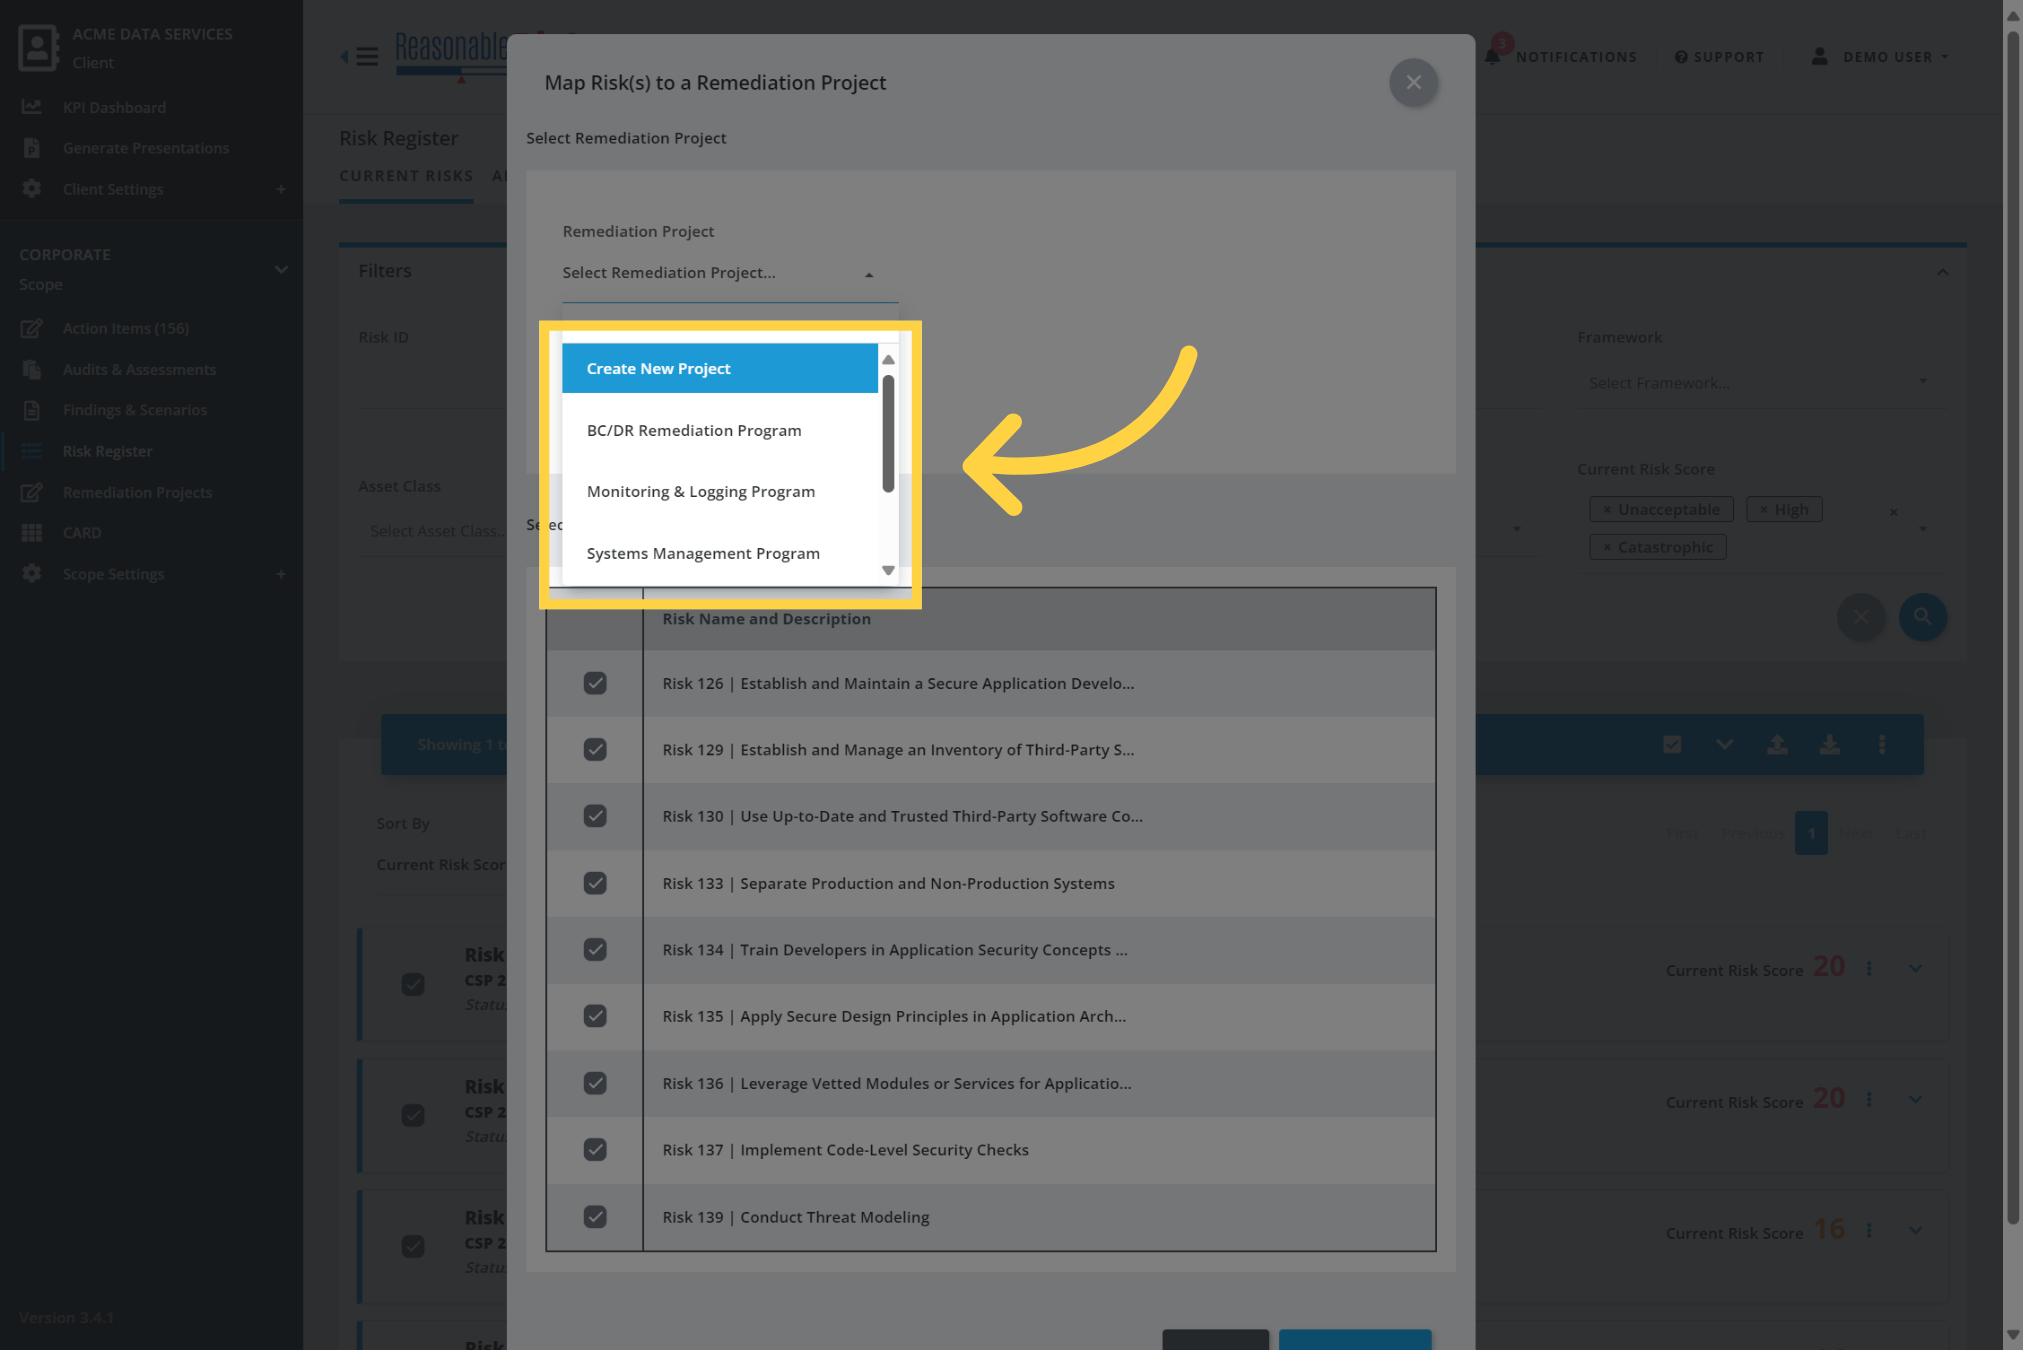
9. Review selected risks
Review the list of selected risks, make sure that each risk that you would like added to the project is selected.
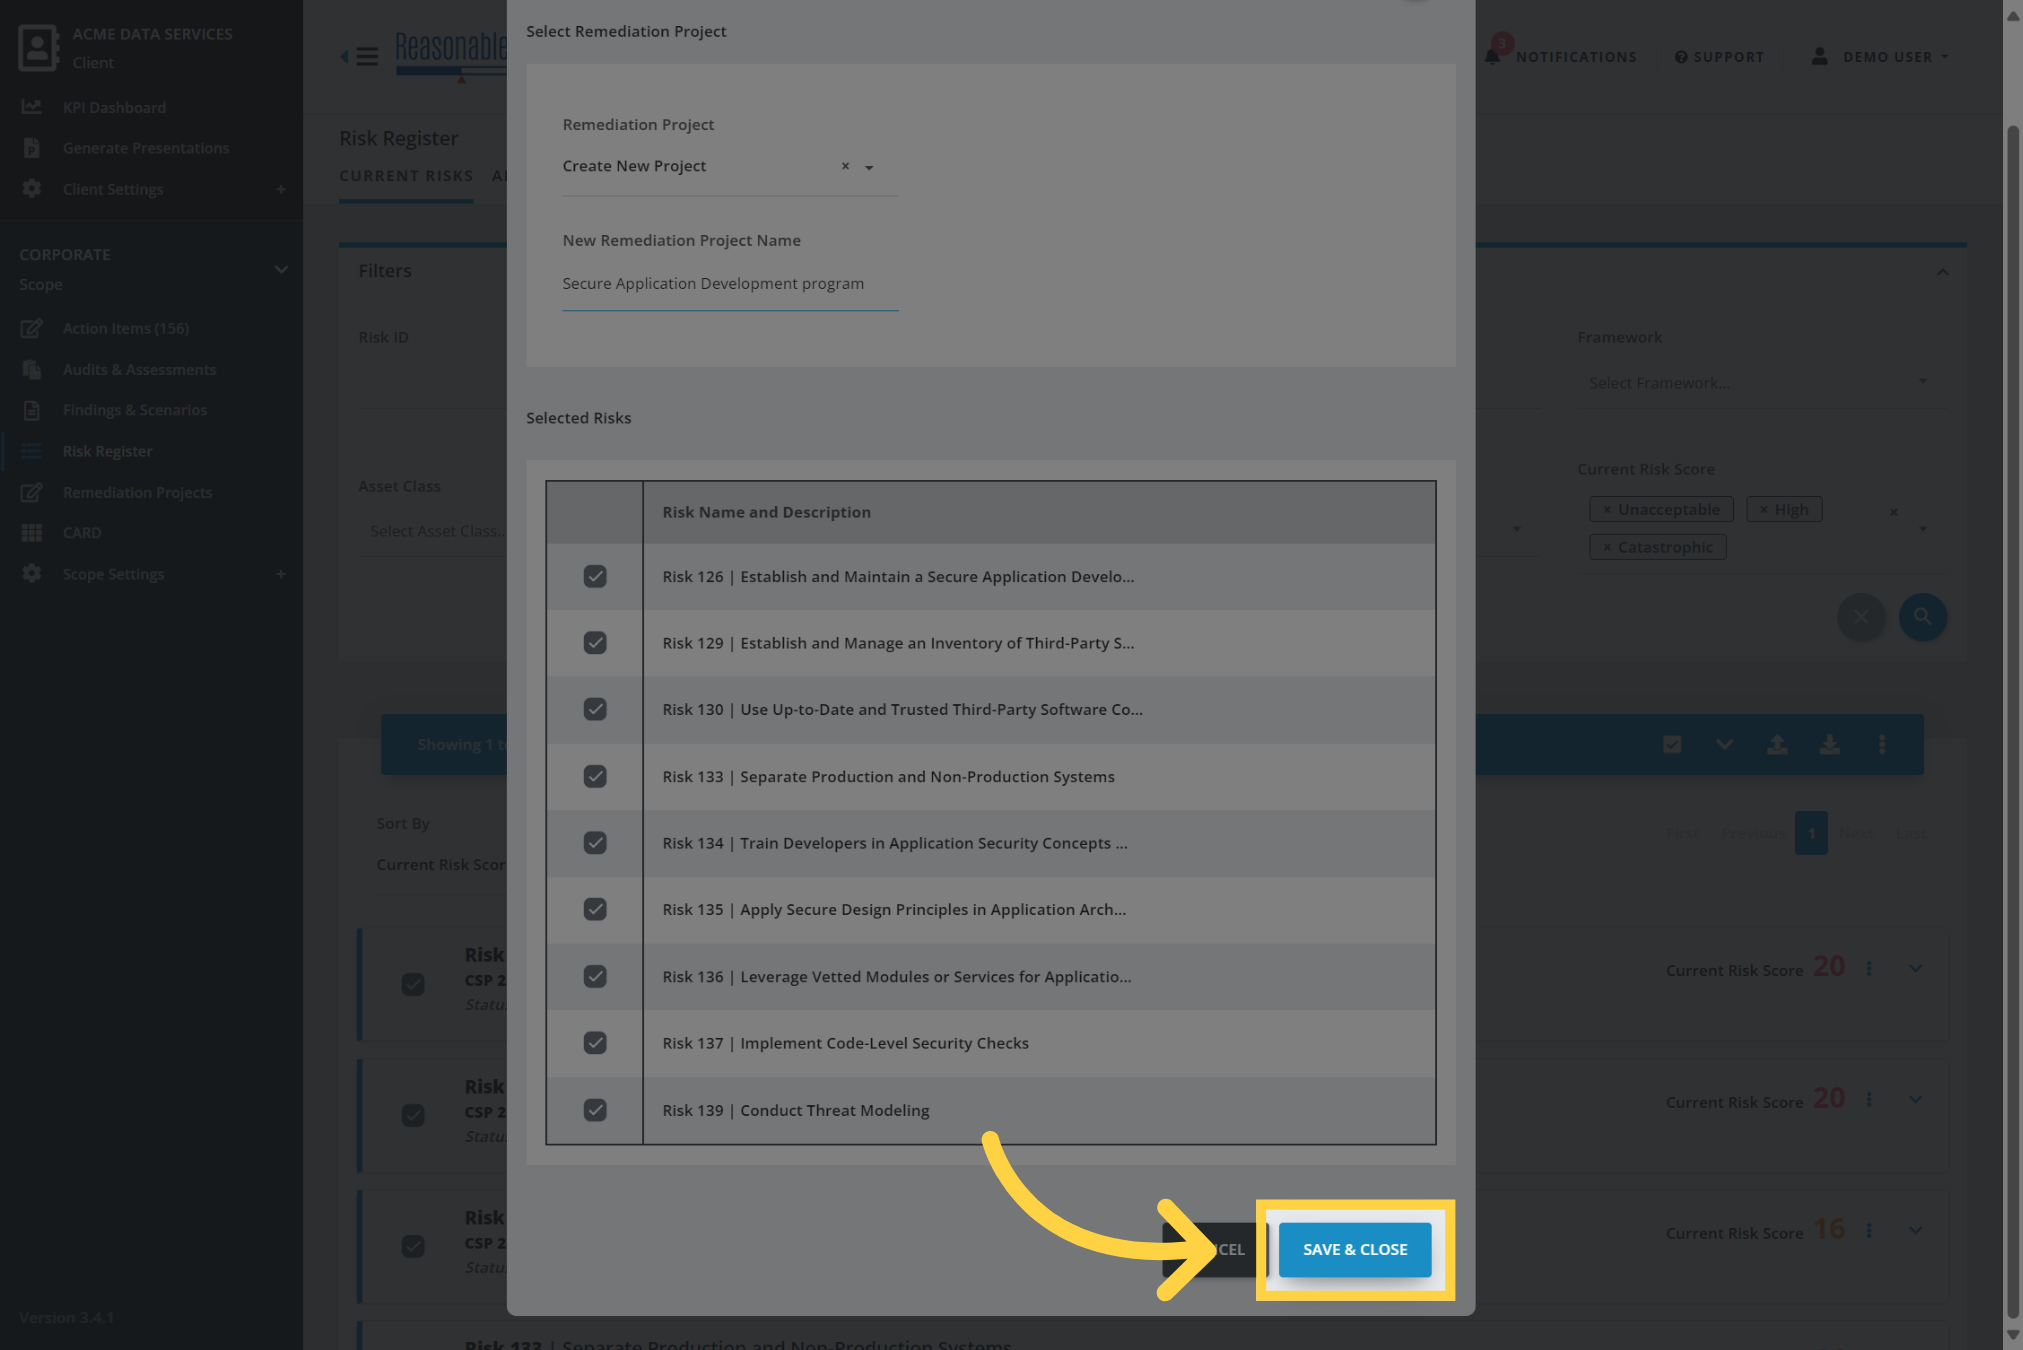
10. Click "Save & Close"
When you are ready, click "Save & Close" to add the selected risks to the Remediation Project.
You will be taken to the Remediation Project where you will be able to provide status, create tasks, and manage other aspects of the remediation activity.
Comments
0 comments
Please sign in to leave a comment.