The Application Navigation Overview will provide an introduction to navigating through Reasonable Risk so that you will understand the core elements used throughout the application.
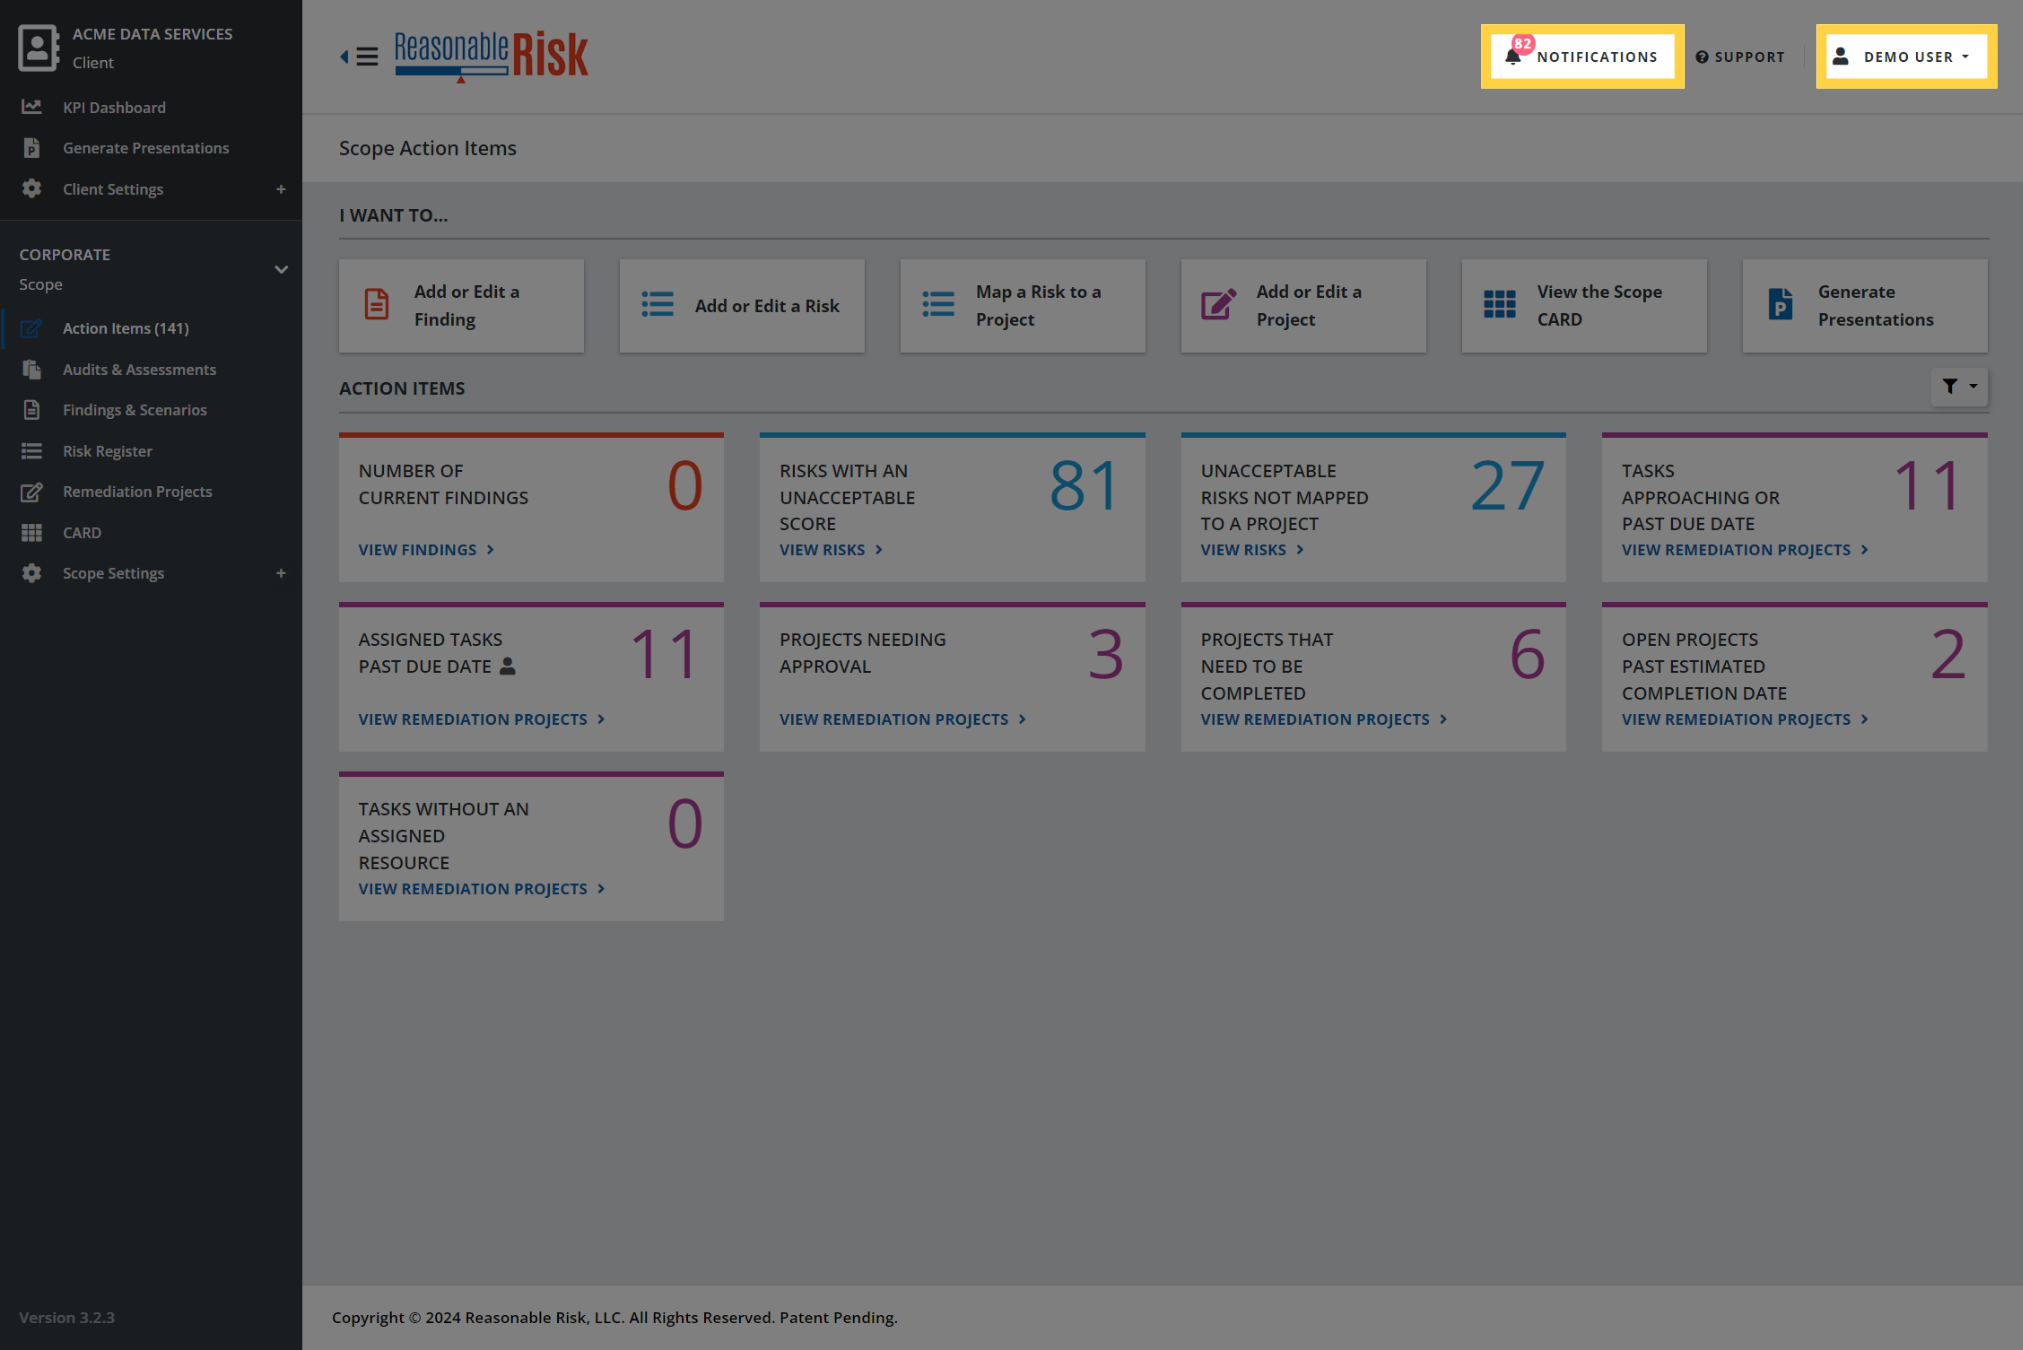
1. User Information Navigation Area
The top right corner of the application contains items that are relevant to the logged in user and are always available.
Here the user is able to see if there are unread notifications, as well as being able to access and manage those notifications.
In addition, the user is able to access their user Profile and Logout.
2. User Information Navigation Area
The Support item in the User Information area will take you to the Reasonable Risk Support Site for the application page that you are on when you click the item.

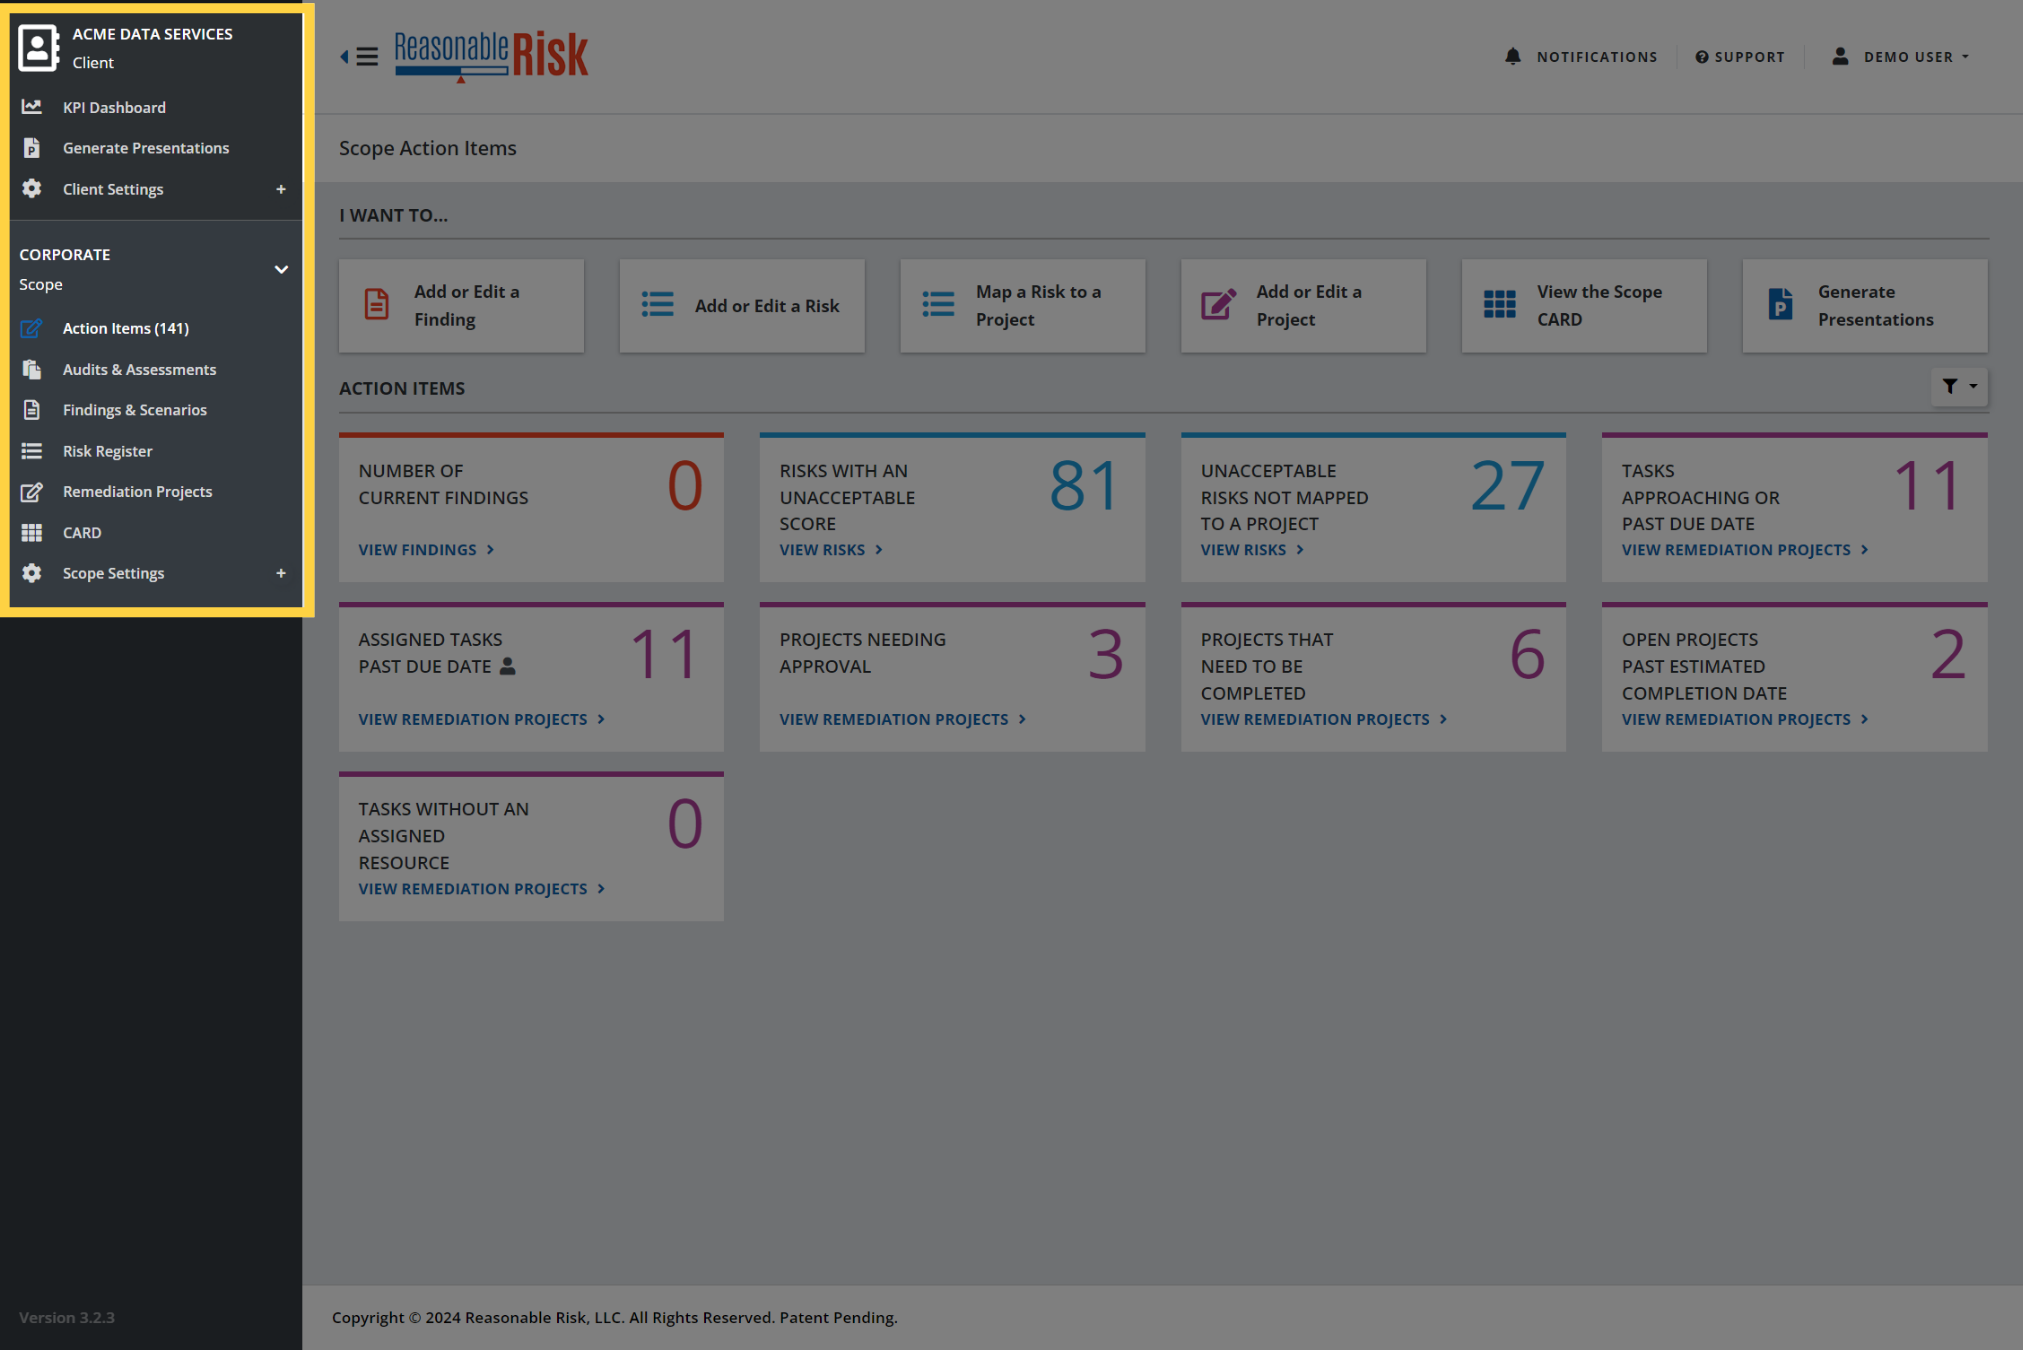
3. The Menu Bar
The Menu Bar is docked to the left side of the application.
The Menu Bar contains two sections, the top section labeled Client, and the bottom section labeled Scope.
First, let's look at how to show and hide the Menu Bar, then we will take a look at each section.
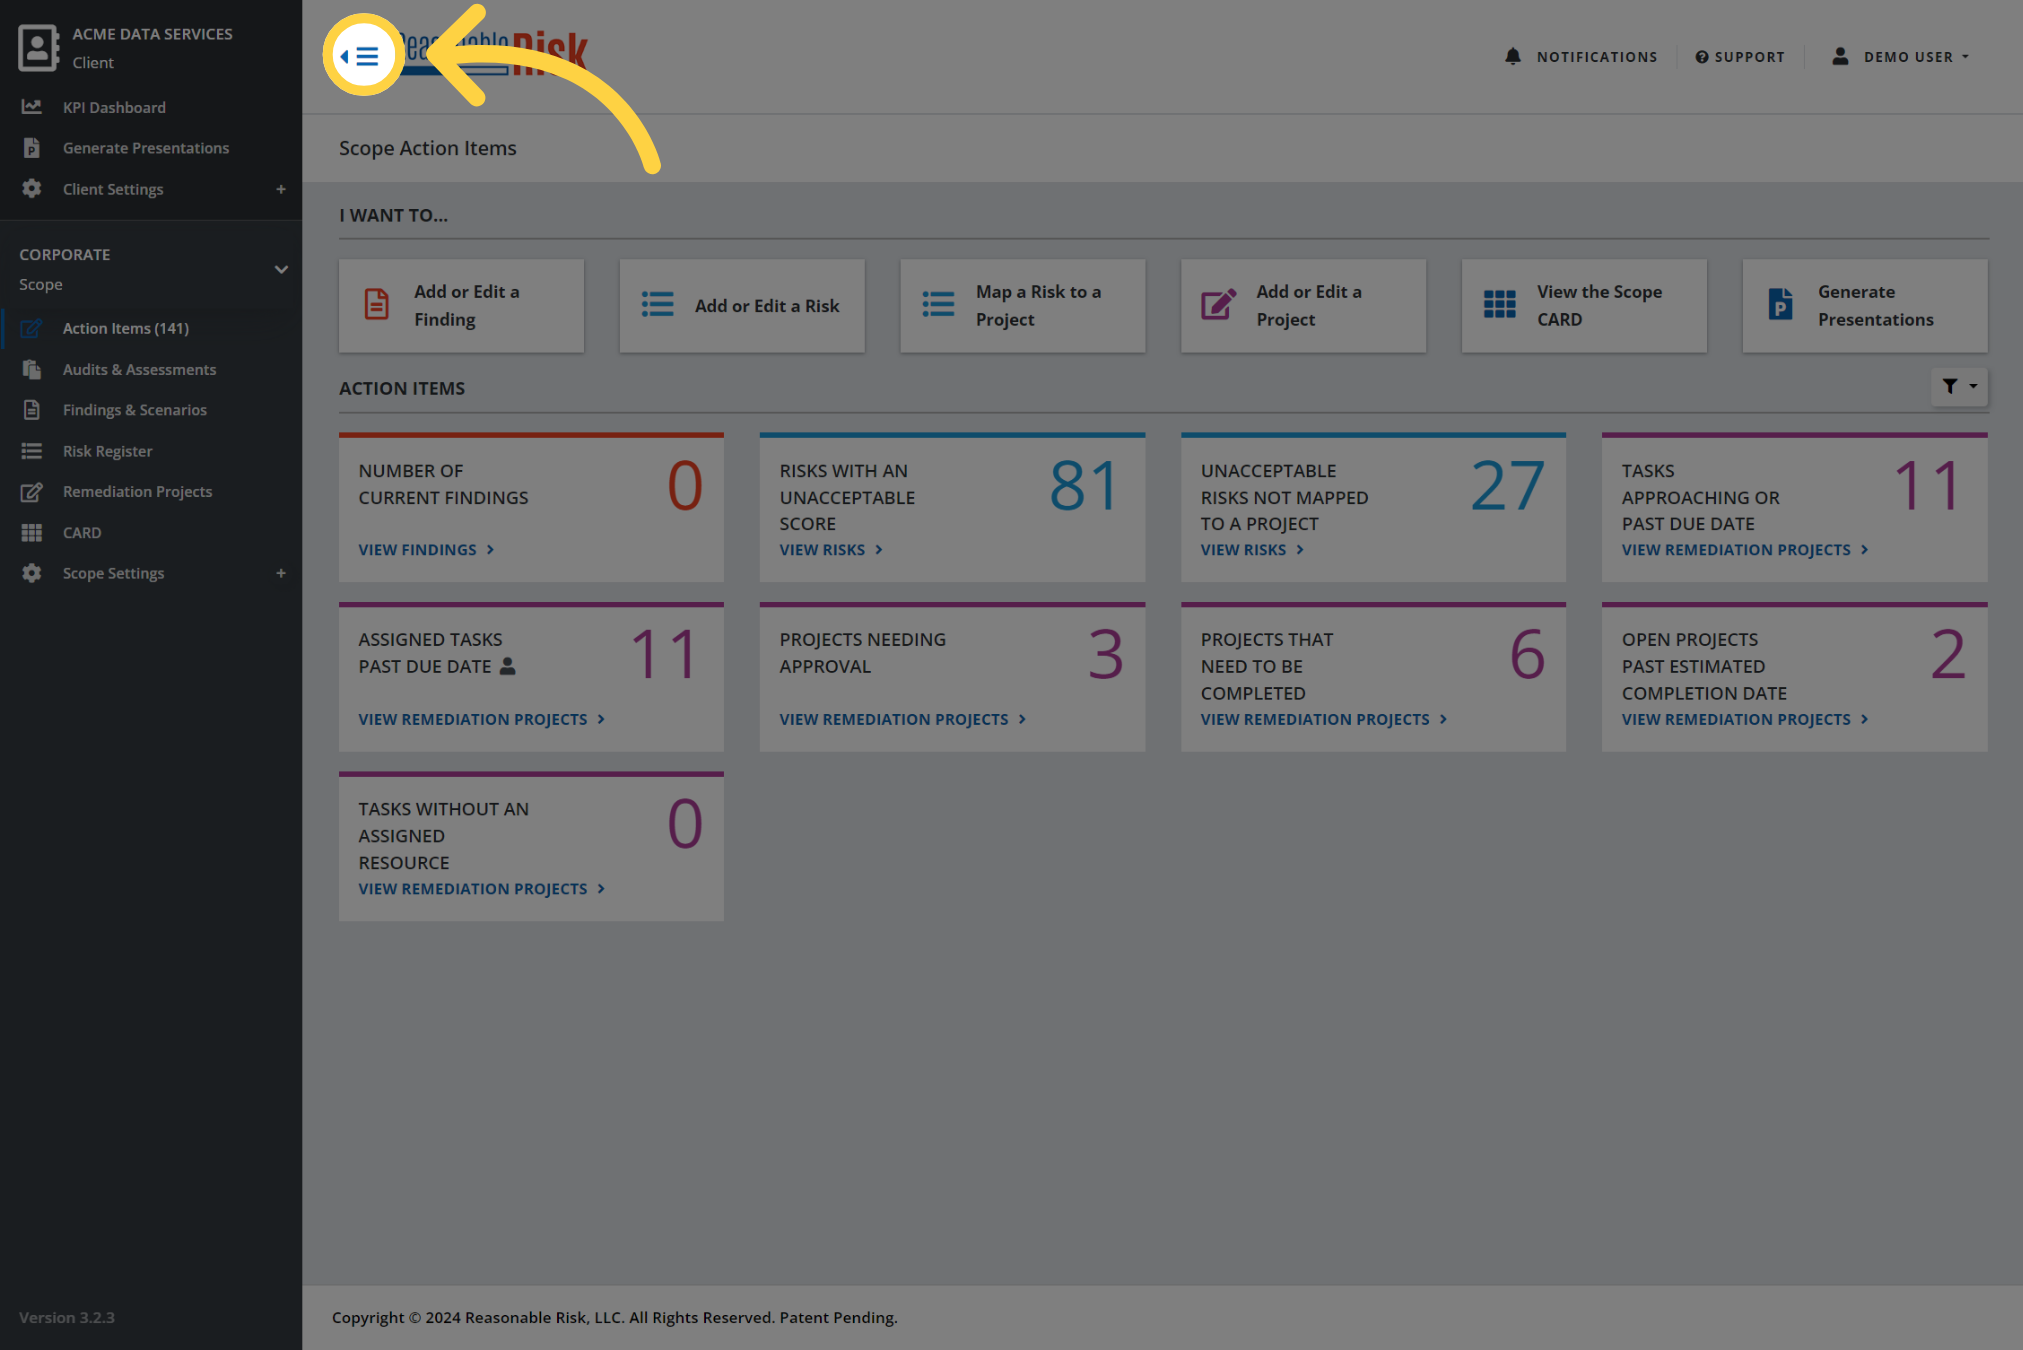
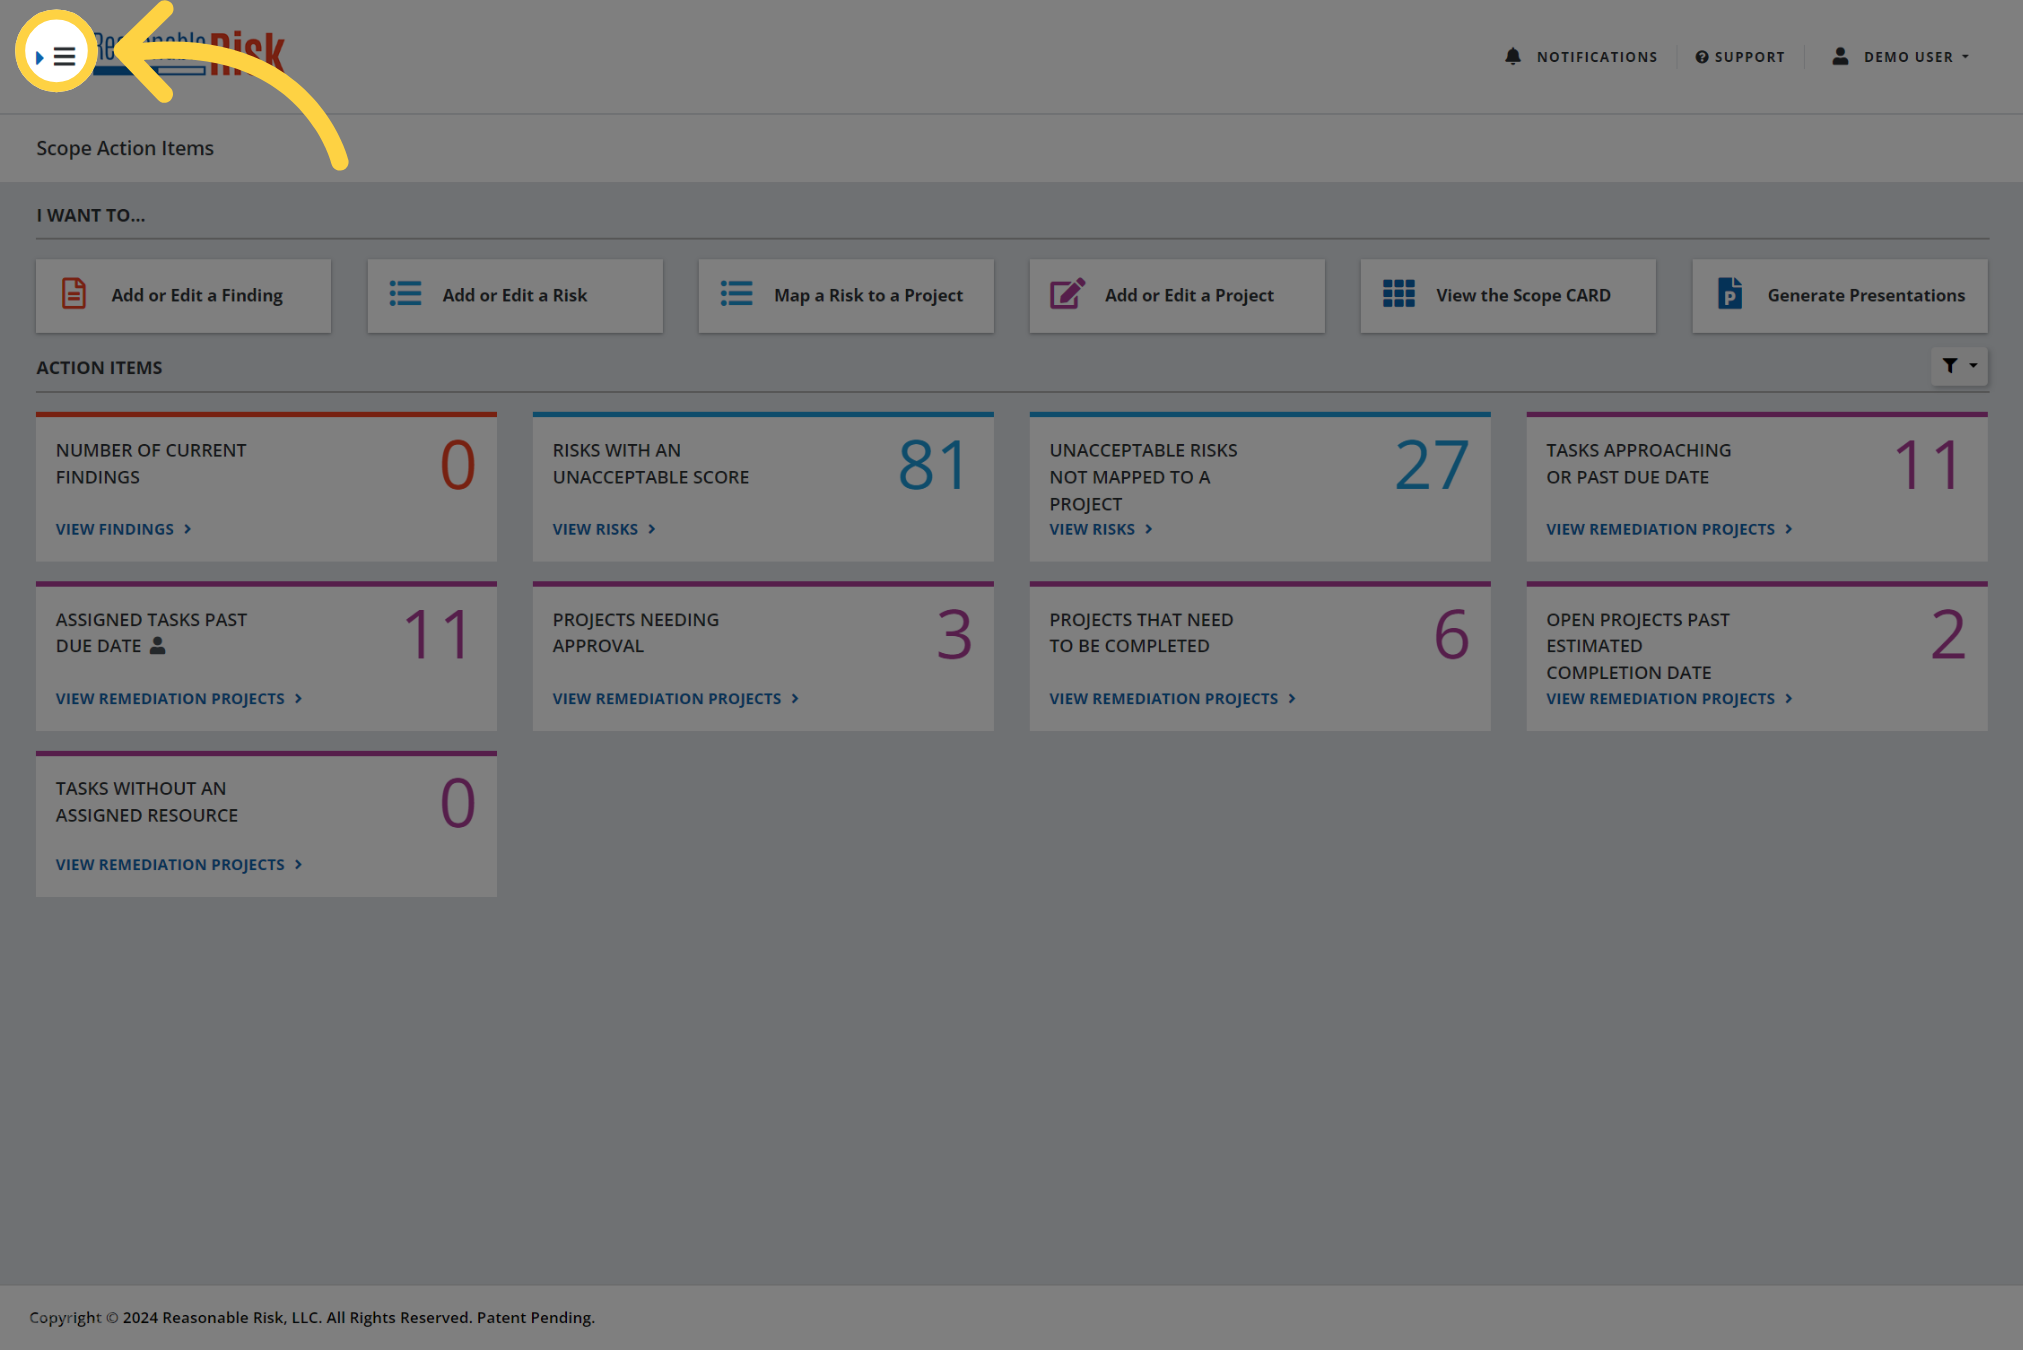
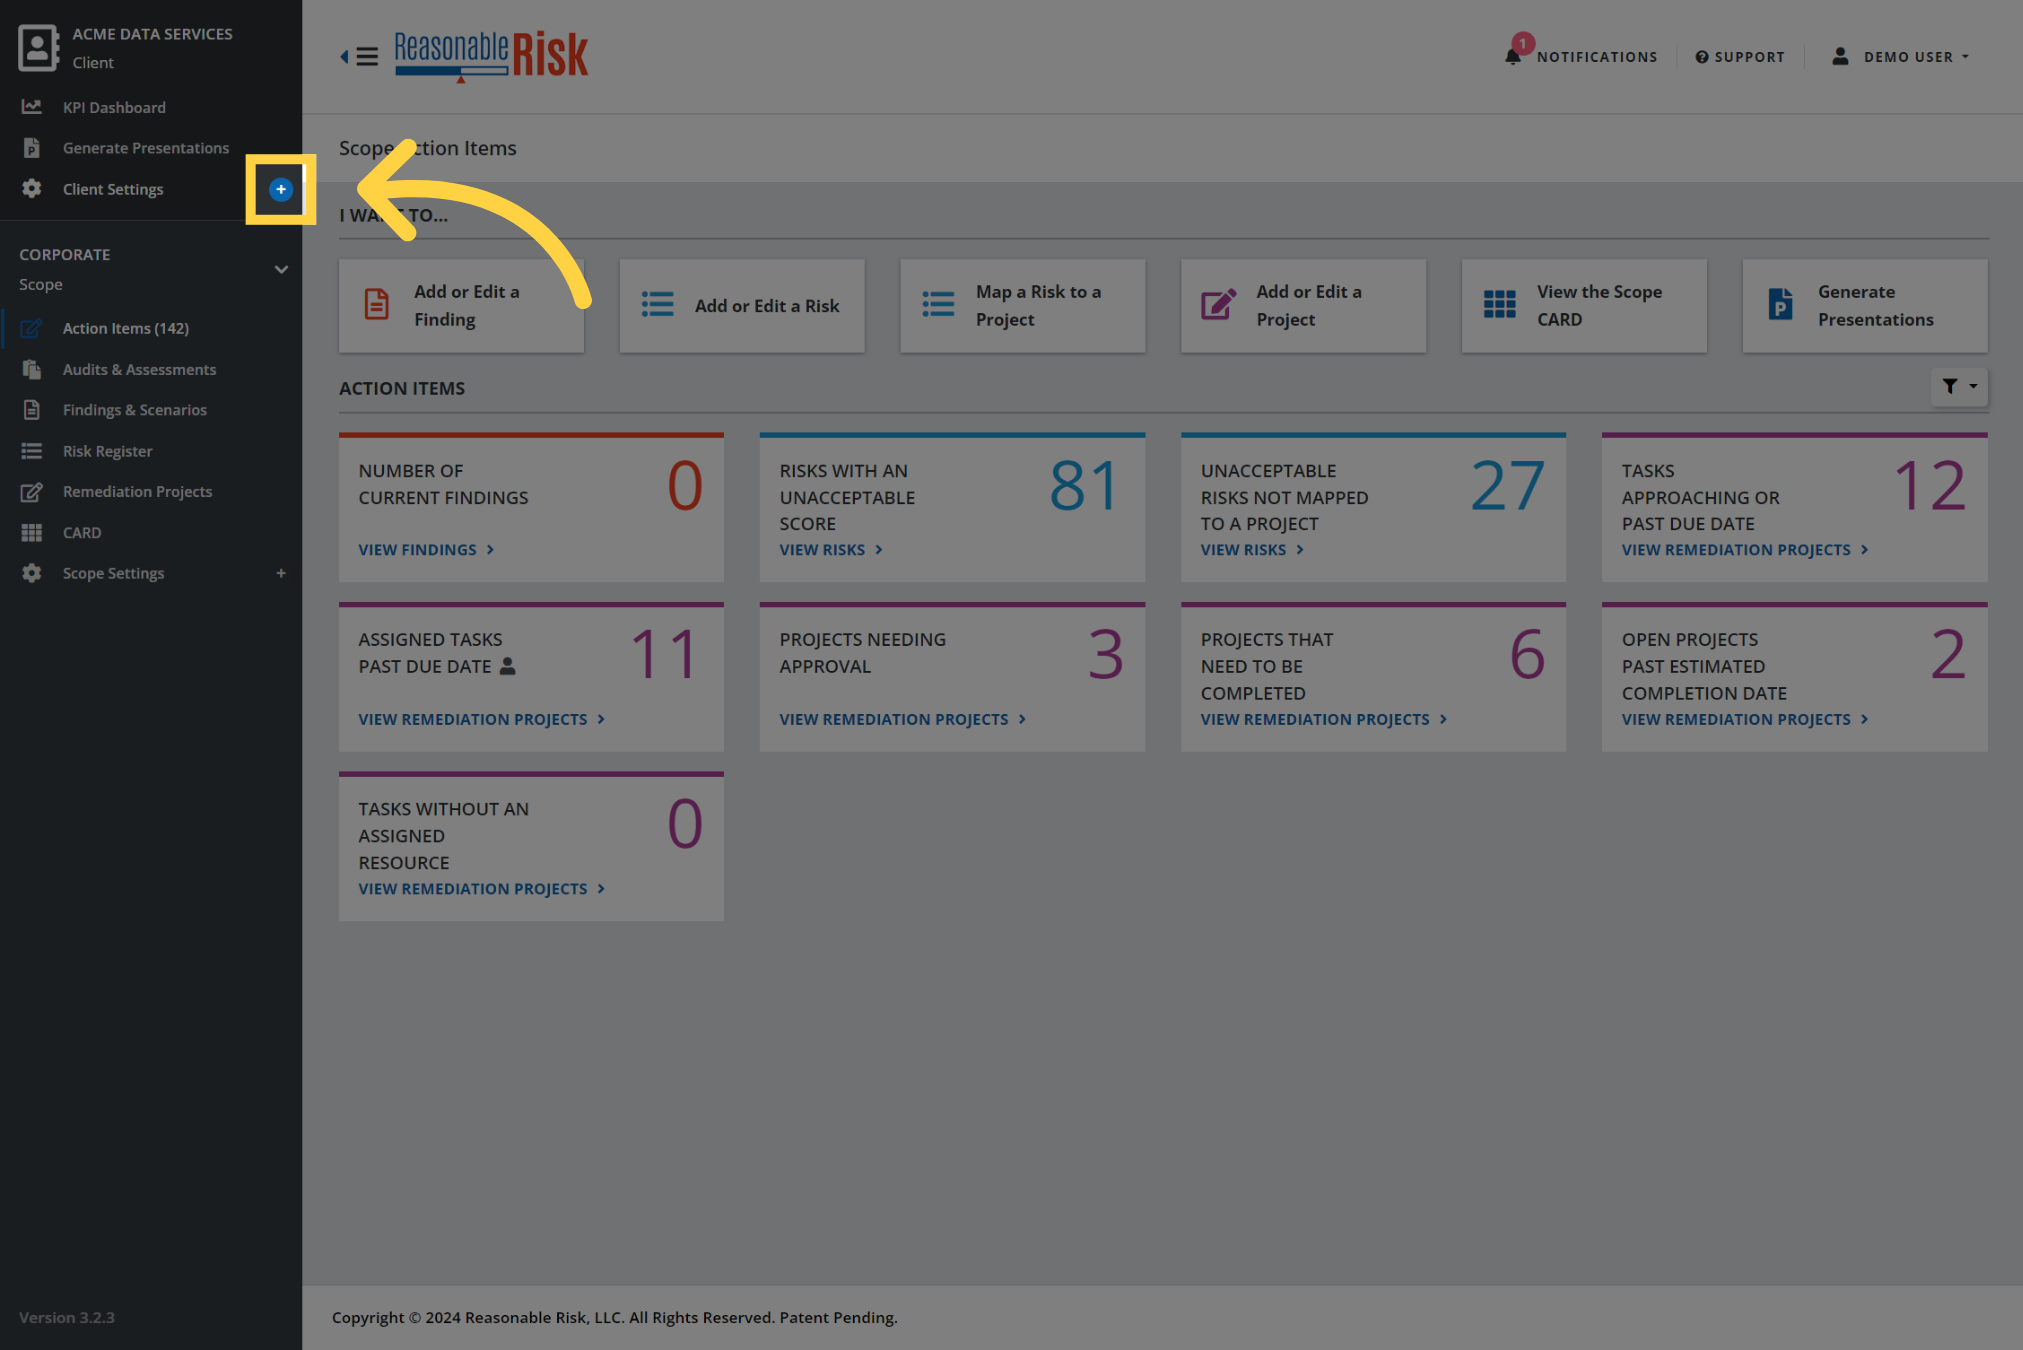
4. Click to "Show / Hide" the Menu Bar
Click the hamburger menu next to the Reasonable Risk logo to toggle visibility of the Menu Bar.
5. Show / Hide the Menu Bar
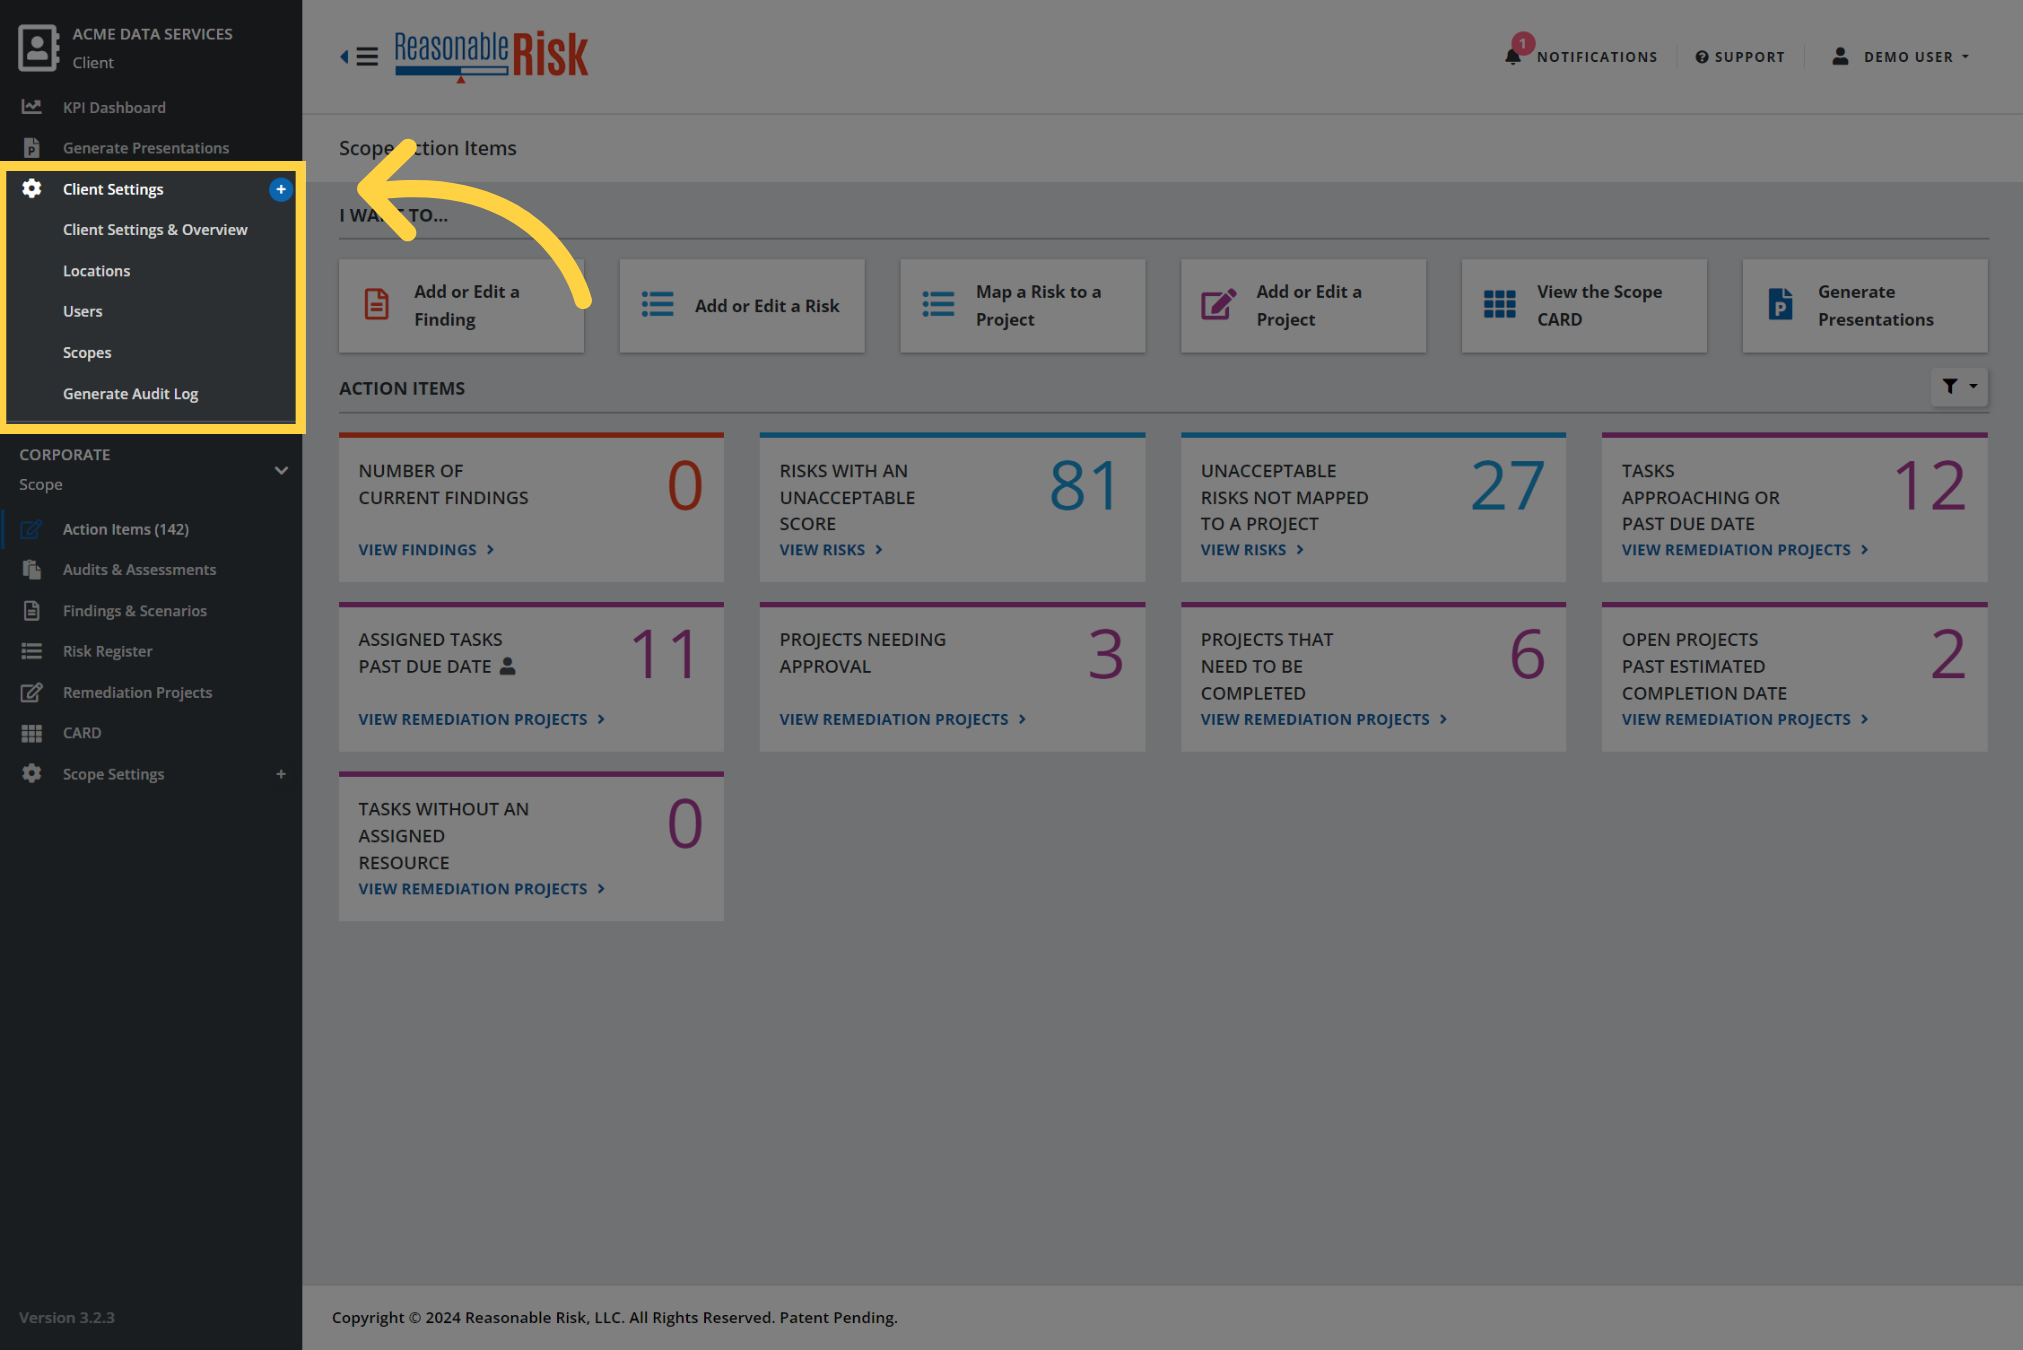
6. Expand an item in the Menu Bar
You may expand items in the Menu Bar by clicking on the + at the right edge of the bar for some items.
Notice how the menu item expands.
7. Expanded item in the Menu Bar
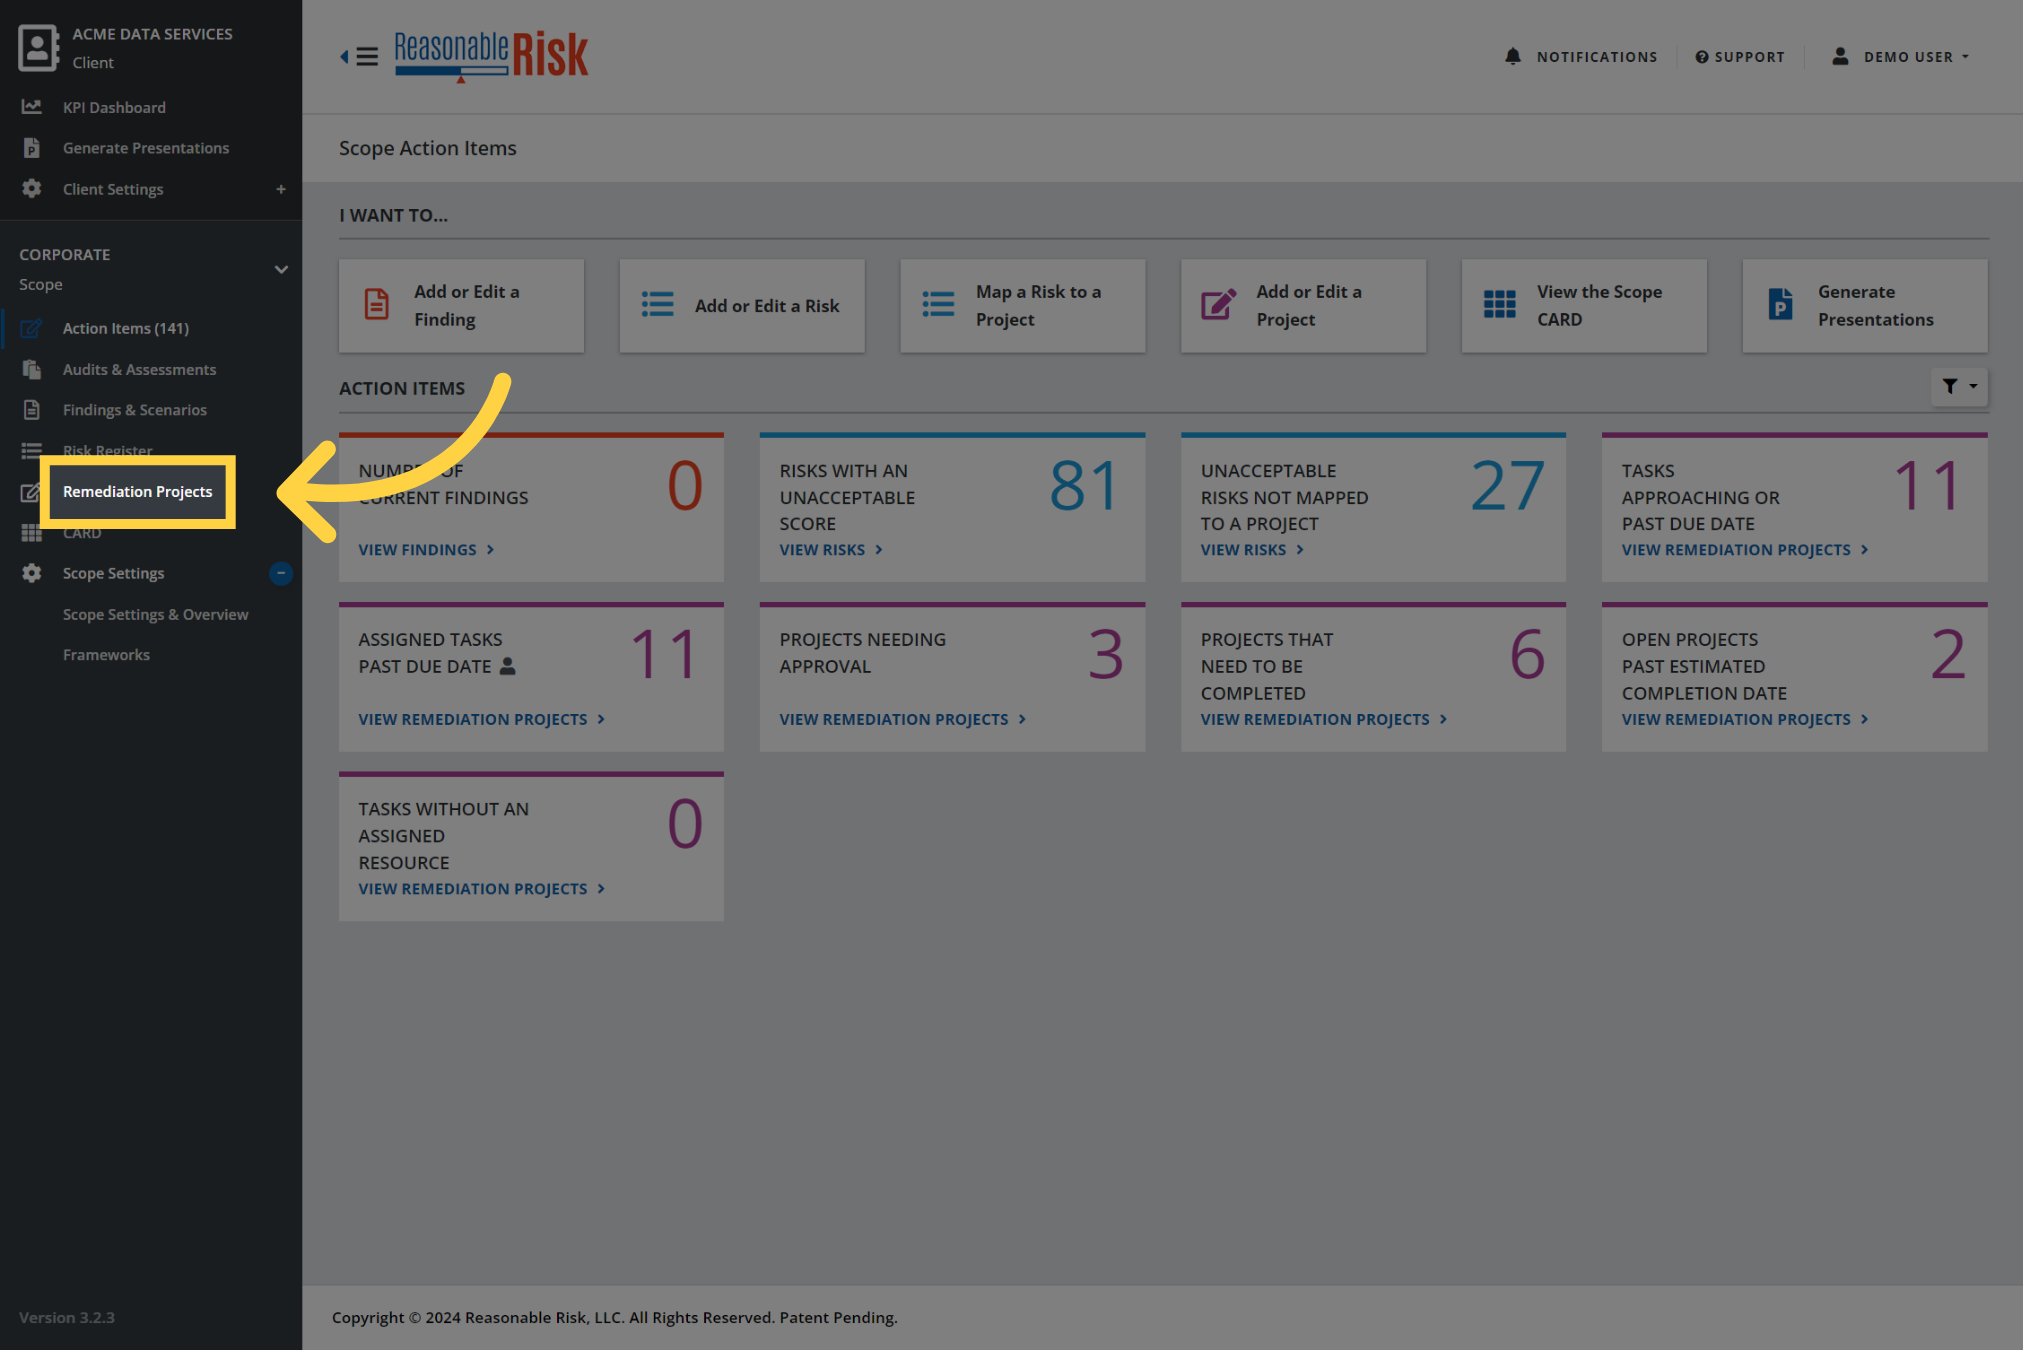
8. Navigate to a module of the application
Now let's use the Menu Bar to go to one of the modules of the application to explore the navigation elements available there.
For this example, let's click on the Remediation Projects item in the Menu Bar.
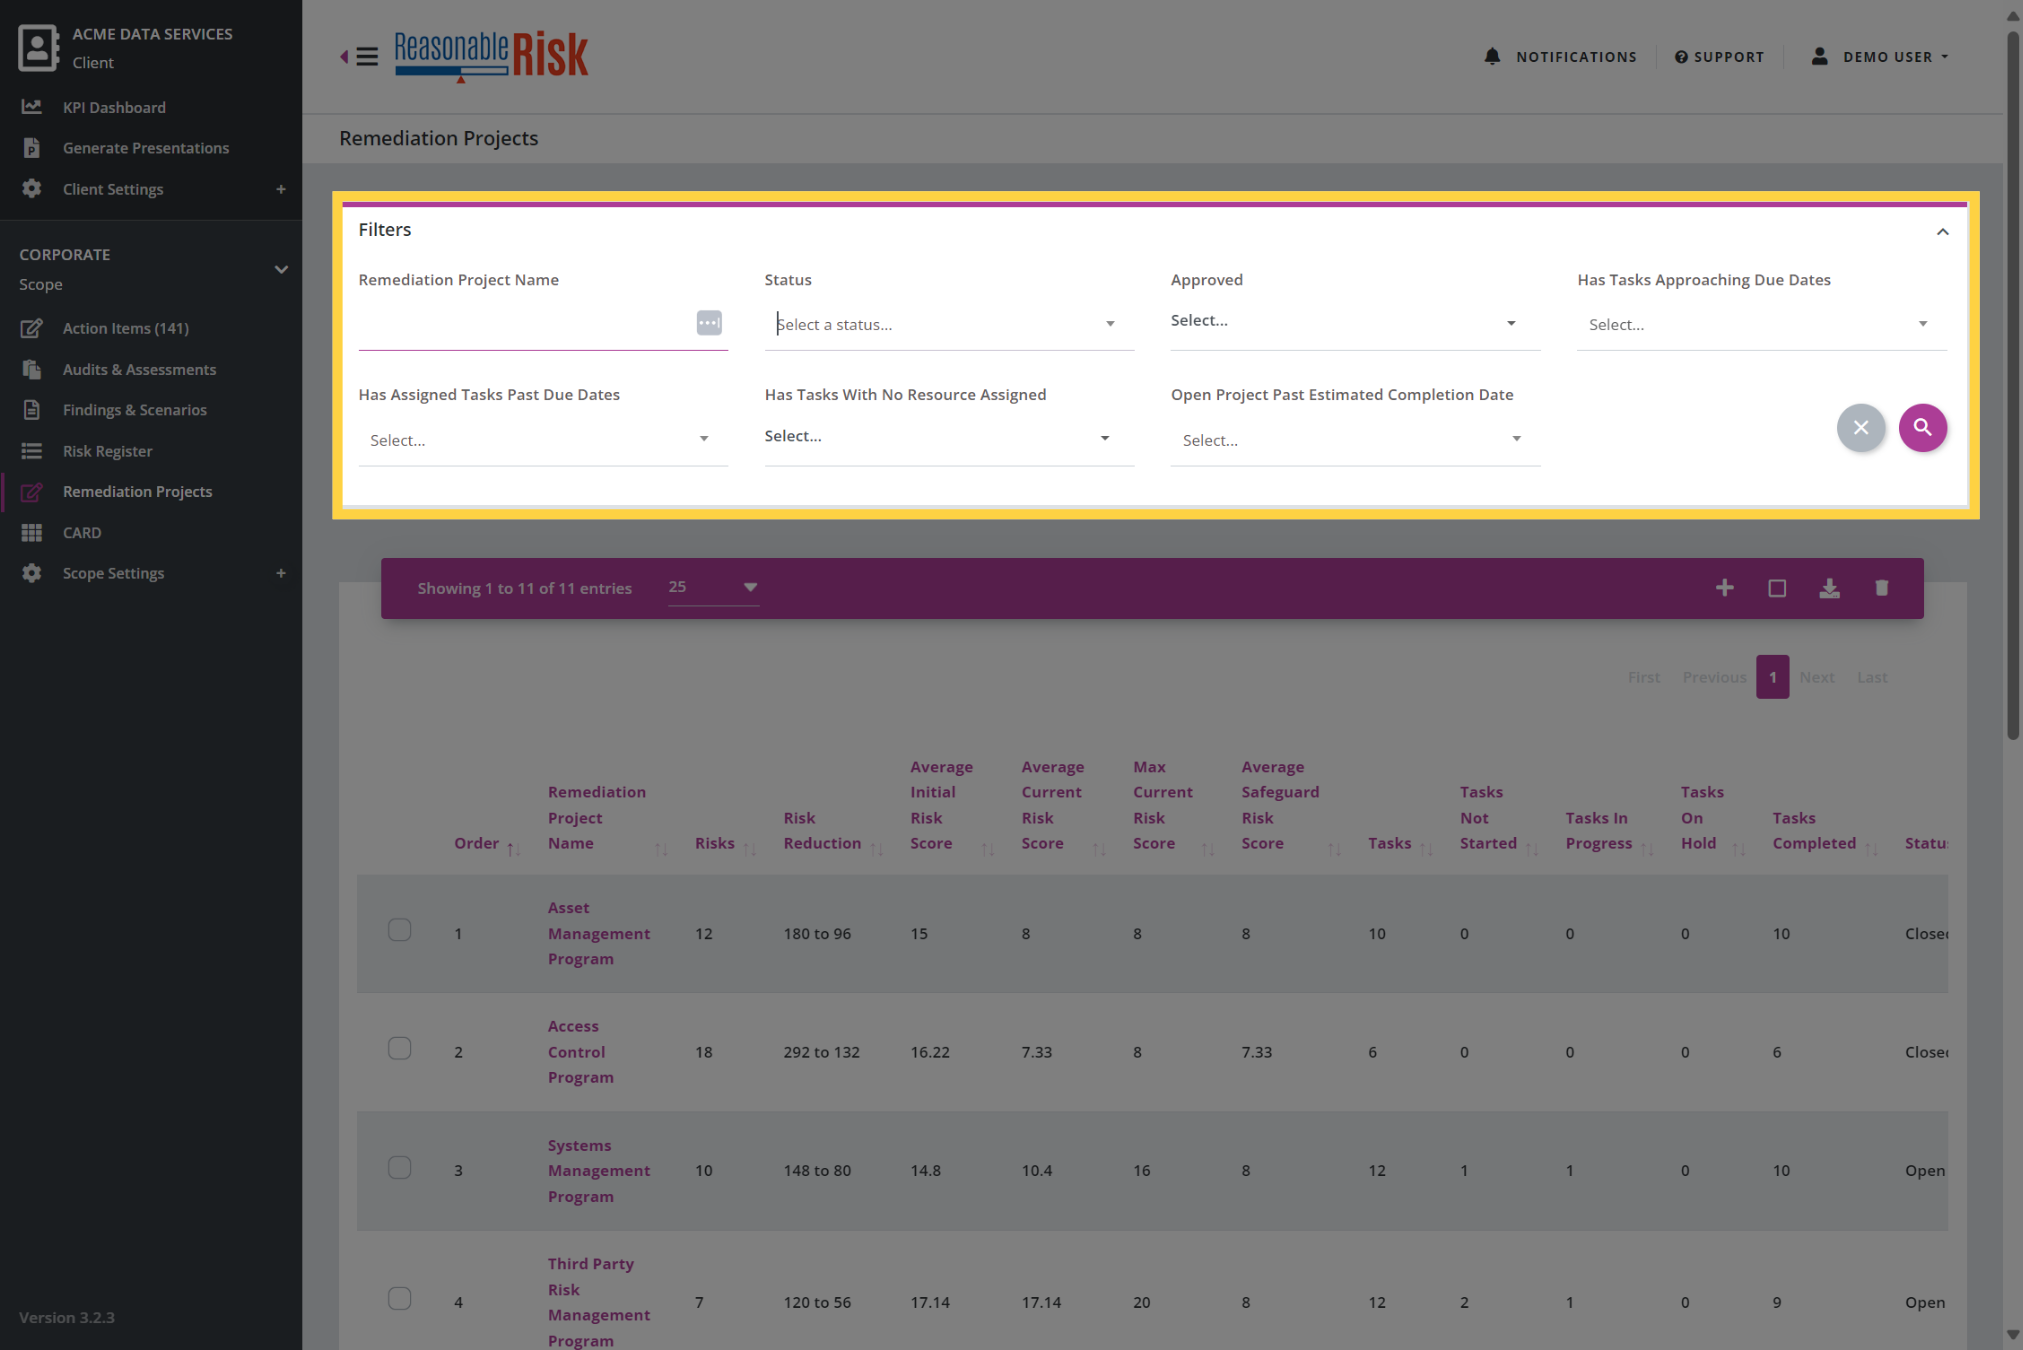
9. Filters Overview
Each major section of the application, such as Findings & Scenarios, Risk Register, and Remediation Projects, will present a Filters area at the top of the main page.
The Filters area allows you to filter the list of items presented below. The Filters available are dependent on the section of the application that you are in.
Here in the Remediation Projects section of the application, you can select from filters such as Status, Approval, Approaching or Past Due Dates, Resource Assignments, etc.
Each filter is unique to the section of the application,/ let's take a look at some examples.
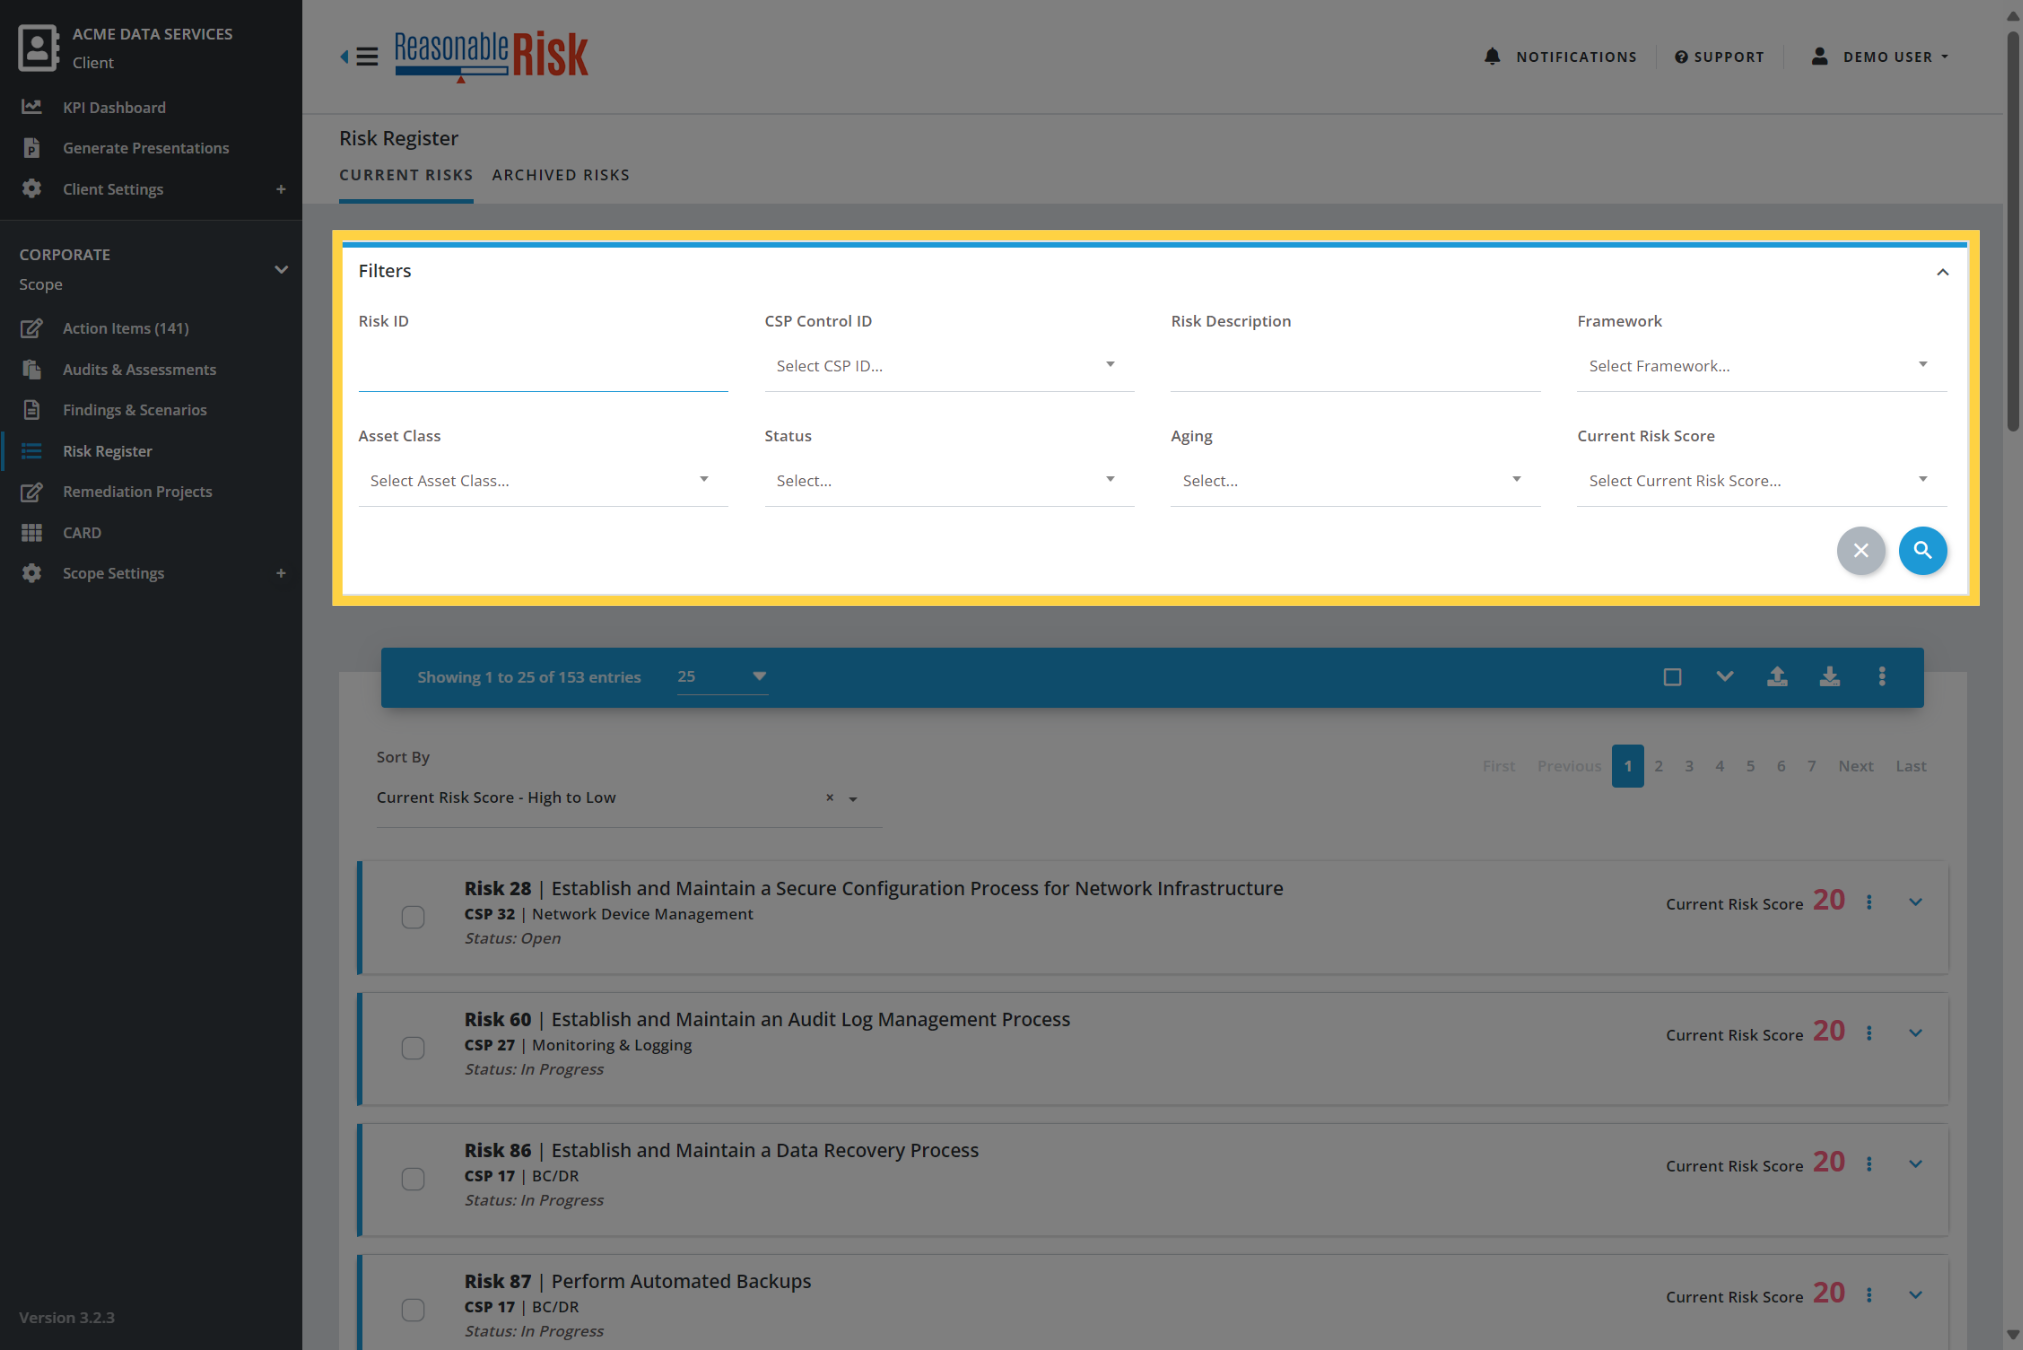
10. Risk Register Filters
Here are the Filters for the Risk Register.
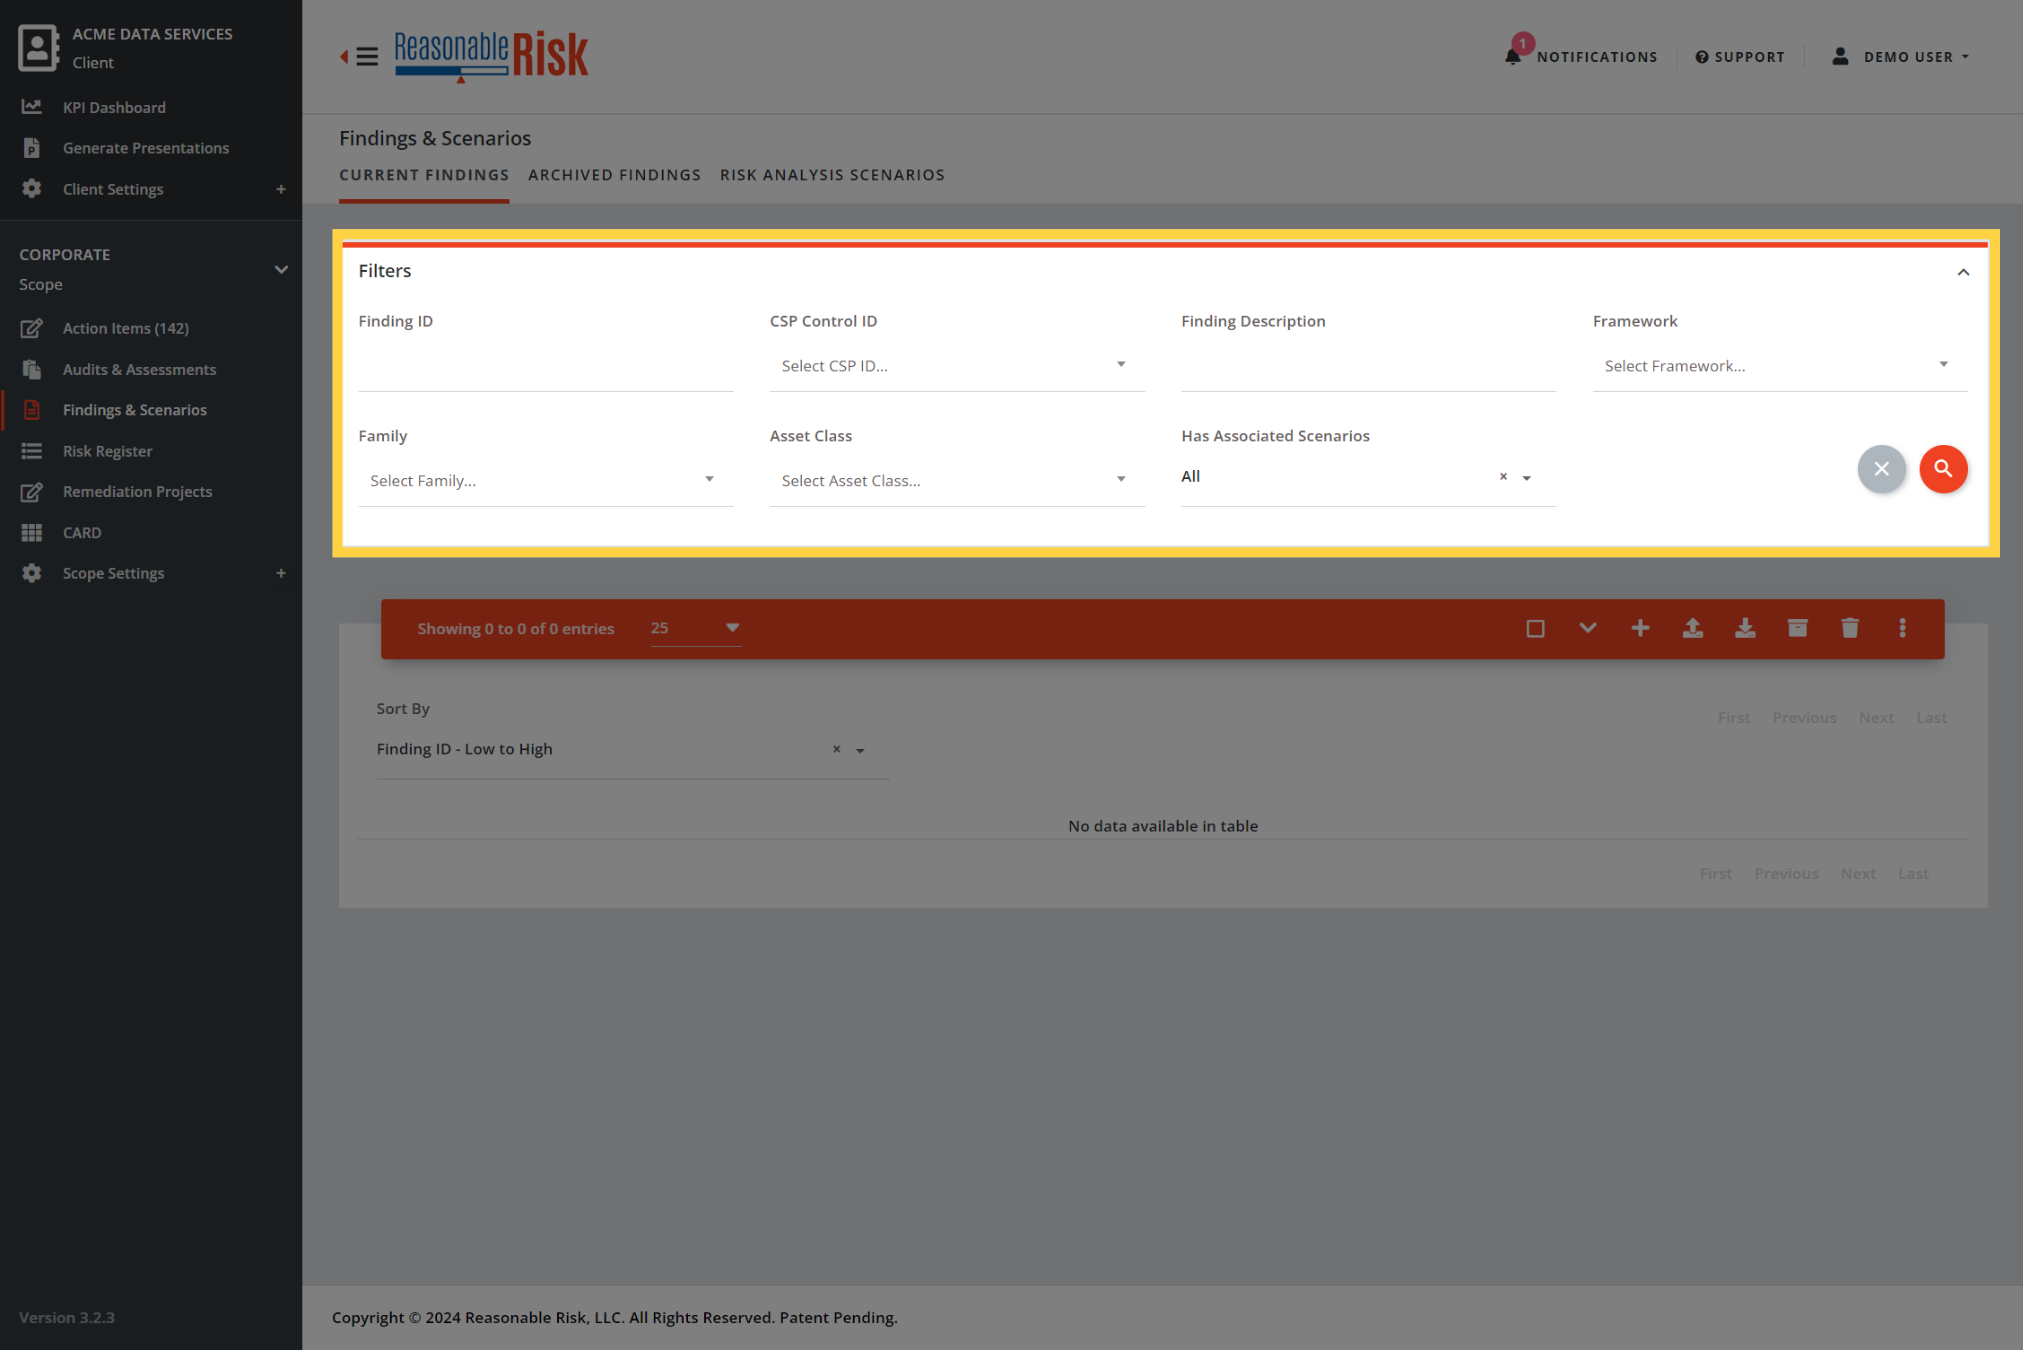
11. Findings & Scenarios Filters
Here are the Filters for the Findings & Scenarios.
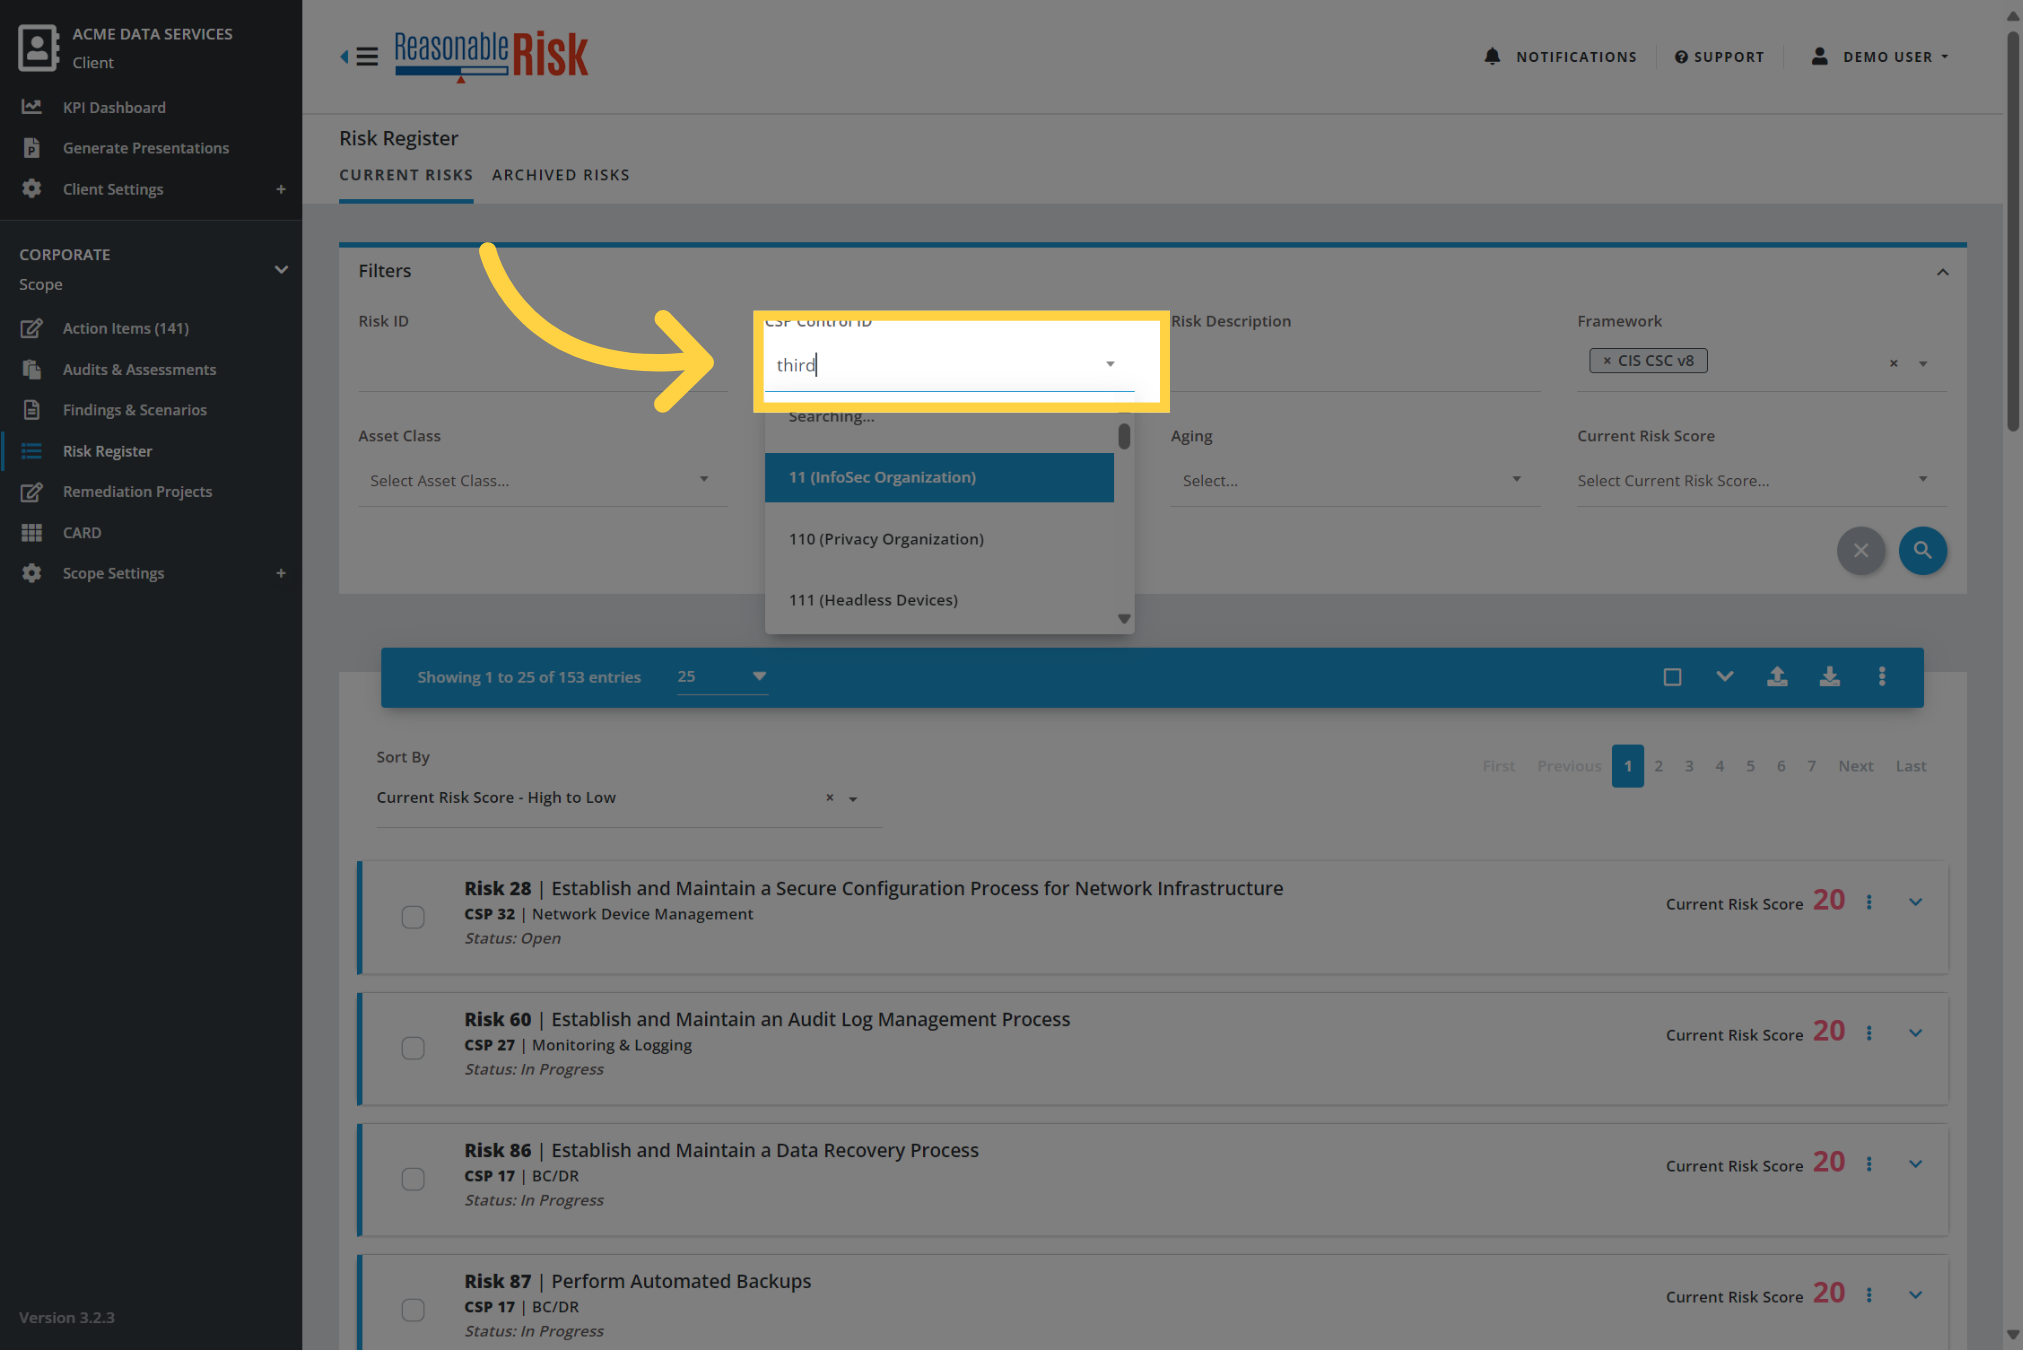
12. Type ahead to find values
Individual Filters that have an associated drop down list allow you to type ahead to search for the item in the list.
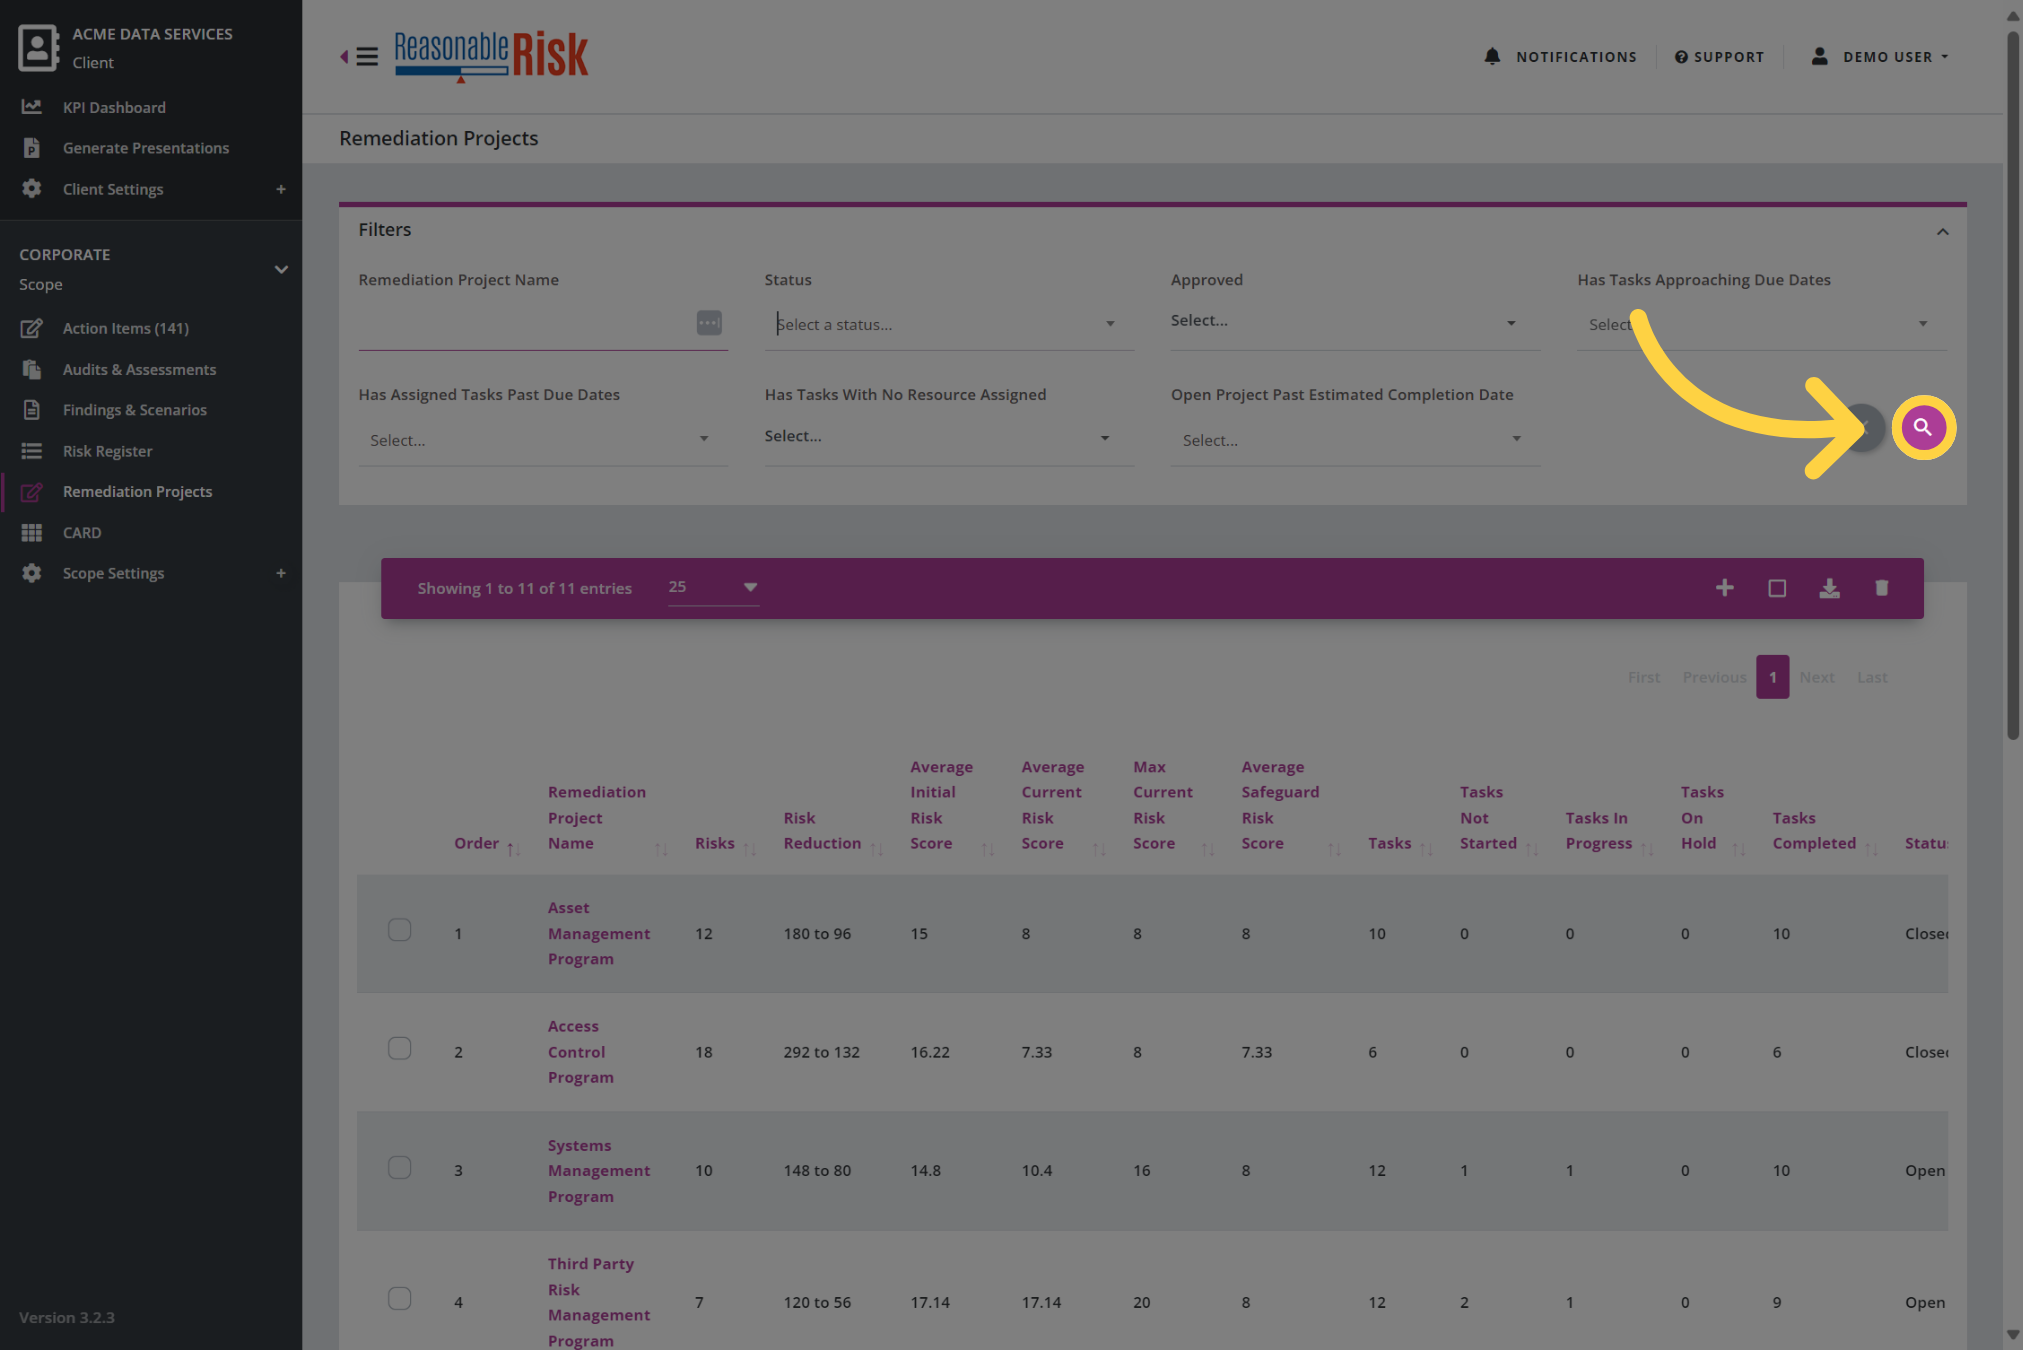
13. Apply the Filters
Once you have selected the Filters that you wish to apply, you may press the Search button depicted with the magnifying glass.
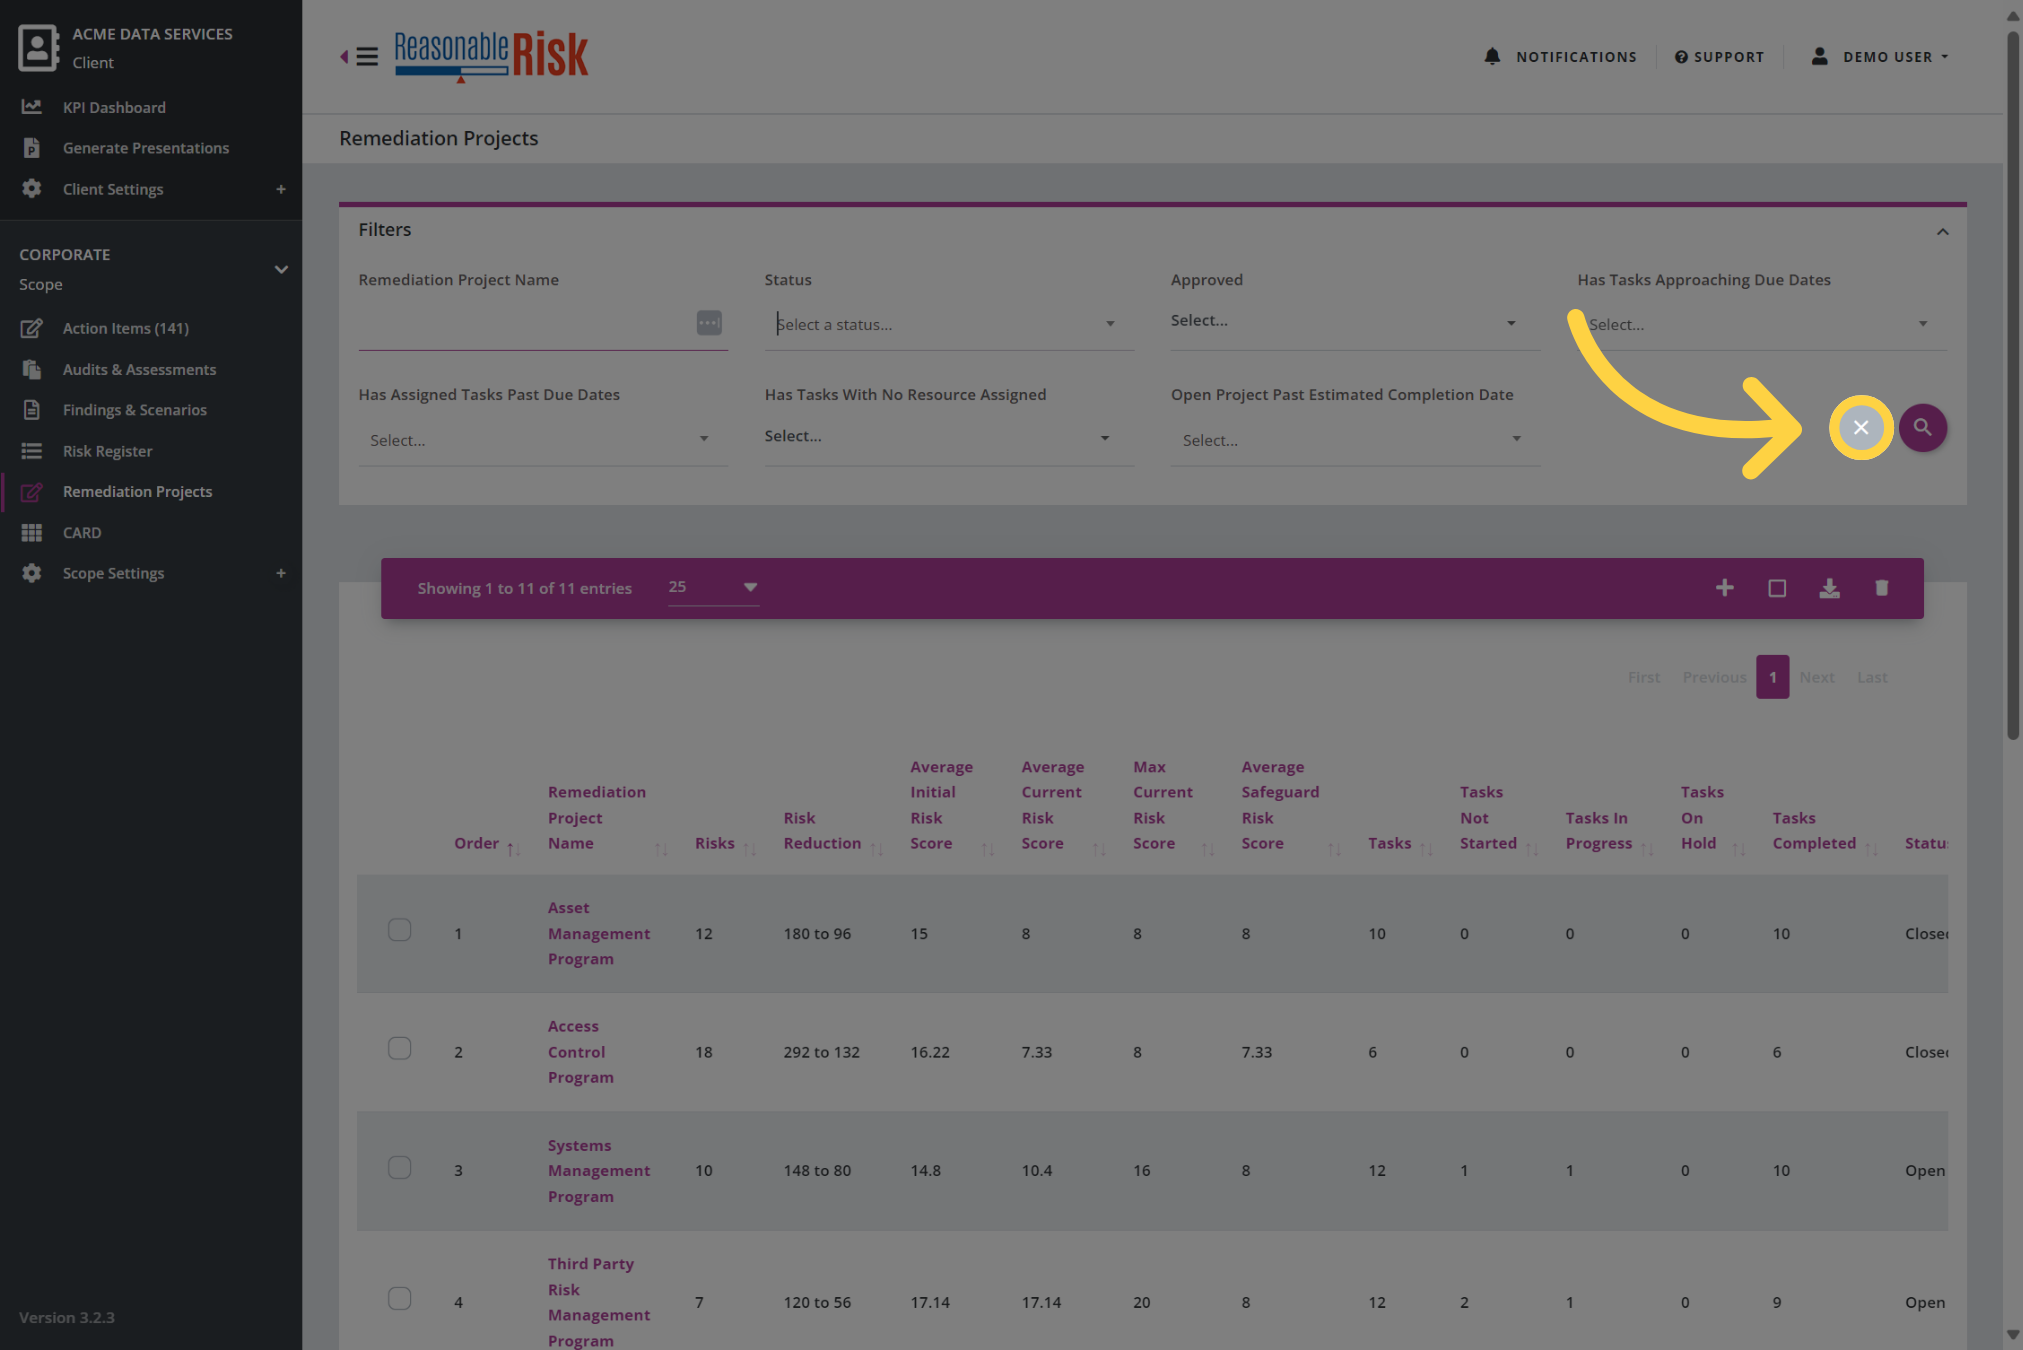
14. Clear the Filters
To clear the filters, you can select the button marked with the 'X' and all selected filters will be removed.
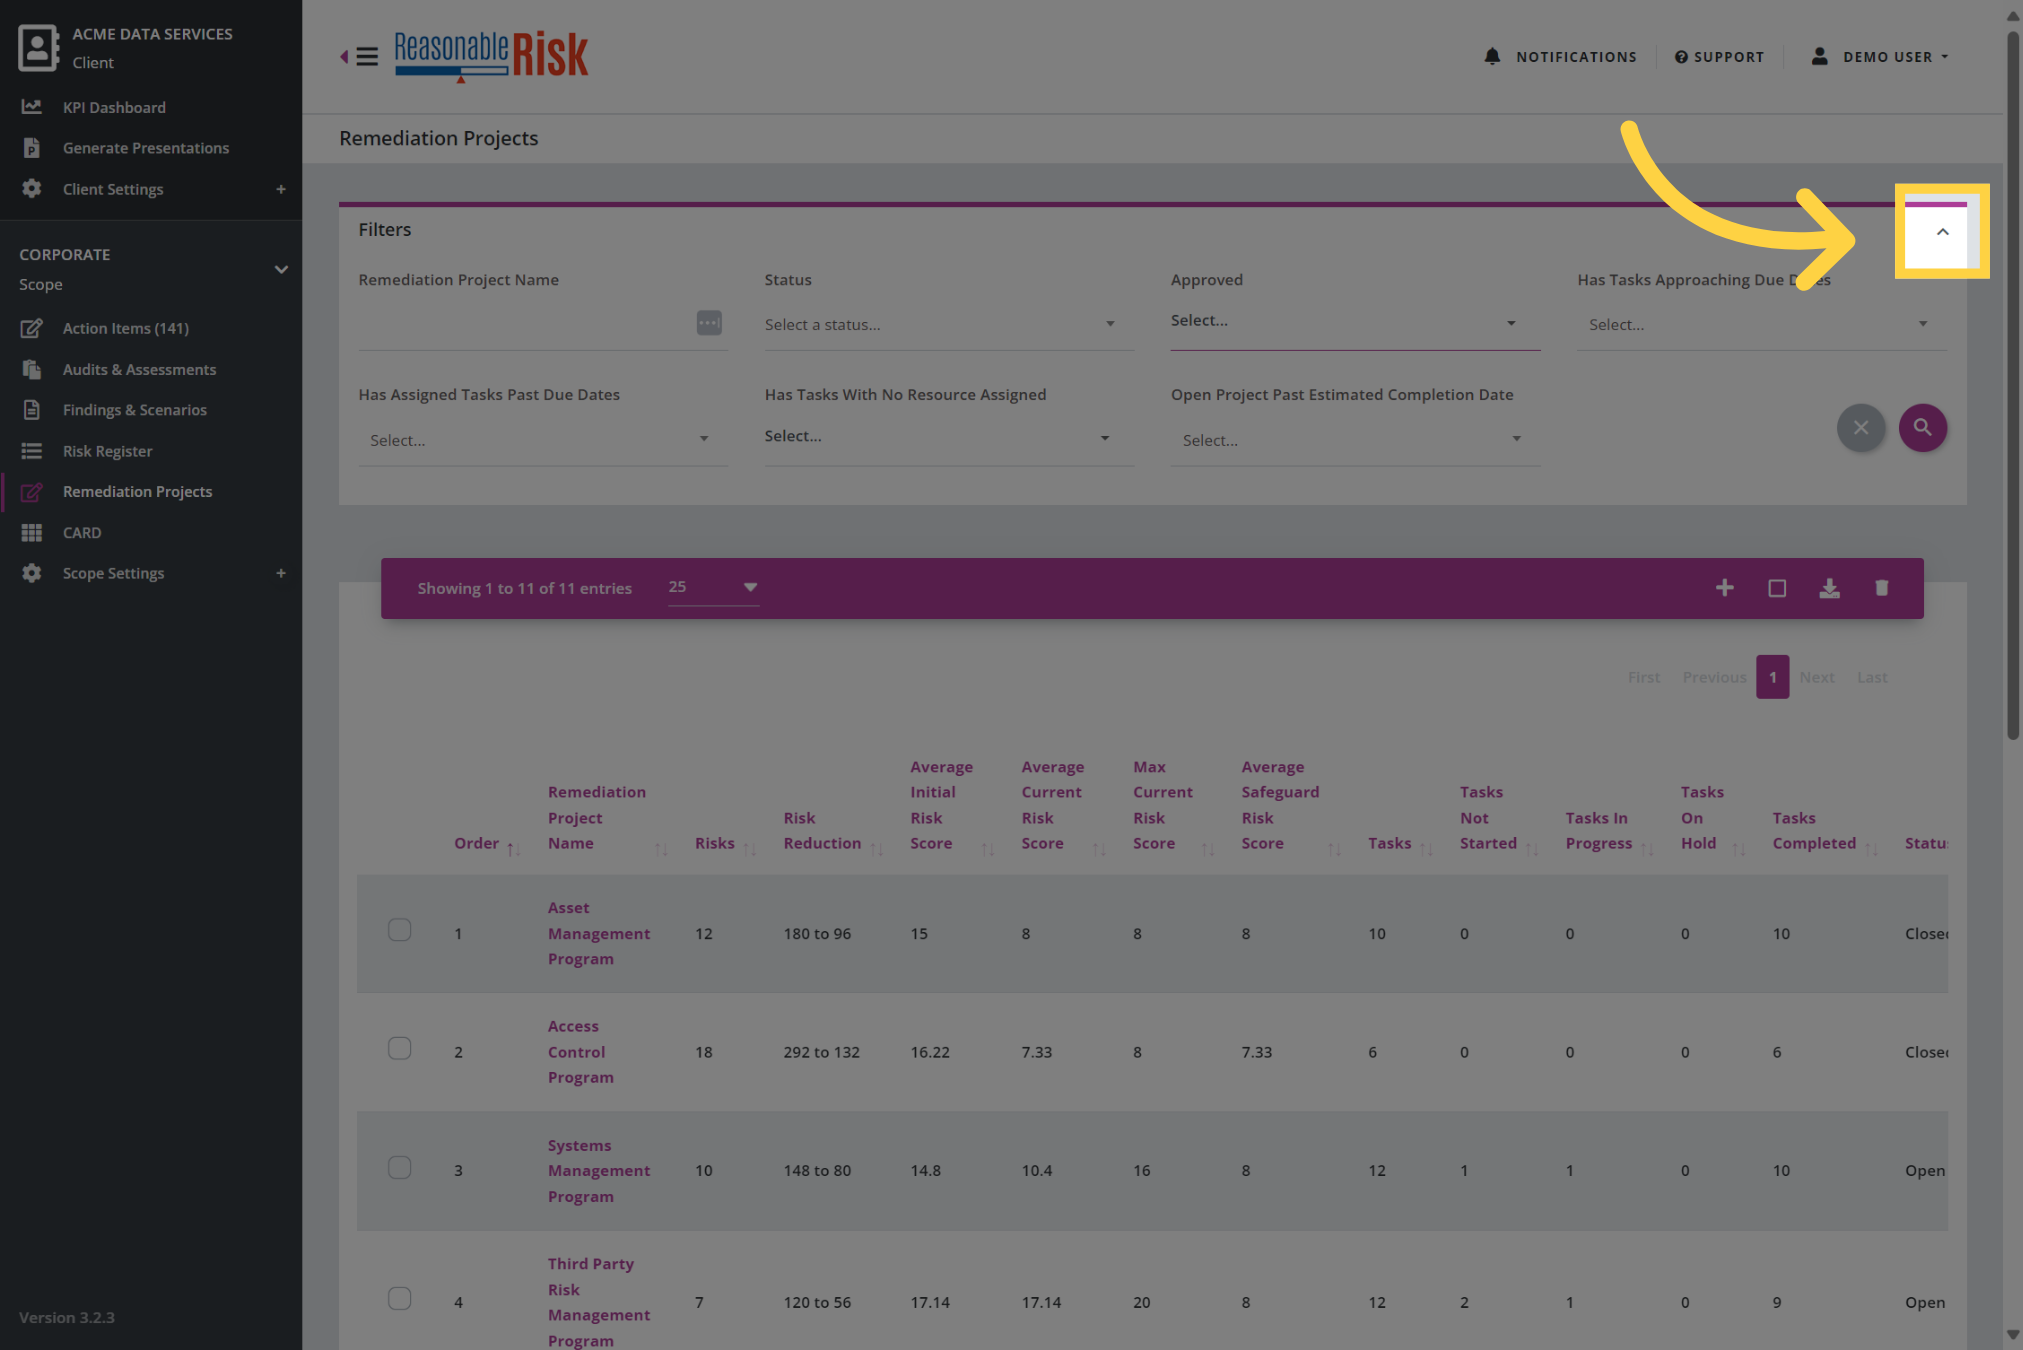
15. Collapse the Filters
In addition, you are able to expand or collapse the Filters area of the page to allow for more screen area for the presented list.
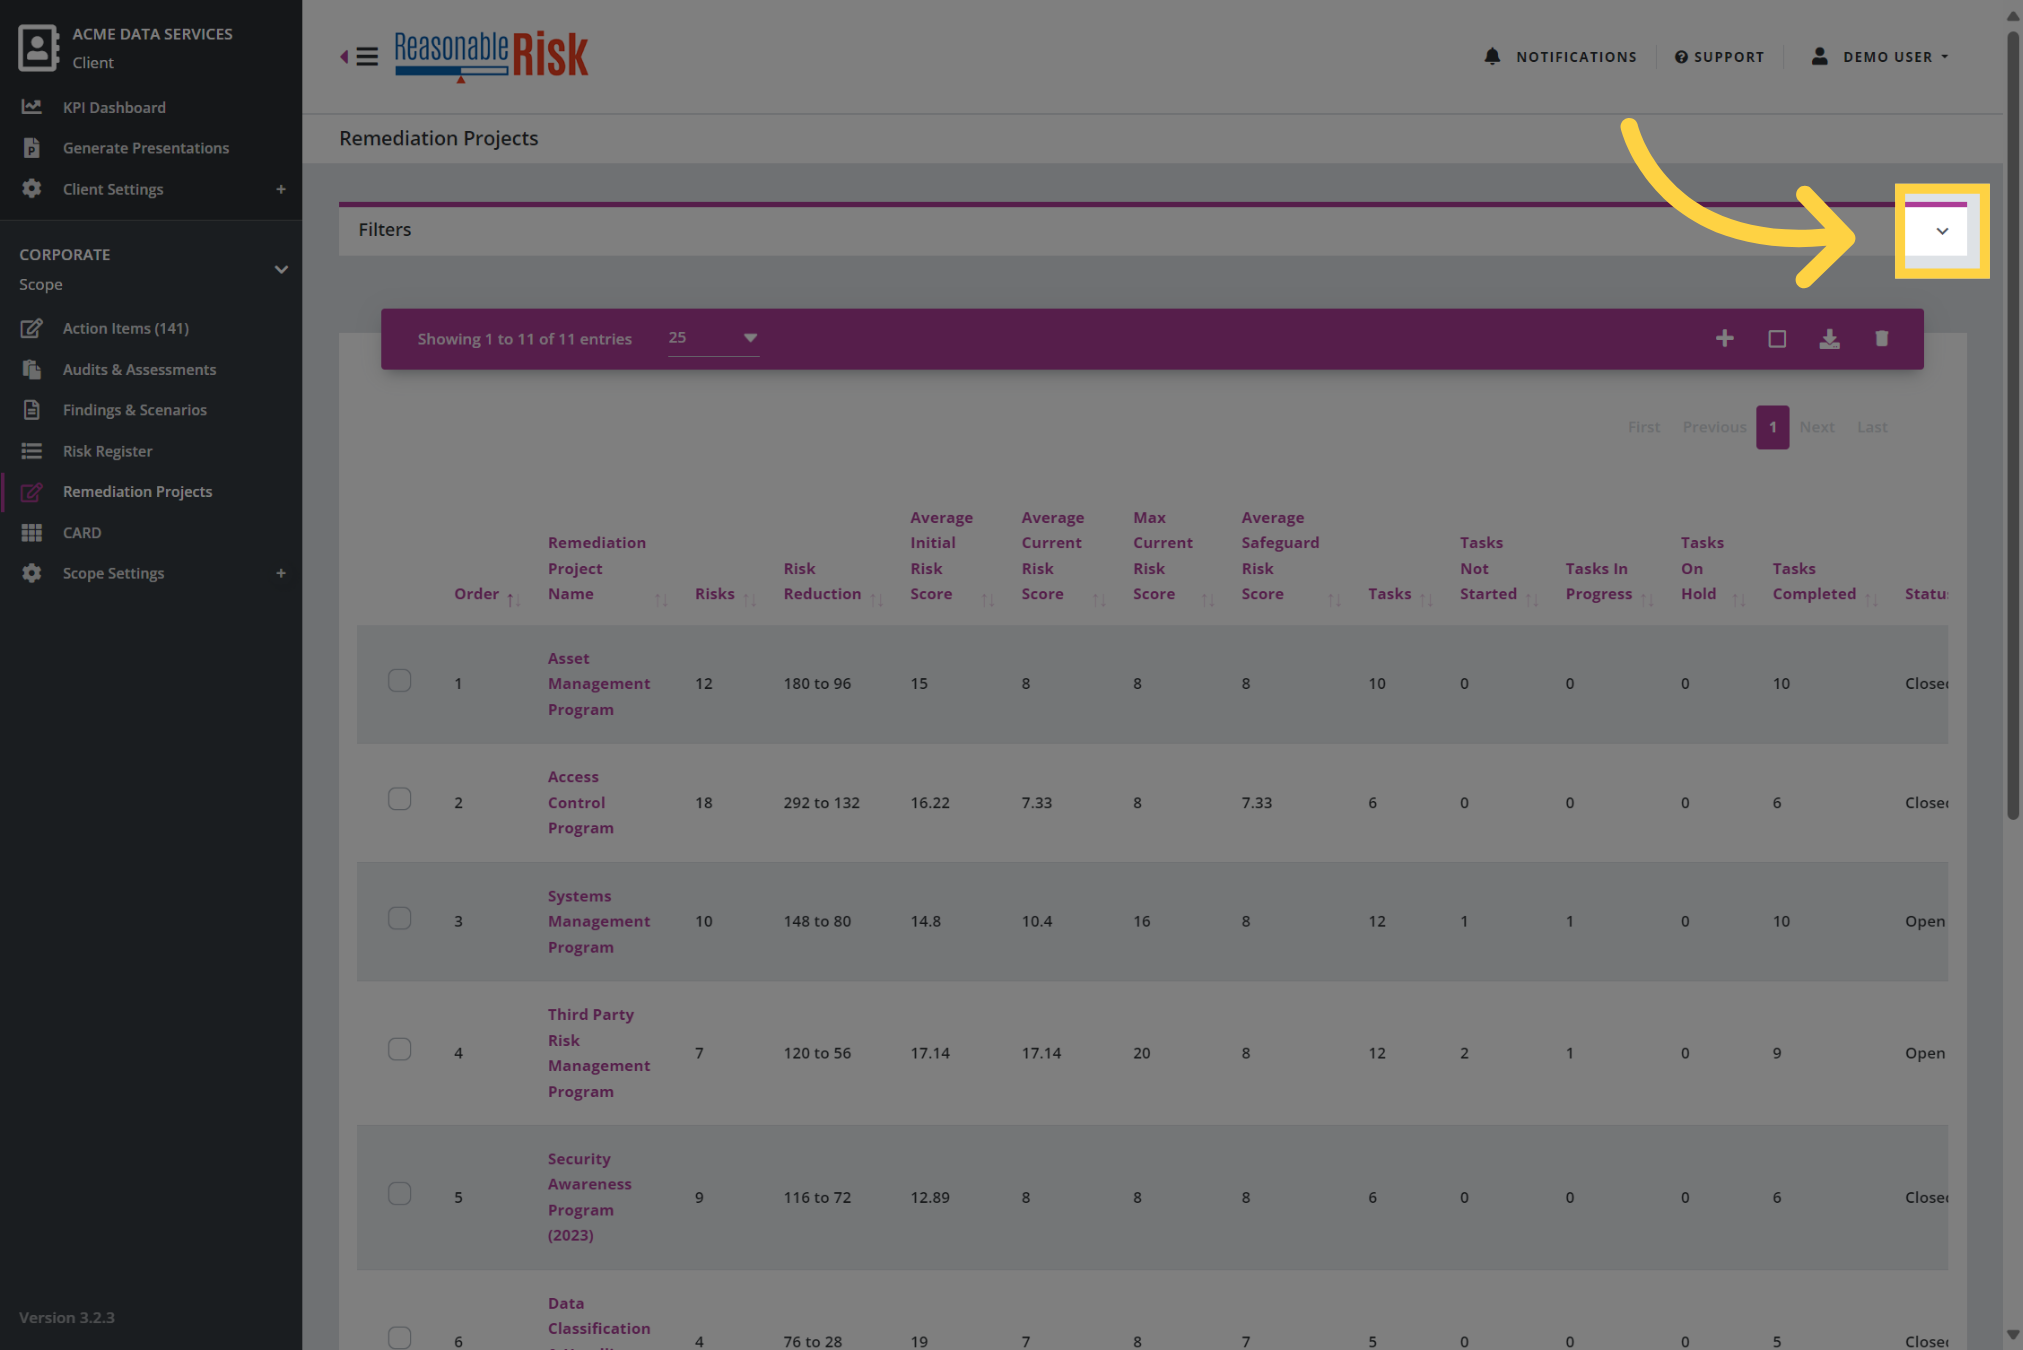
16. Expand the Filters area
Clicking on the inverted caret at the end of the Filters area will expand the Filters again for display.
17. Action Bar Overview
Each section of the application also has an Action Bar at the top of each list.
The Action Bar presents the actions that can be taken on the one or more selected items in the list below.
As you will see, the items in the Action Bar are unique to the section of the application you are in.
This is the Action Bar for the Findings & Scenarios. The Action Bar provides options to do things like Select All, Expand/Collapse list items, Add new items, Import, Export, Archive, and Delete.
In addition, each Action Bar may also have a three dots menu with additional choices.
Now let's look at some other Action Bars.

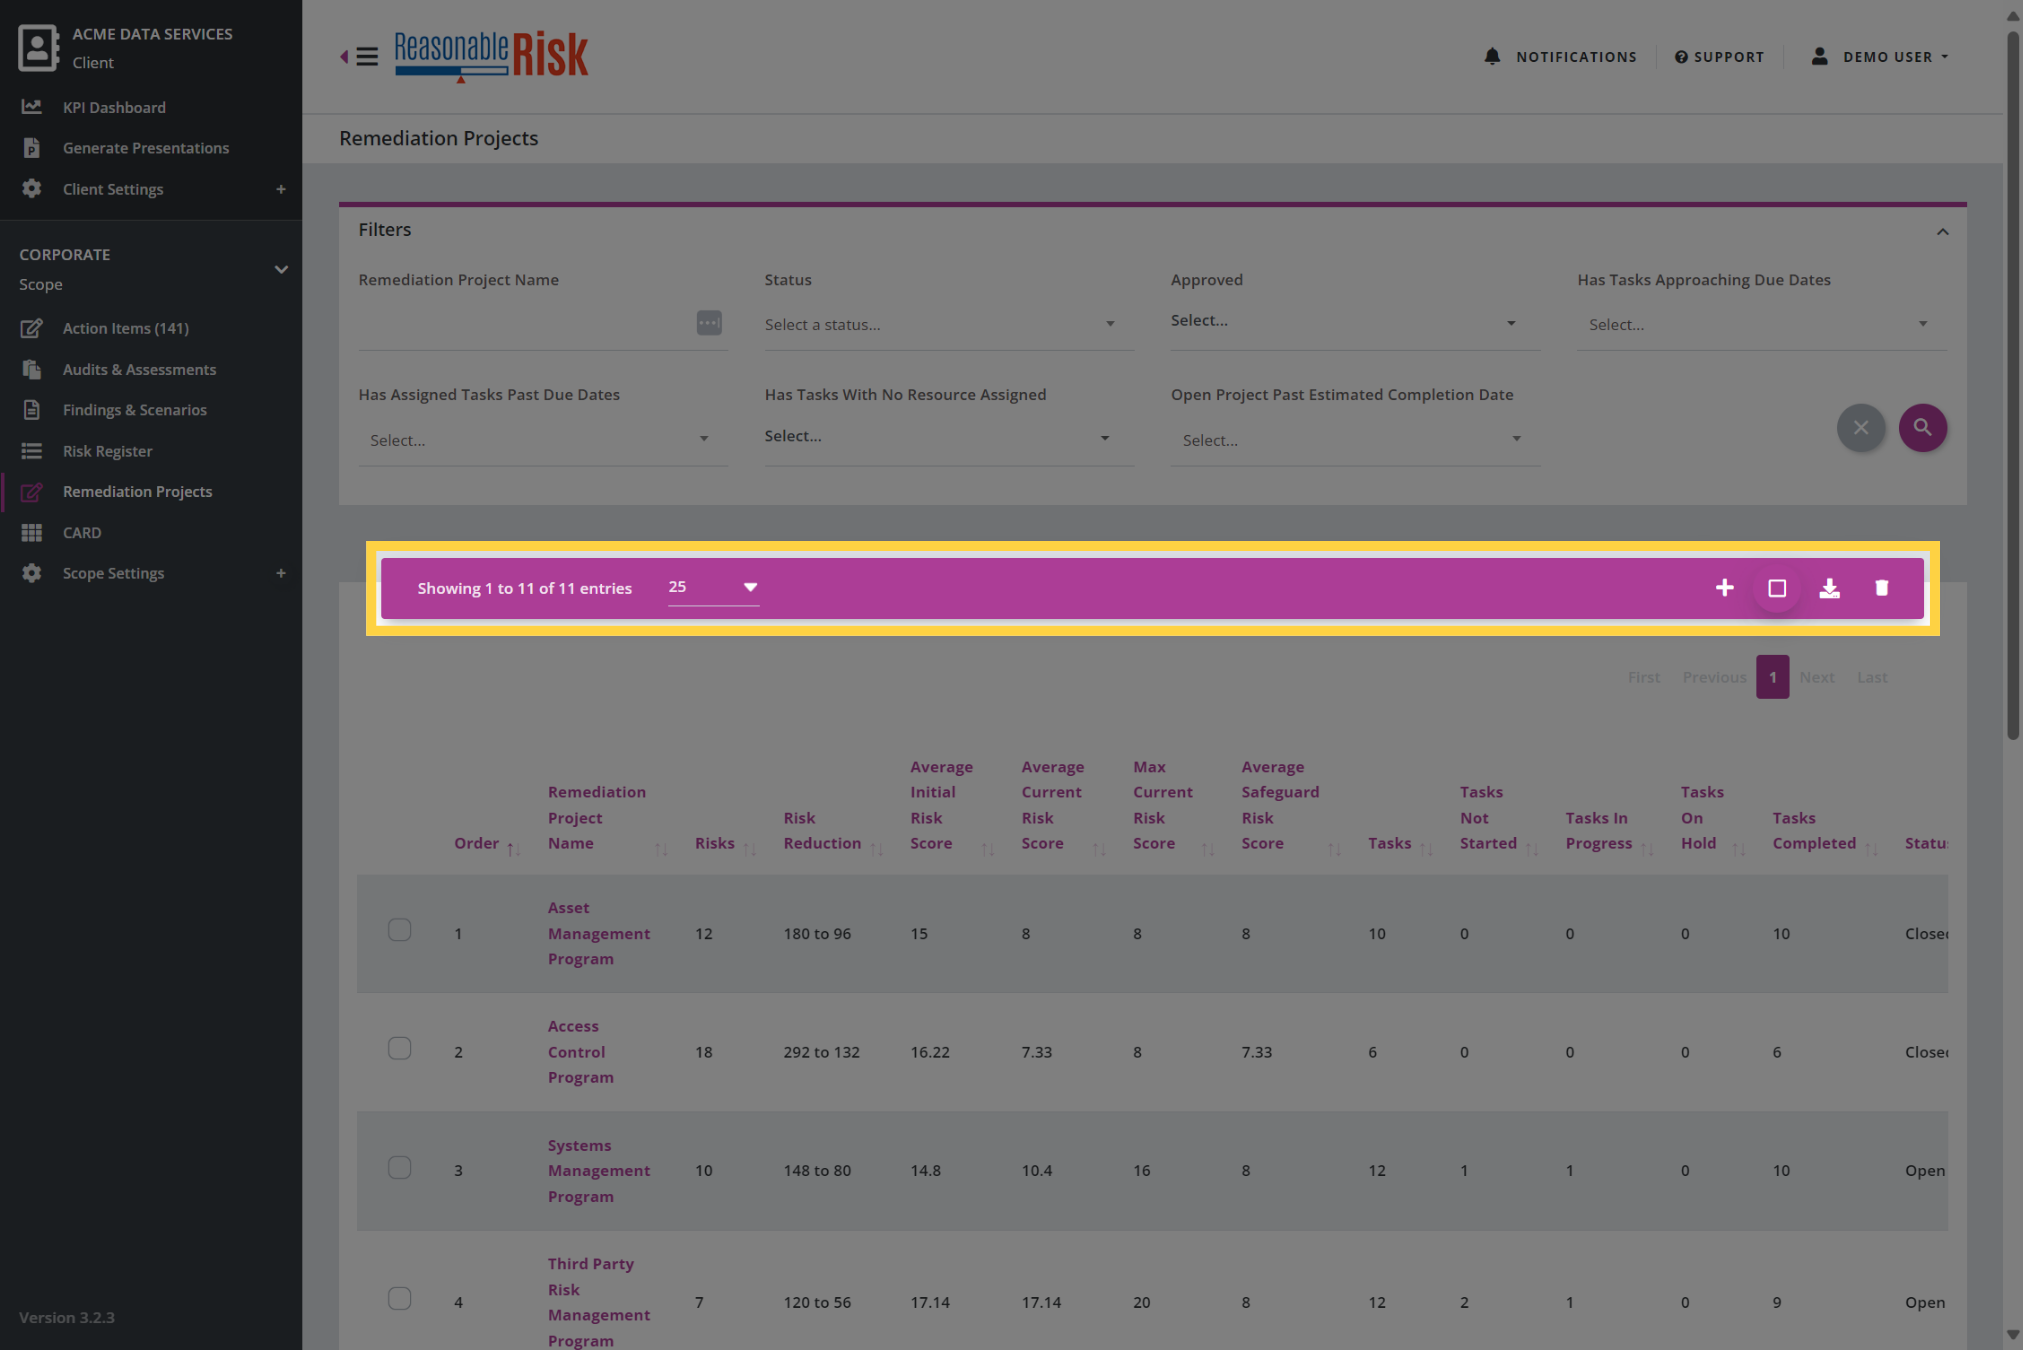
18. Remediation Projects Action Bar
Here is the Action Bar for the Remediation Projects.
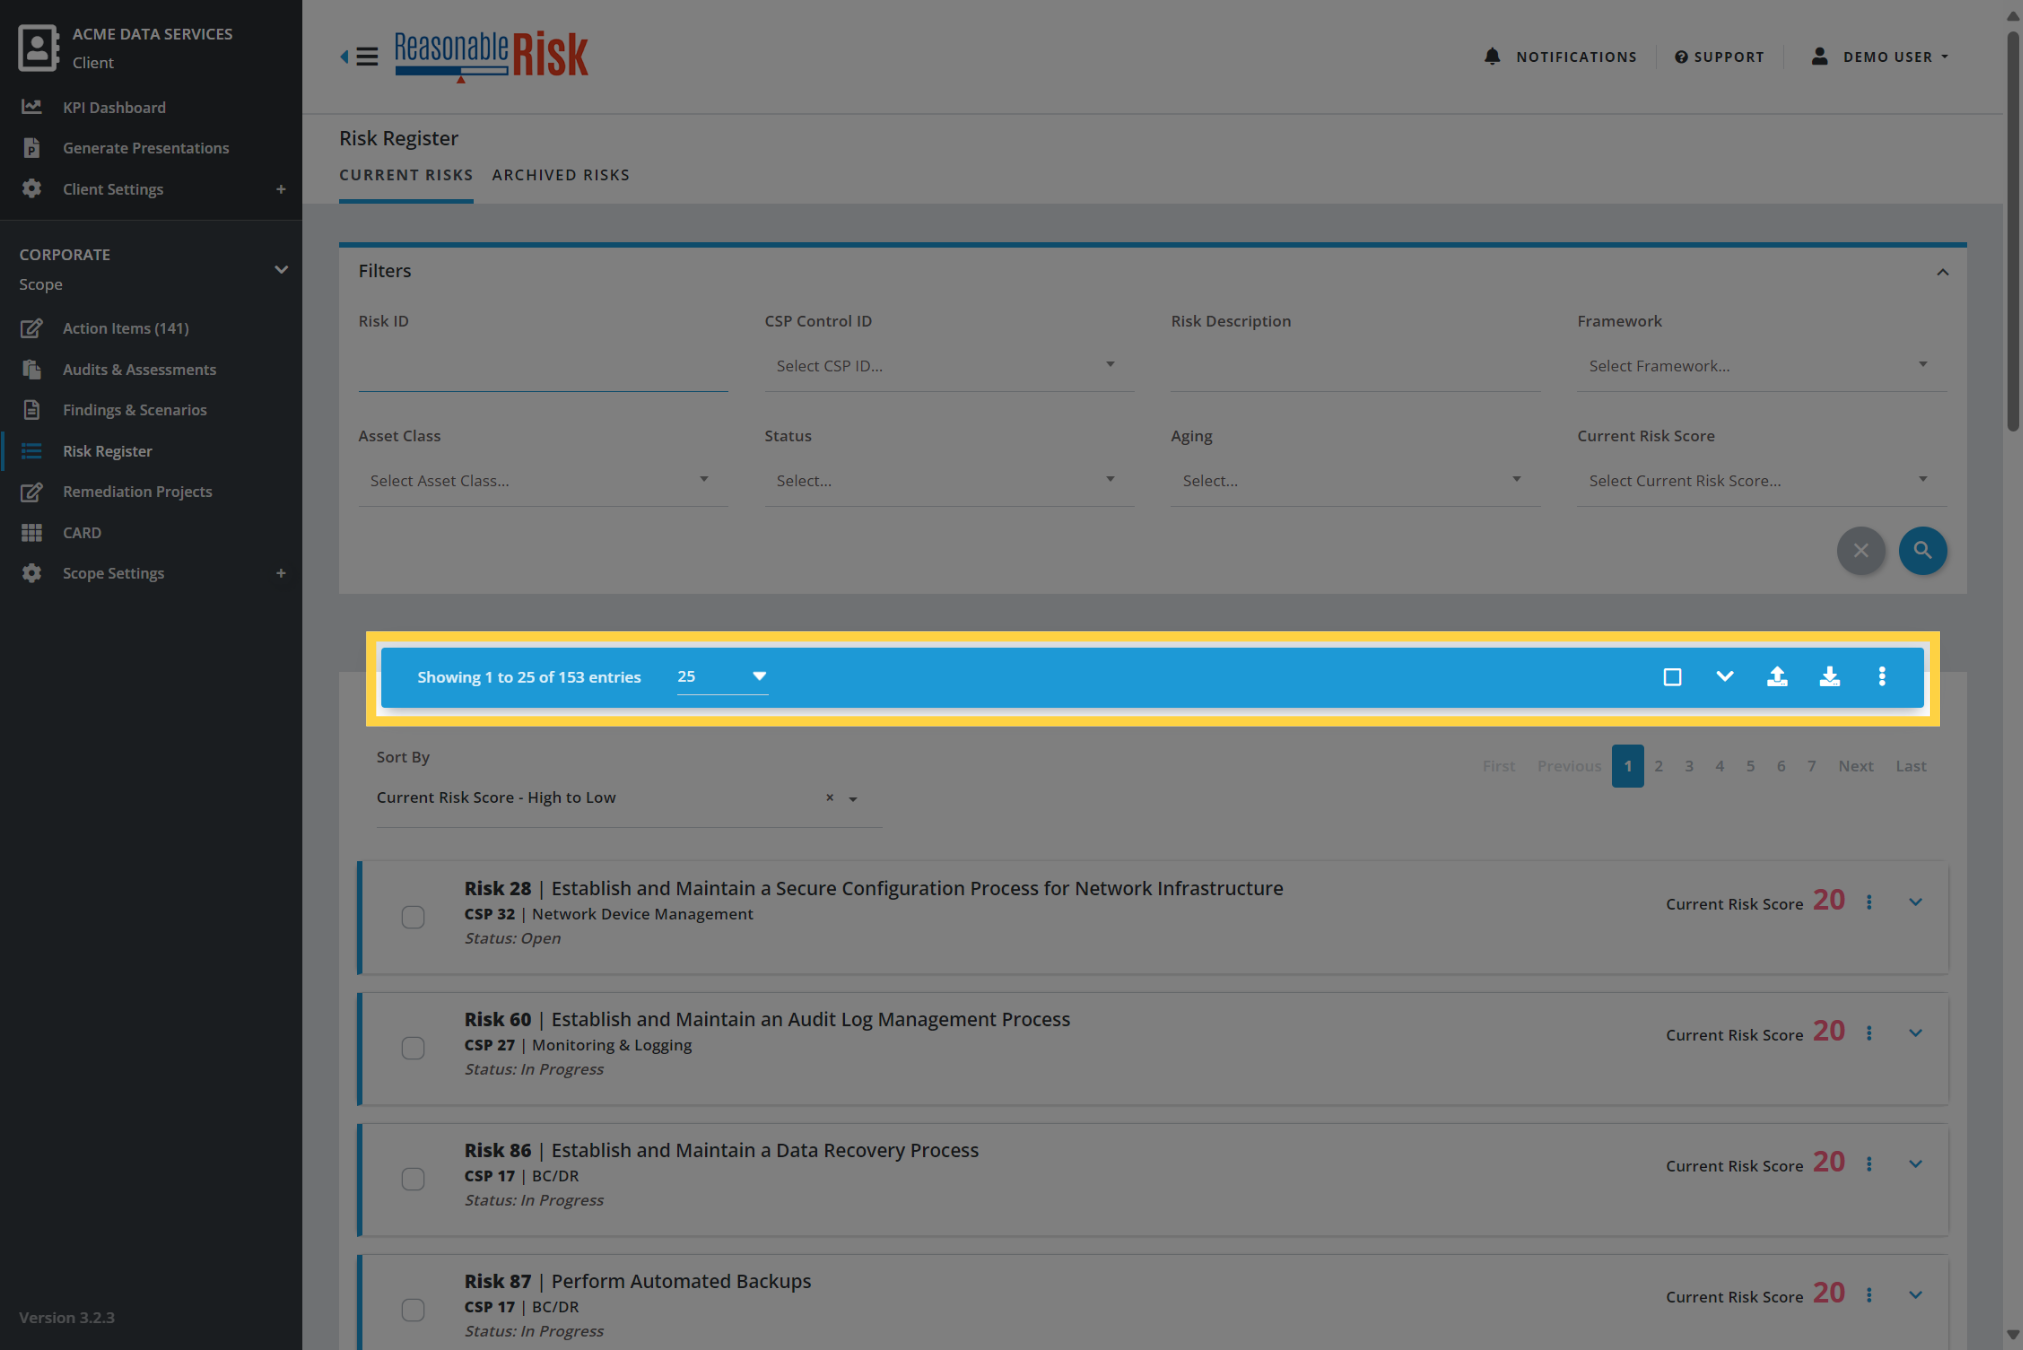
19. Risk Register Action Bar
Here is the Action Bar for the Risk Register.
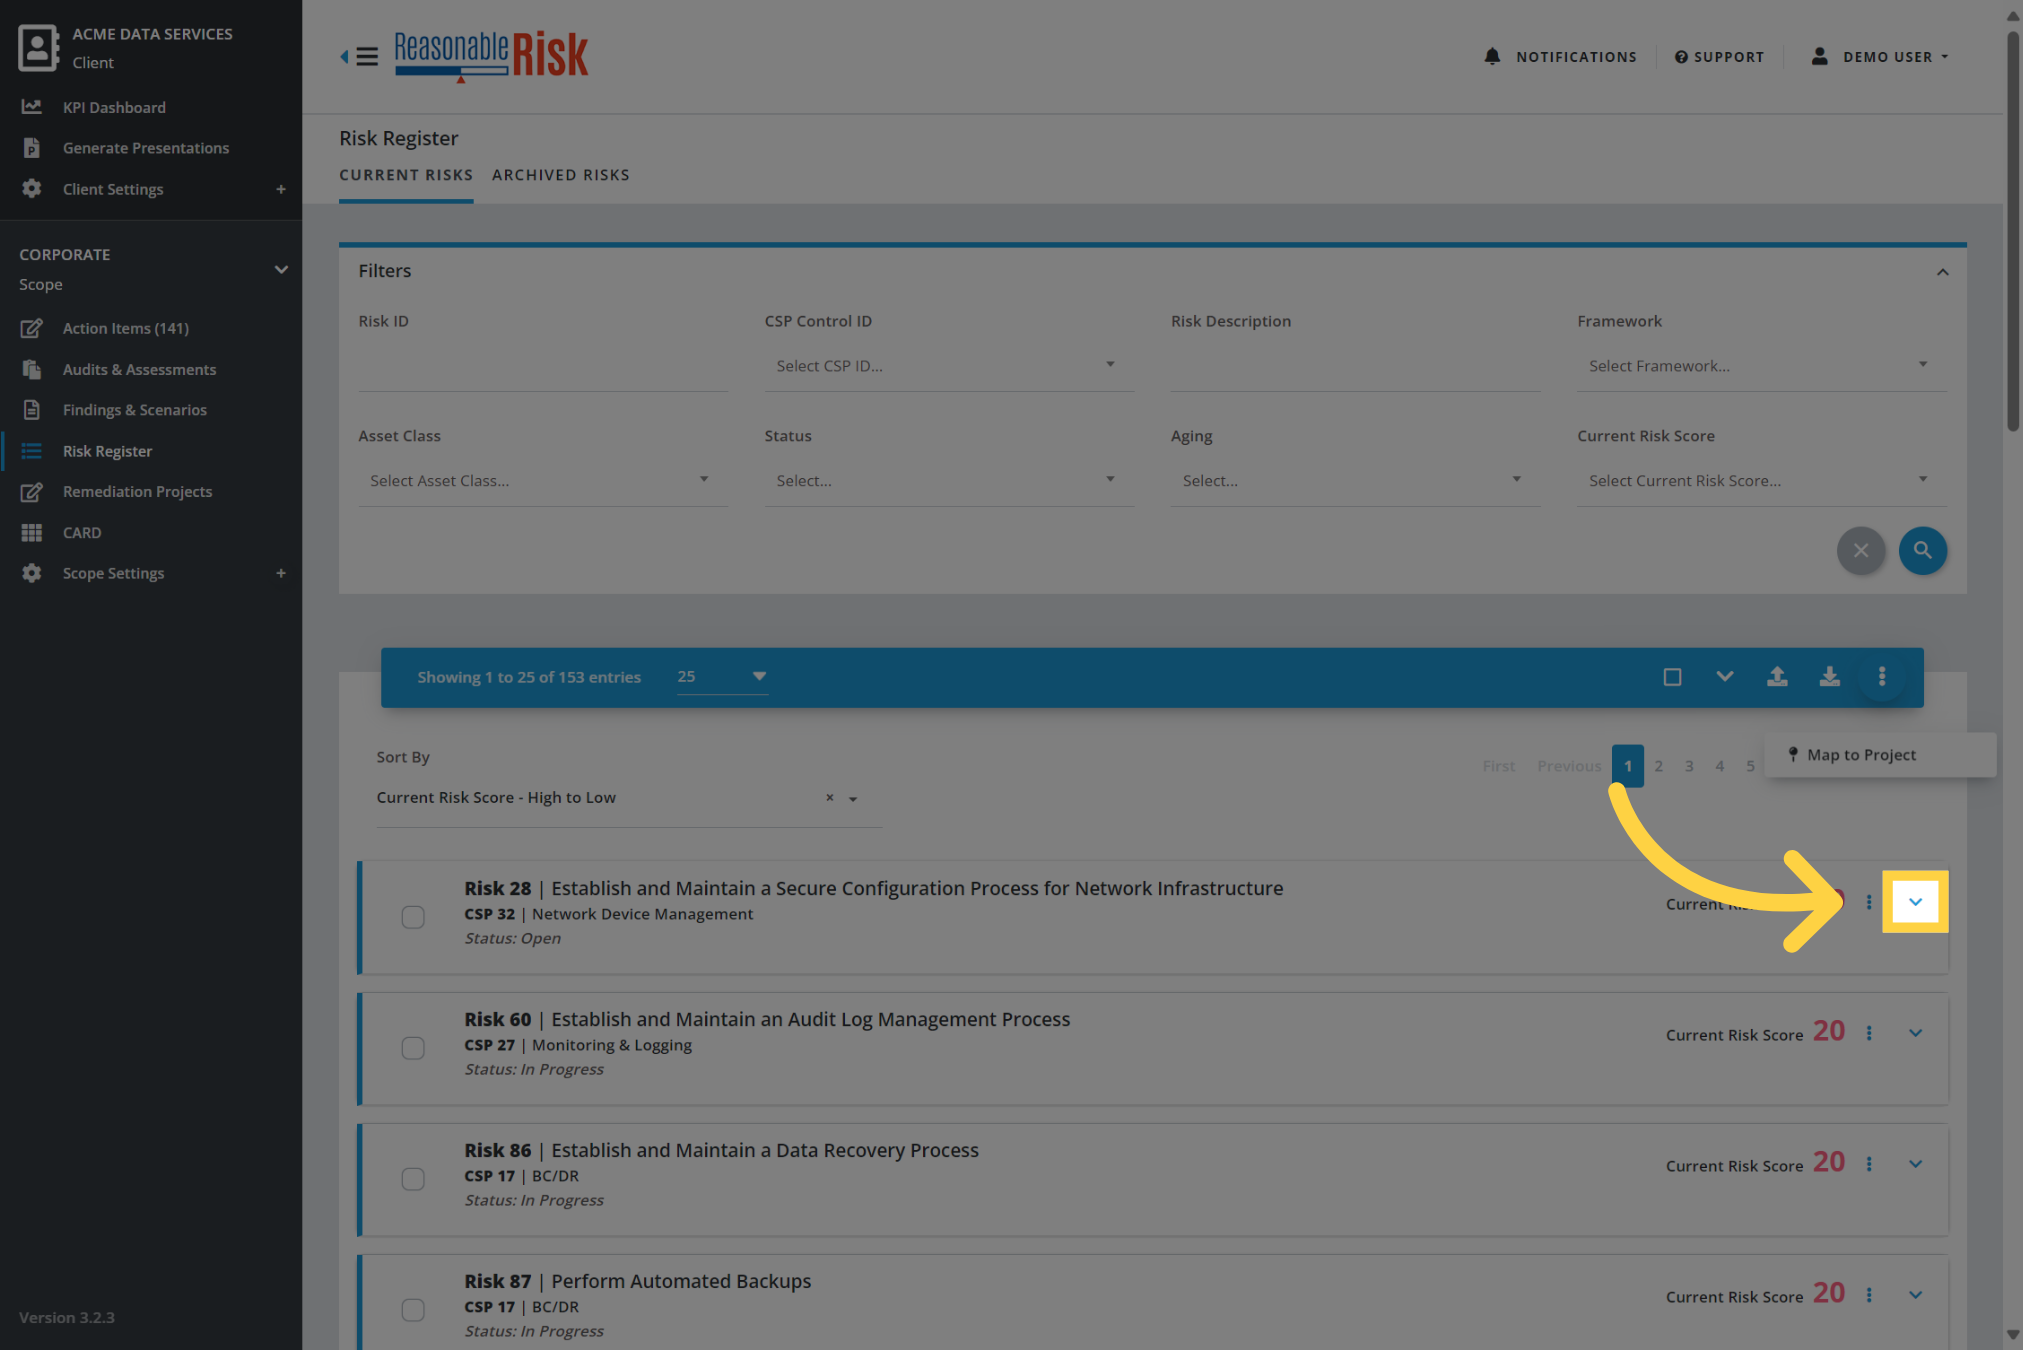
20. List Item Expand/Collapse
Individual items within each list may be presented in a collapsed format, depending on the section.
To see more detail for an individual item, click on the inverted caret.
21. List Item Expanded View
Once expanded, additional details are visible for the individual list item.
Additional navigation options are available within the expanded view of a list item.
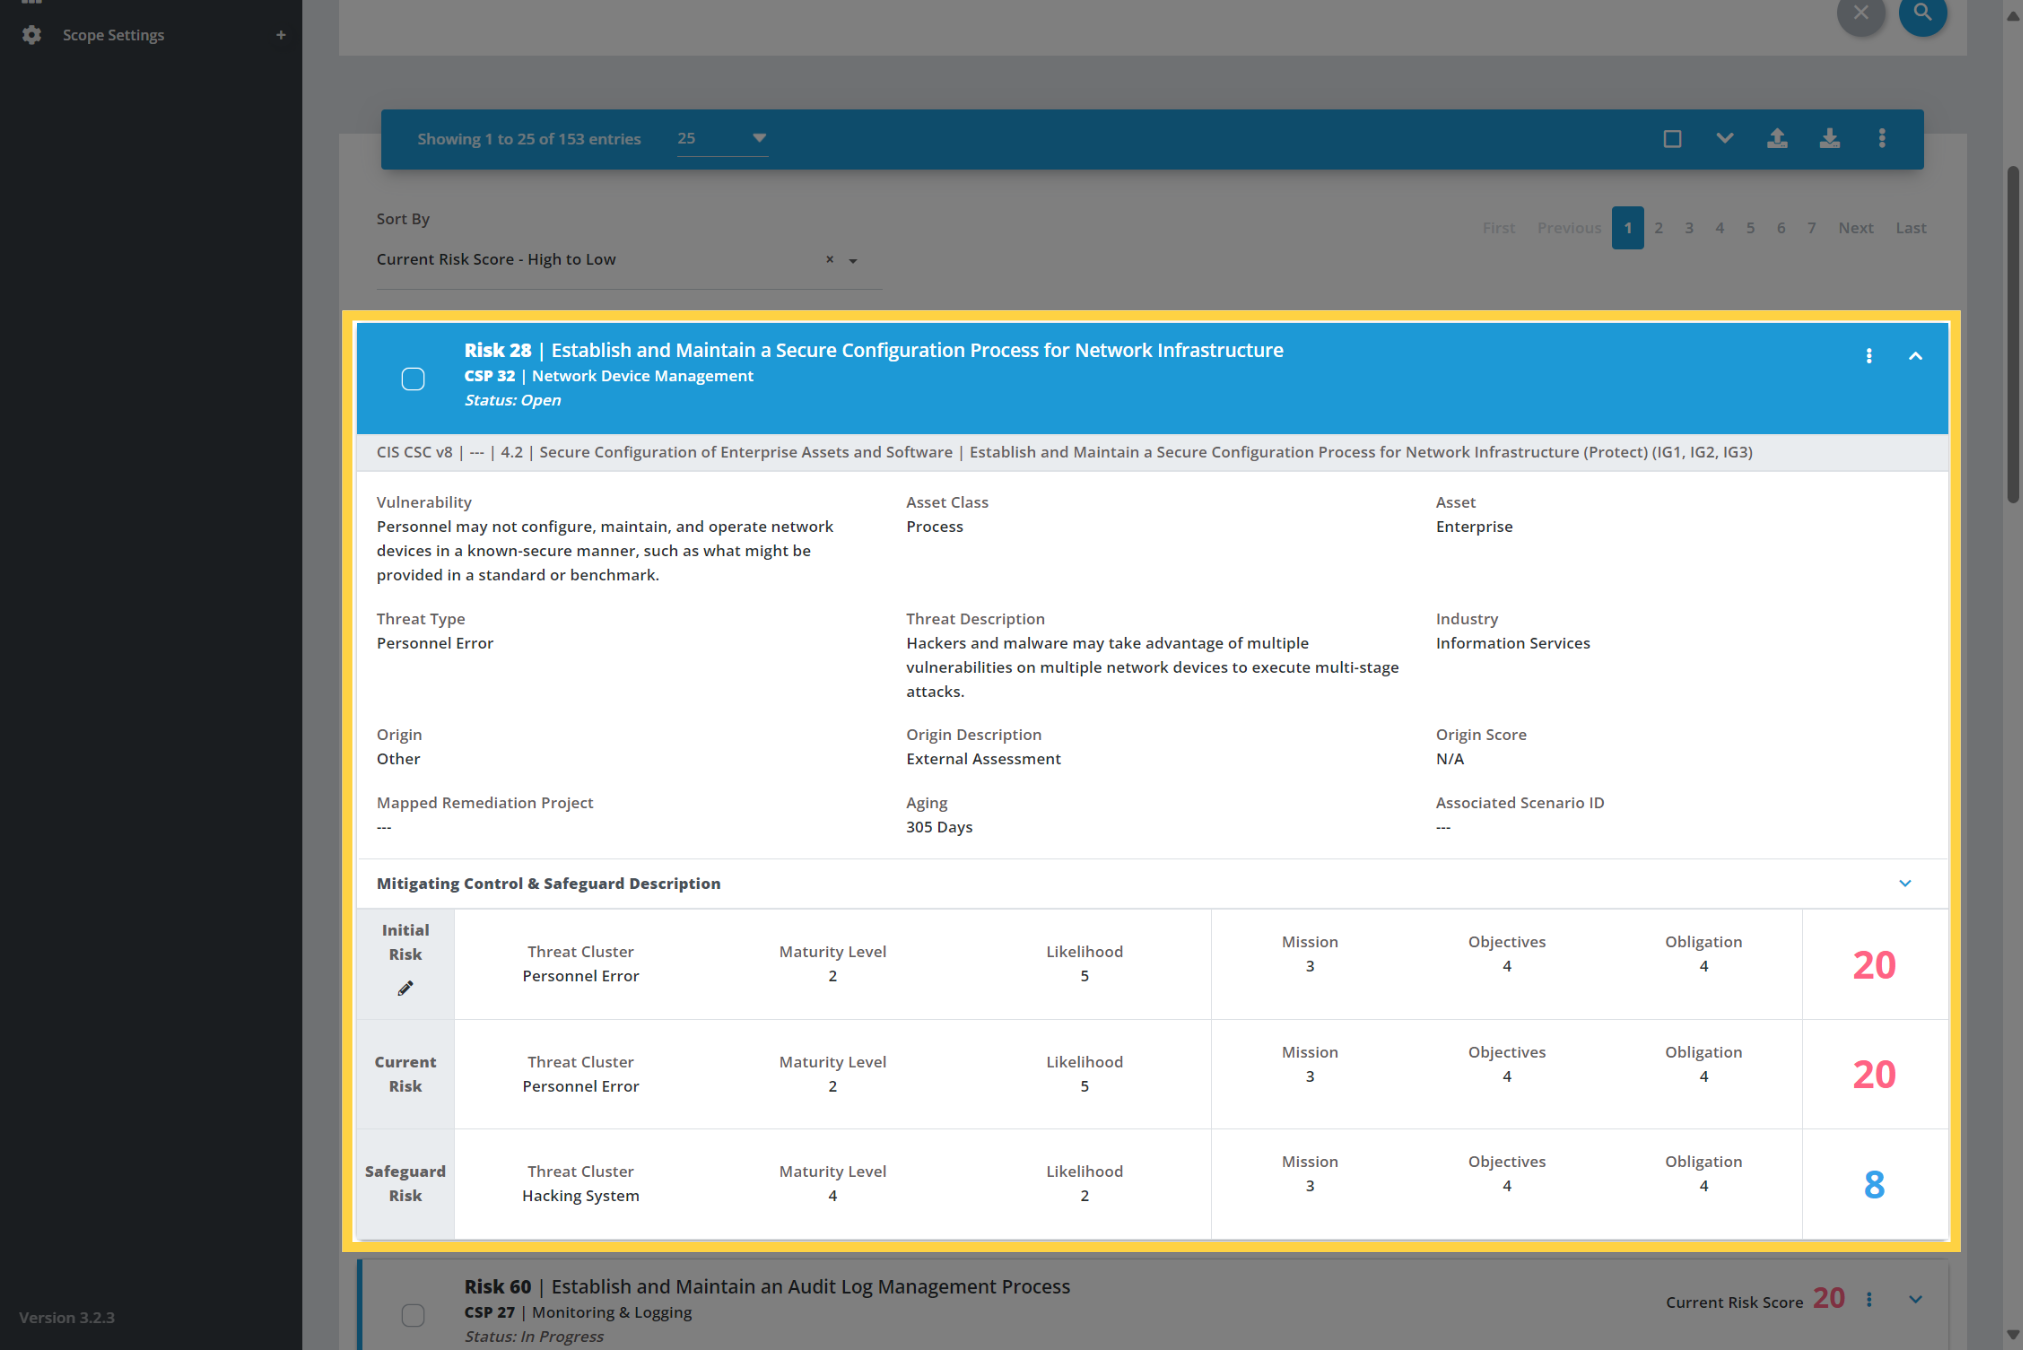
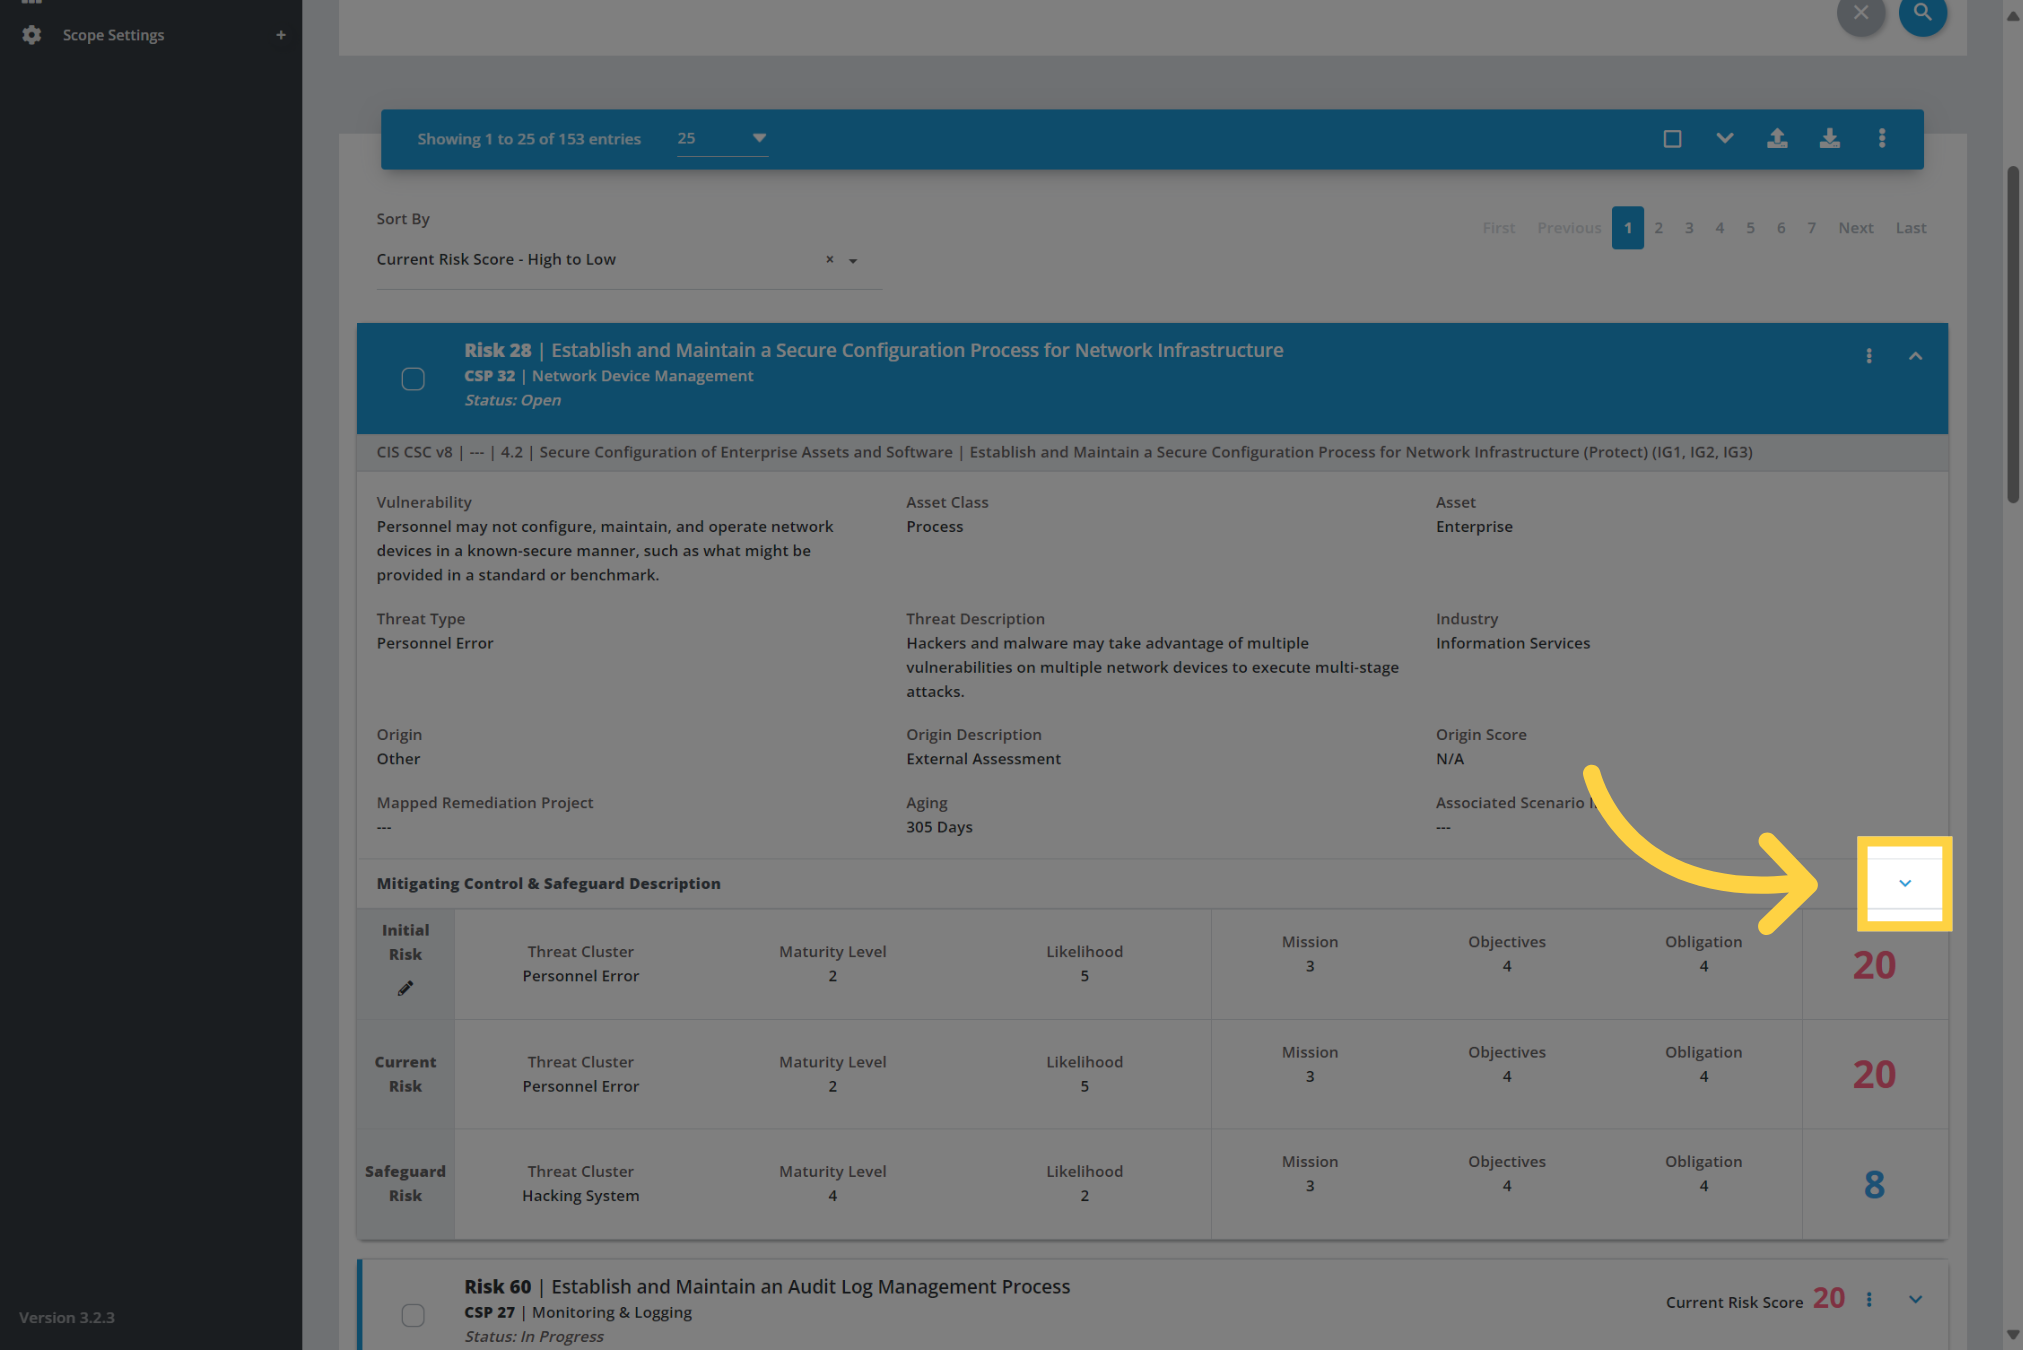
22. List Item Additional Expansion
Some list items allow you to expand again for even more detail.
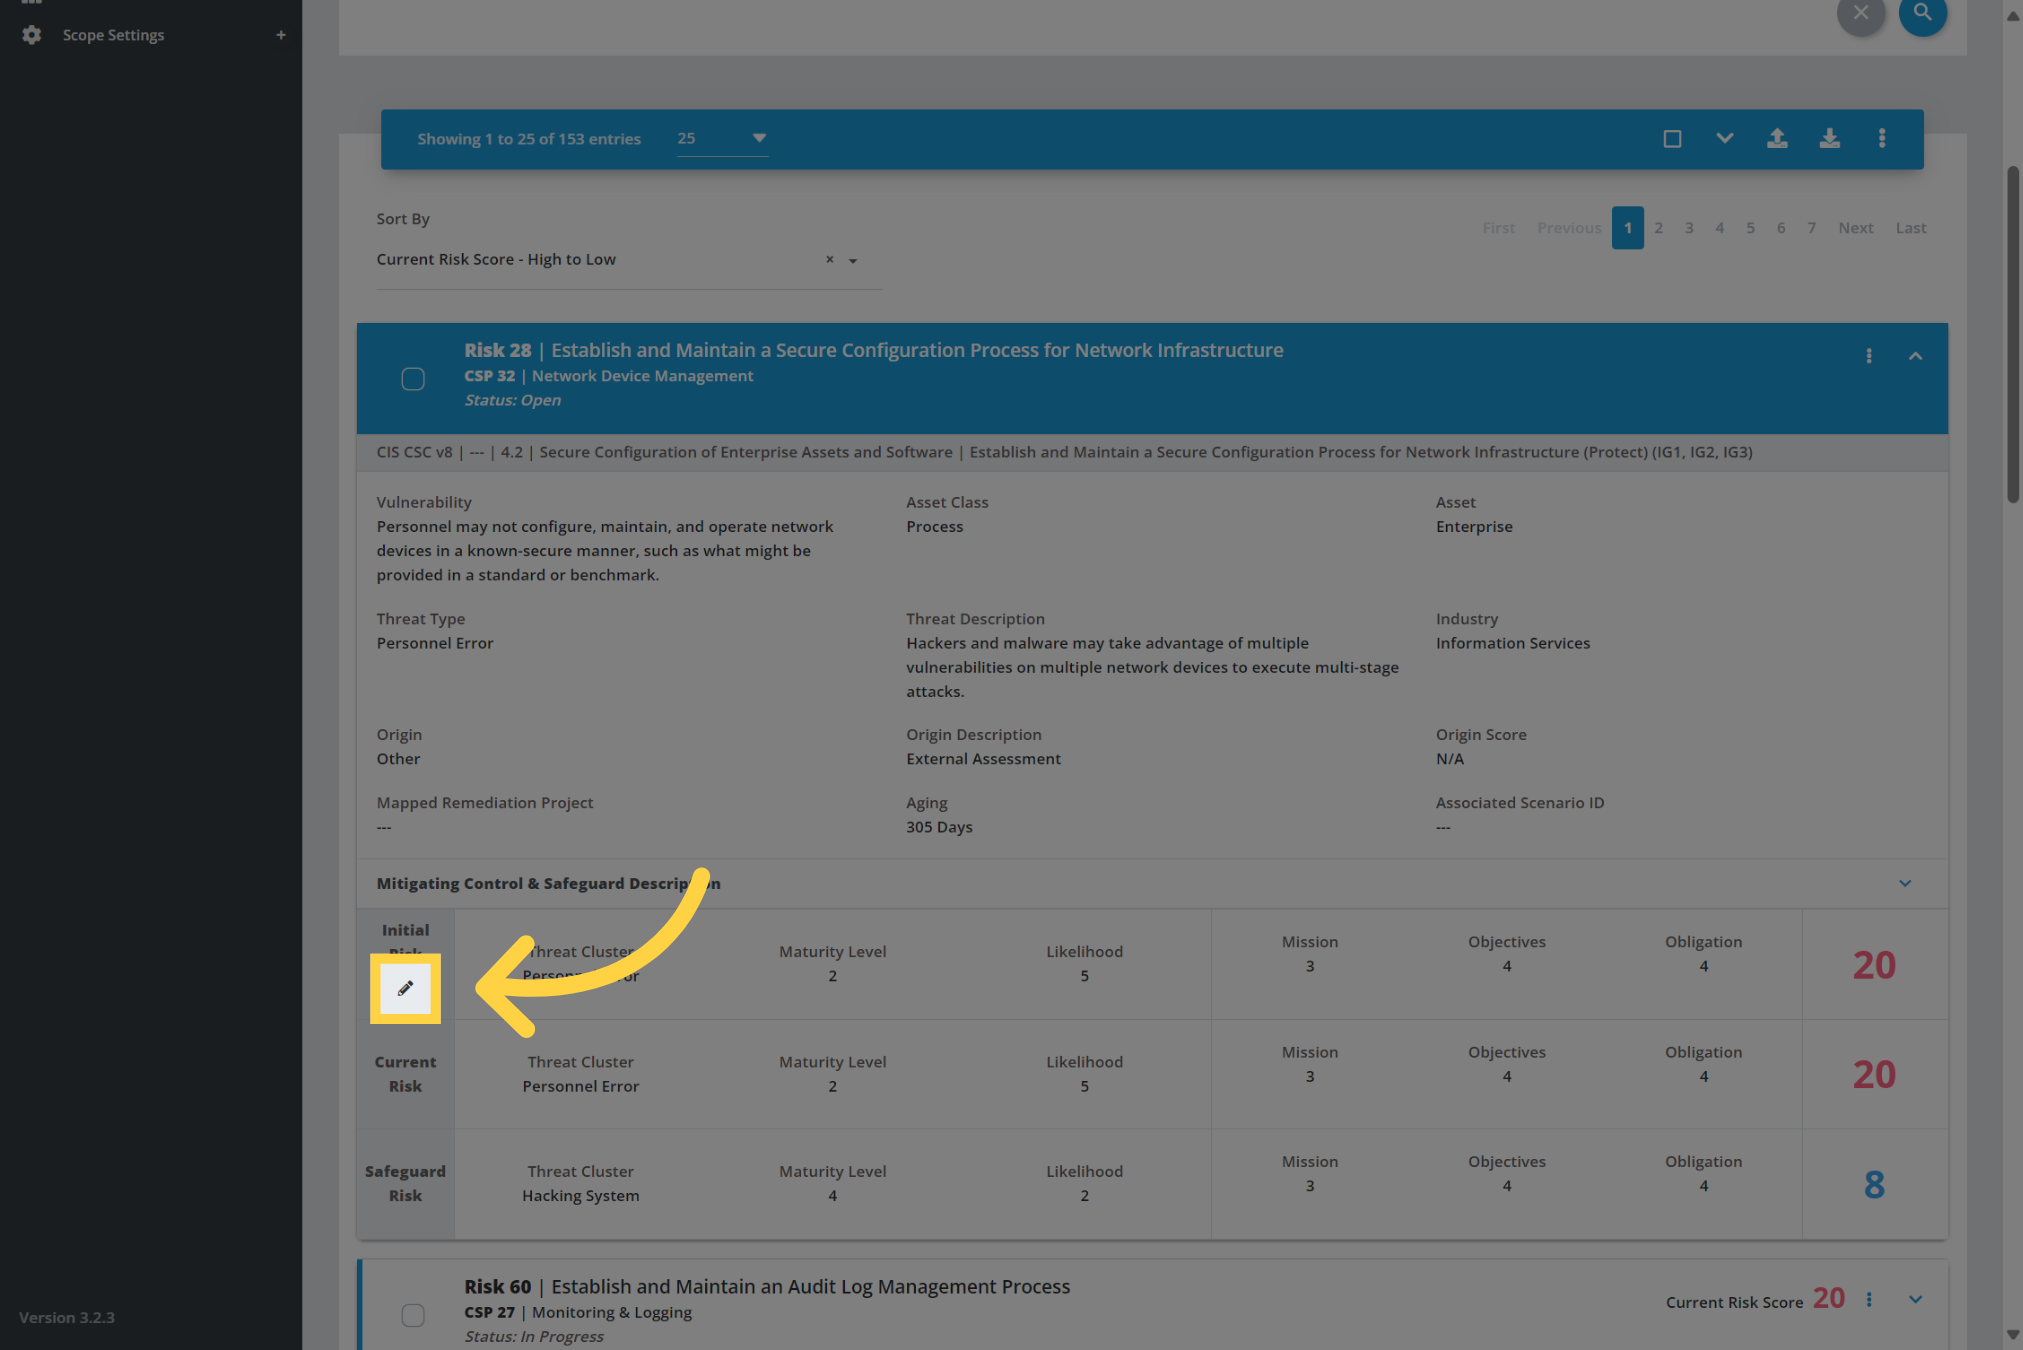
23. List Item Edits - Pencil
Some list items allow you to edit elements of the item.
By clicking on the Pencil icon you are able to edit an element of the list item.
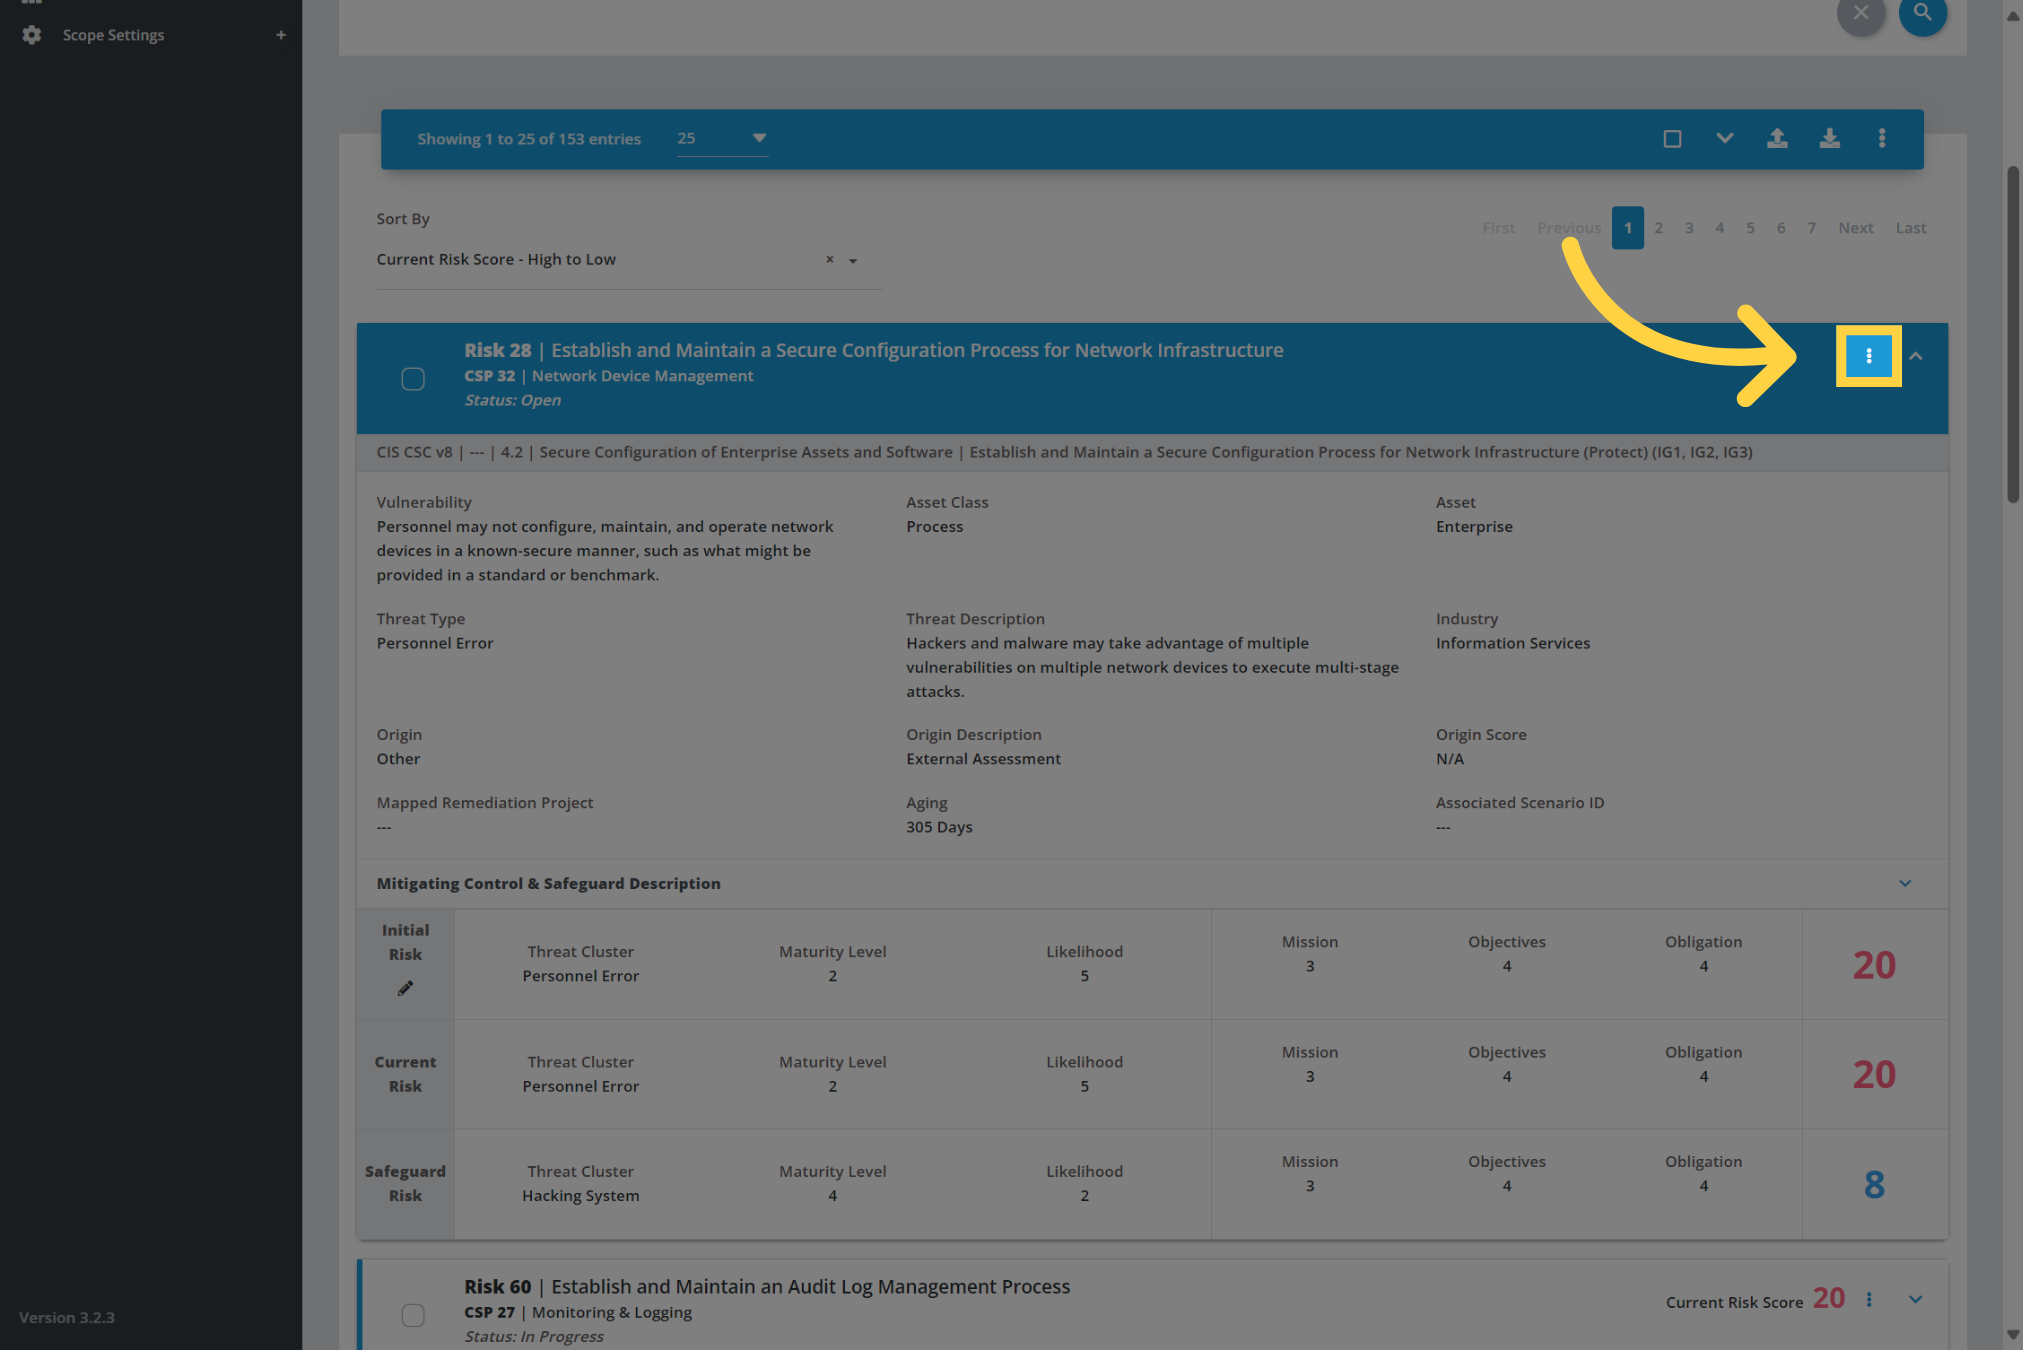
24. List Item Actions
Each list item will also have a three dots menu that presents options for the individual item.
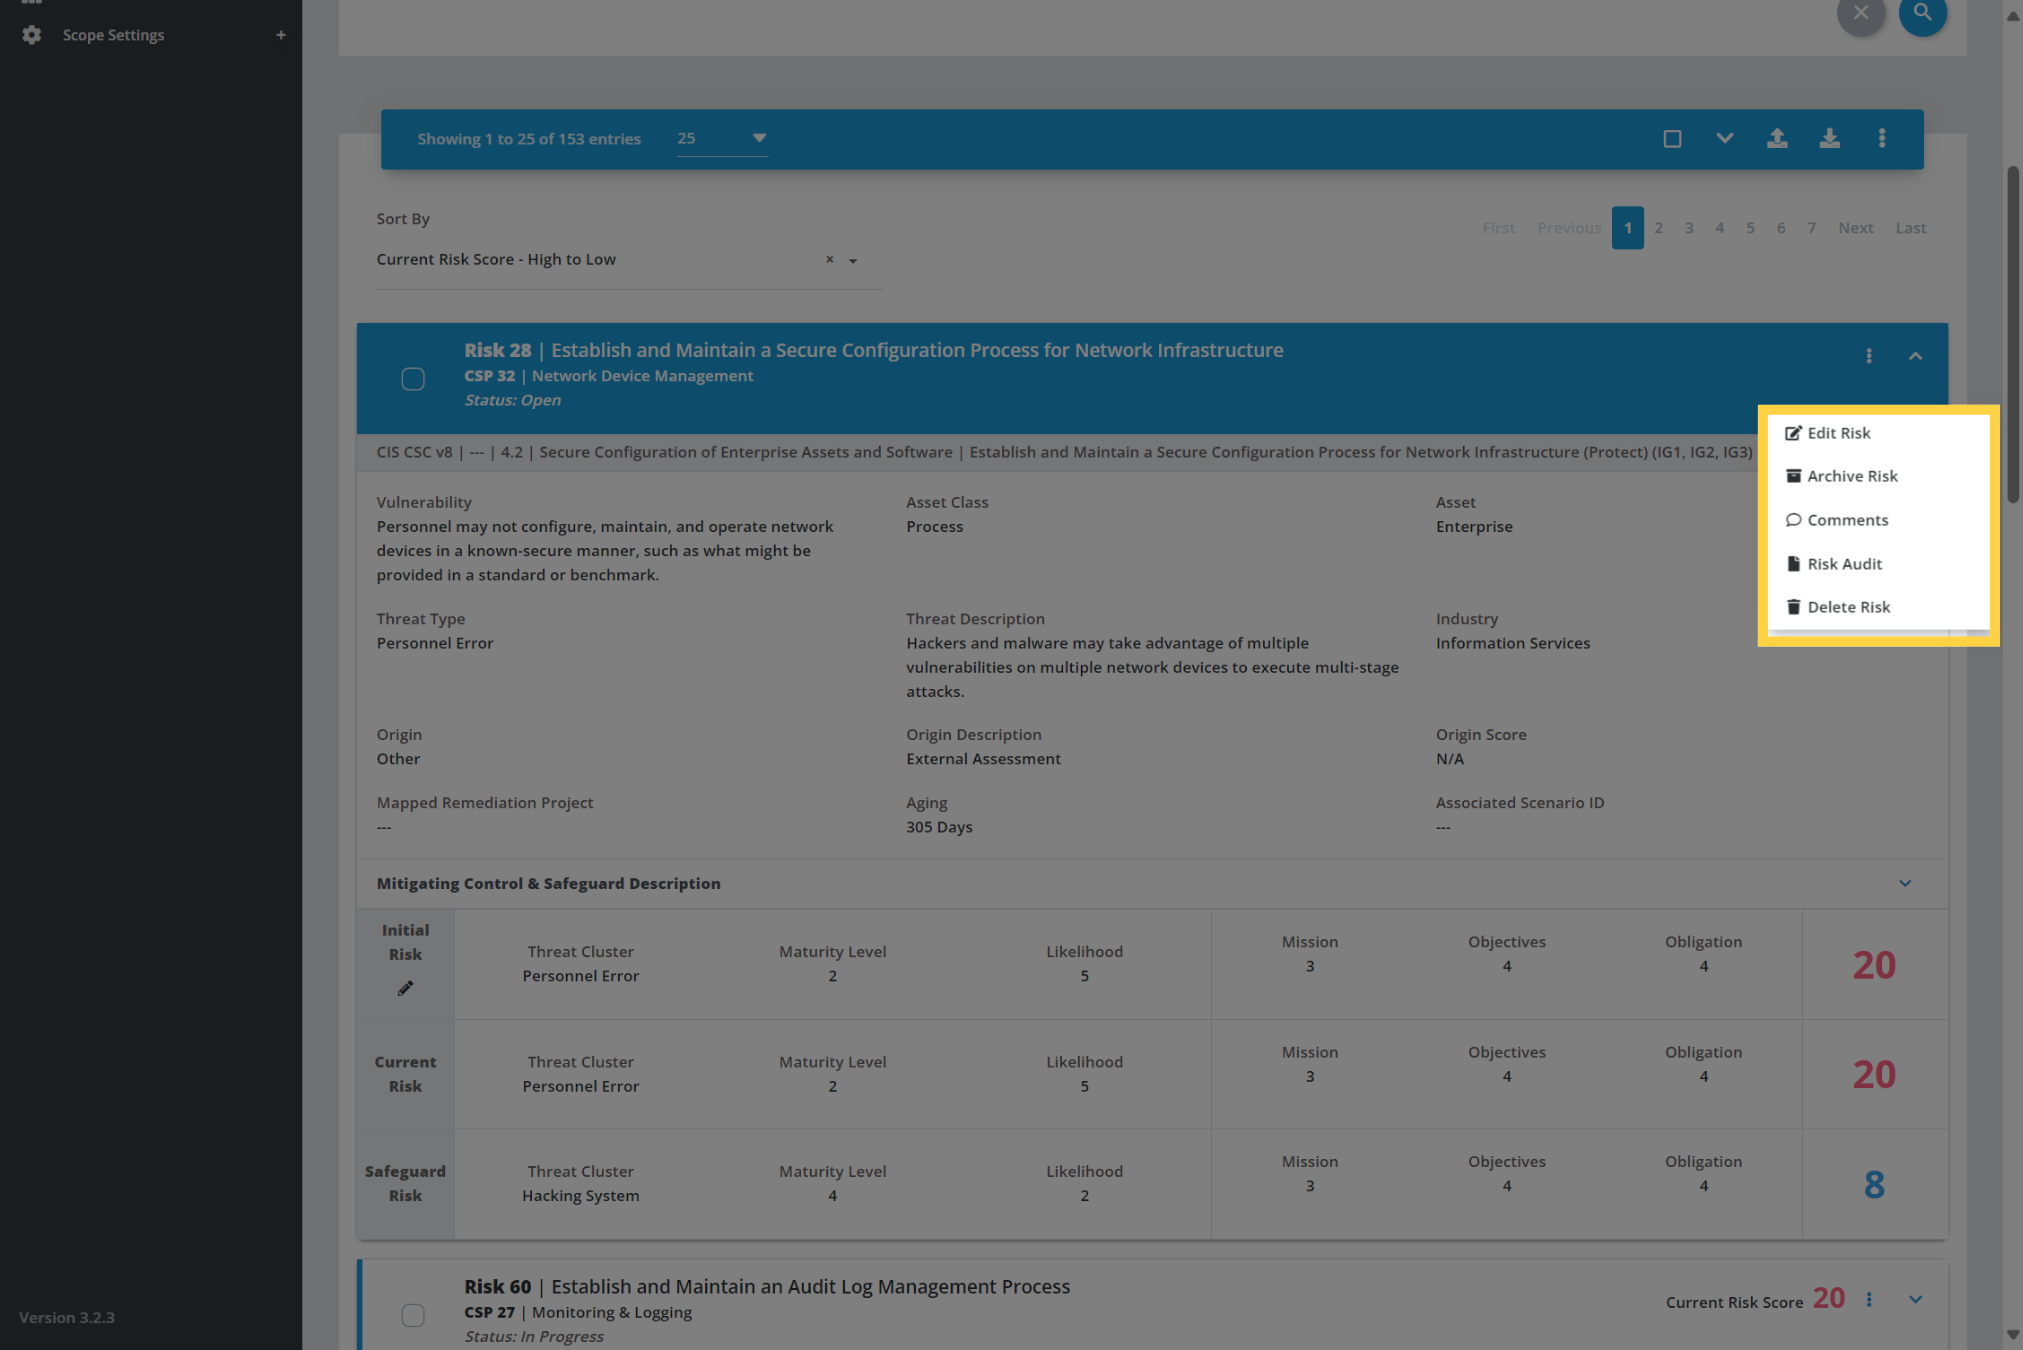
25. List Item Three Dots Menu
Here is an example of the three dots menu for an individual risk item in the Risk Register.
From this menu, you can choose to edit, archive, or delete the risk. In addition, you can add comments or view an audit of the risk activity.
Congratulations, you have completed the Application Navigation Overview.
This guide covered the variety of navigation elements within the Reasonable Risk application, including accessing key features, selecting options, and interacting with different sections to manage your content.
Look for additional support material that provides a more detailed review of specific navigation and menu options for individual sections of the application.
Comments
0 comments
Please sign in to leave a comment.