1. Where it fits...
Audits & Assessments allow you to plan and monitor the periodic activities and assessments normally associated with a security program.
Execution of Audits & Assessments external to the system result in the items that may need to be entered into Reasonable Risk as Findings for consideration in your Risk Register.
Let's look at the application to see how we can work with Audits & Assessments.
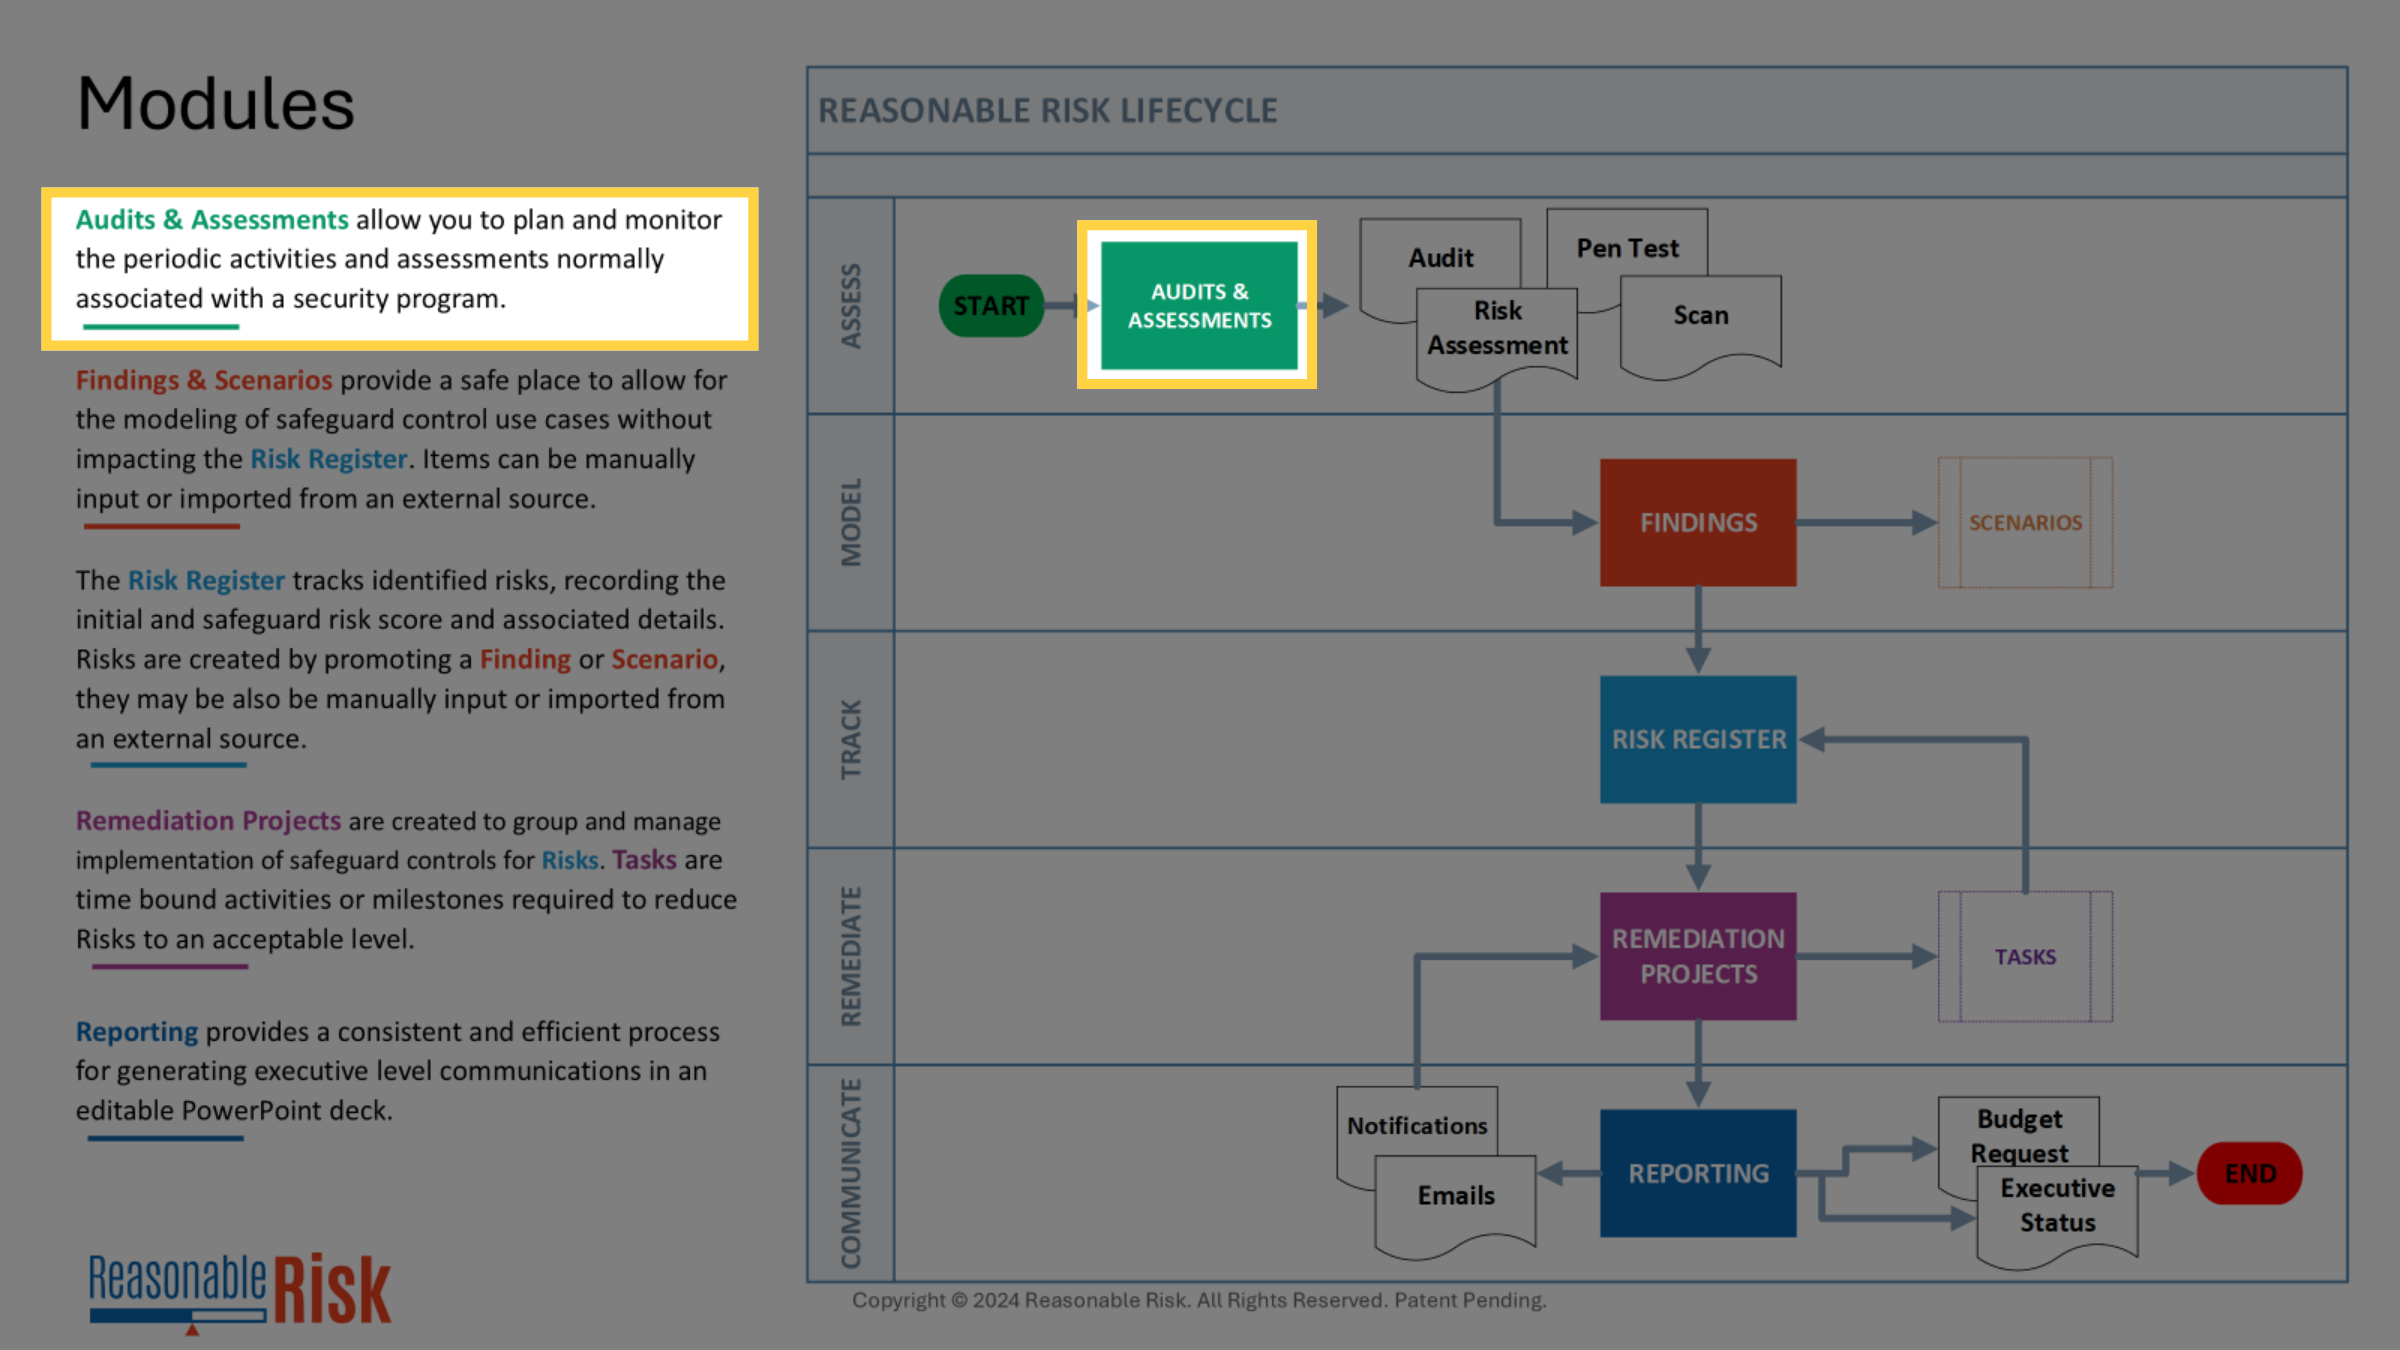
2. Access Audits & Assessments
From the main menu, select "Audits & Assessments".
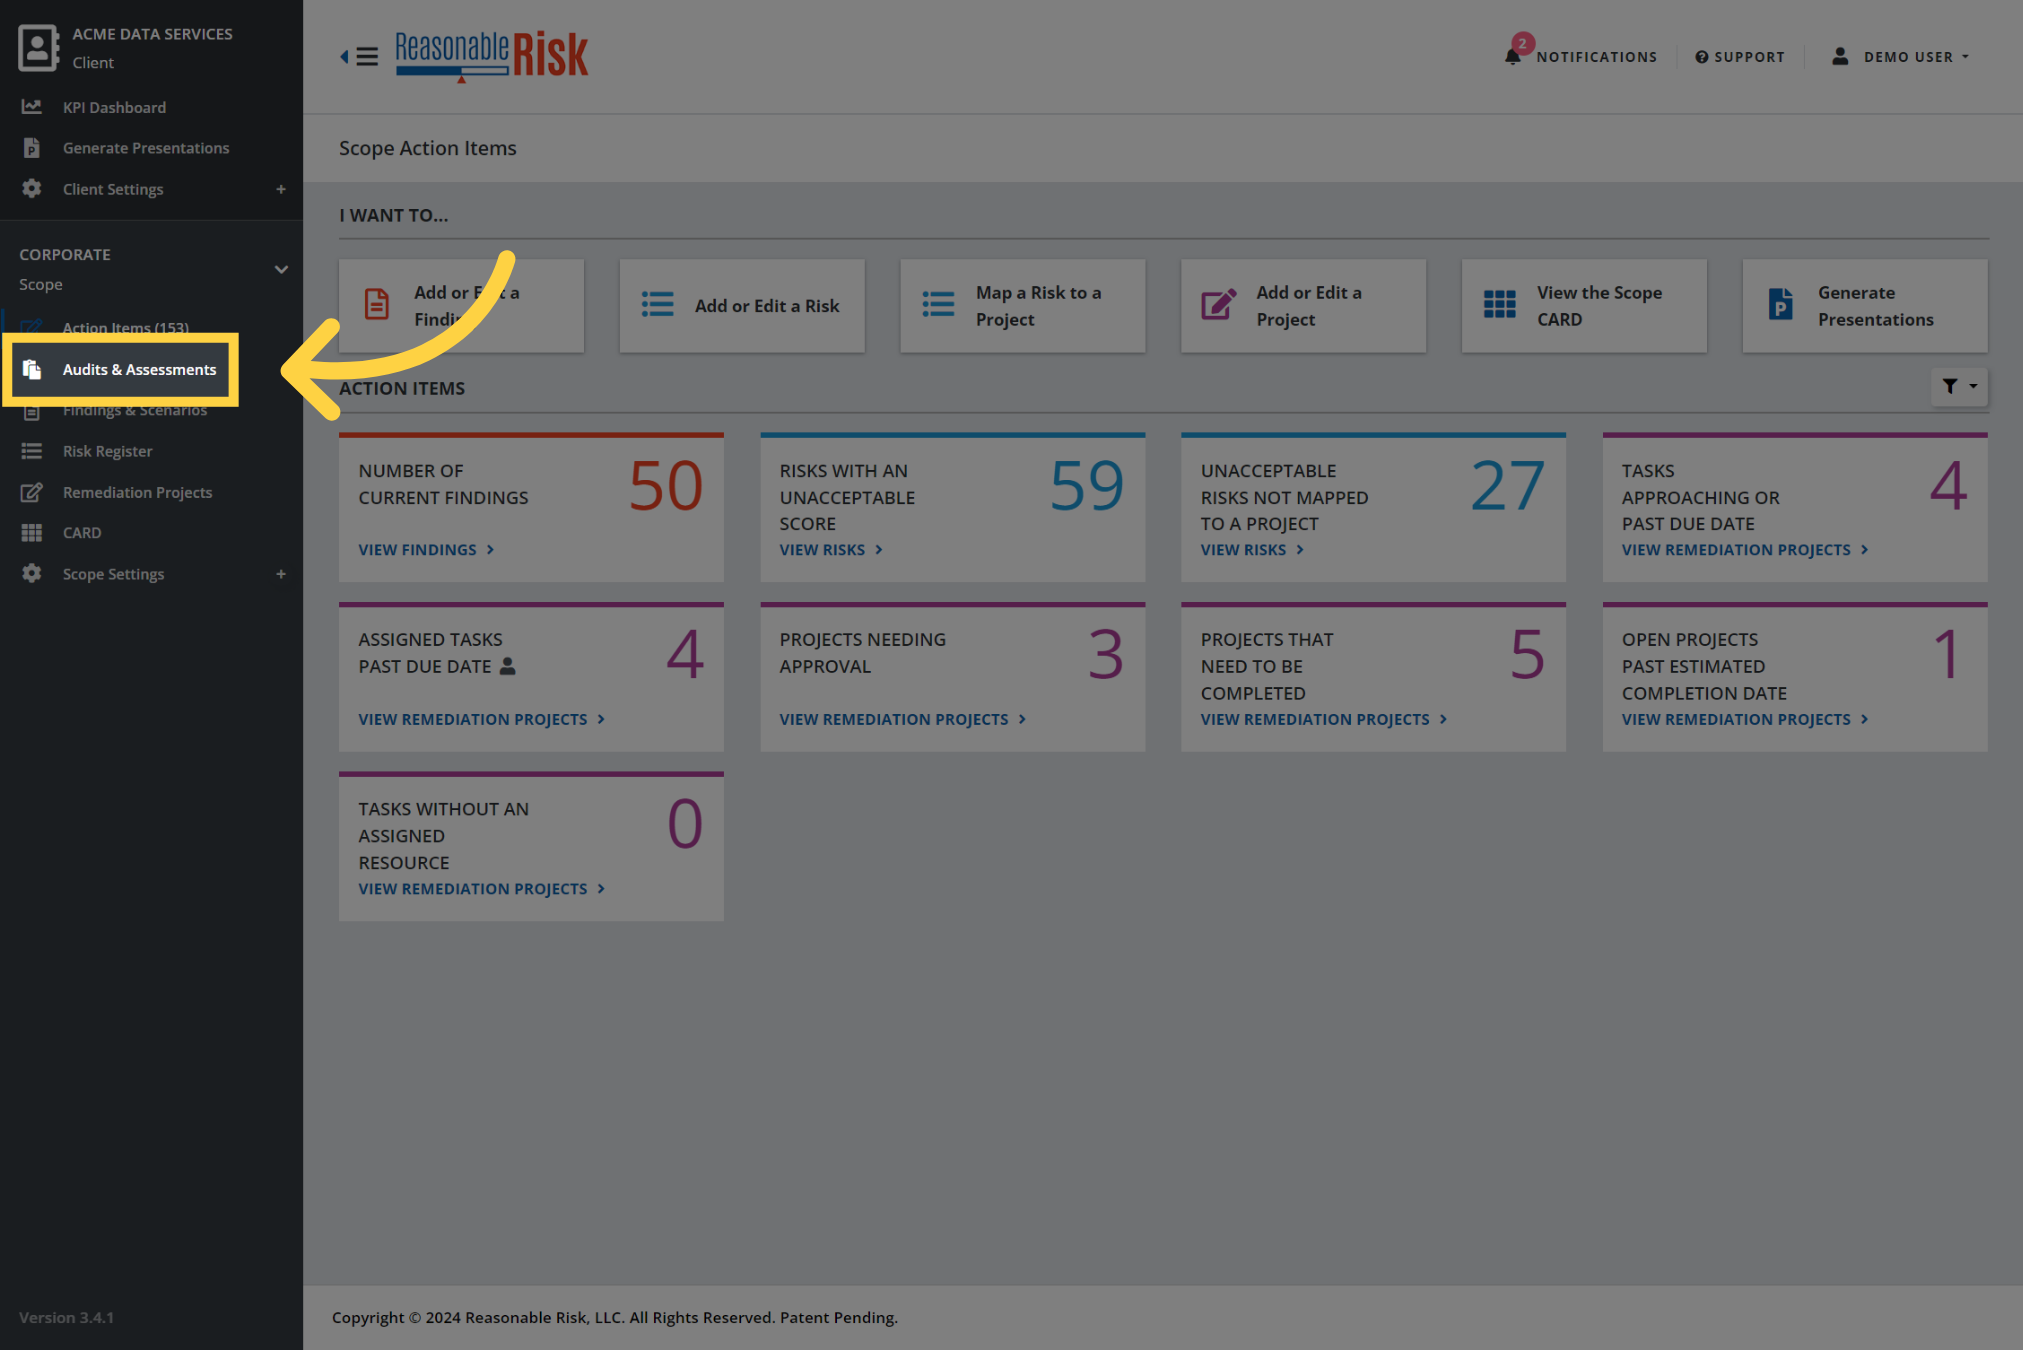
3. Audits & Assessments filters
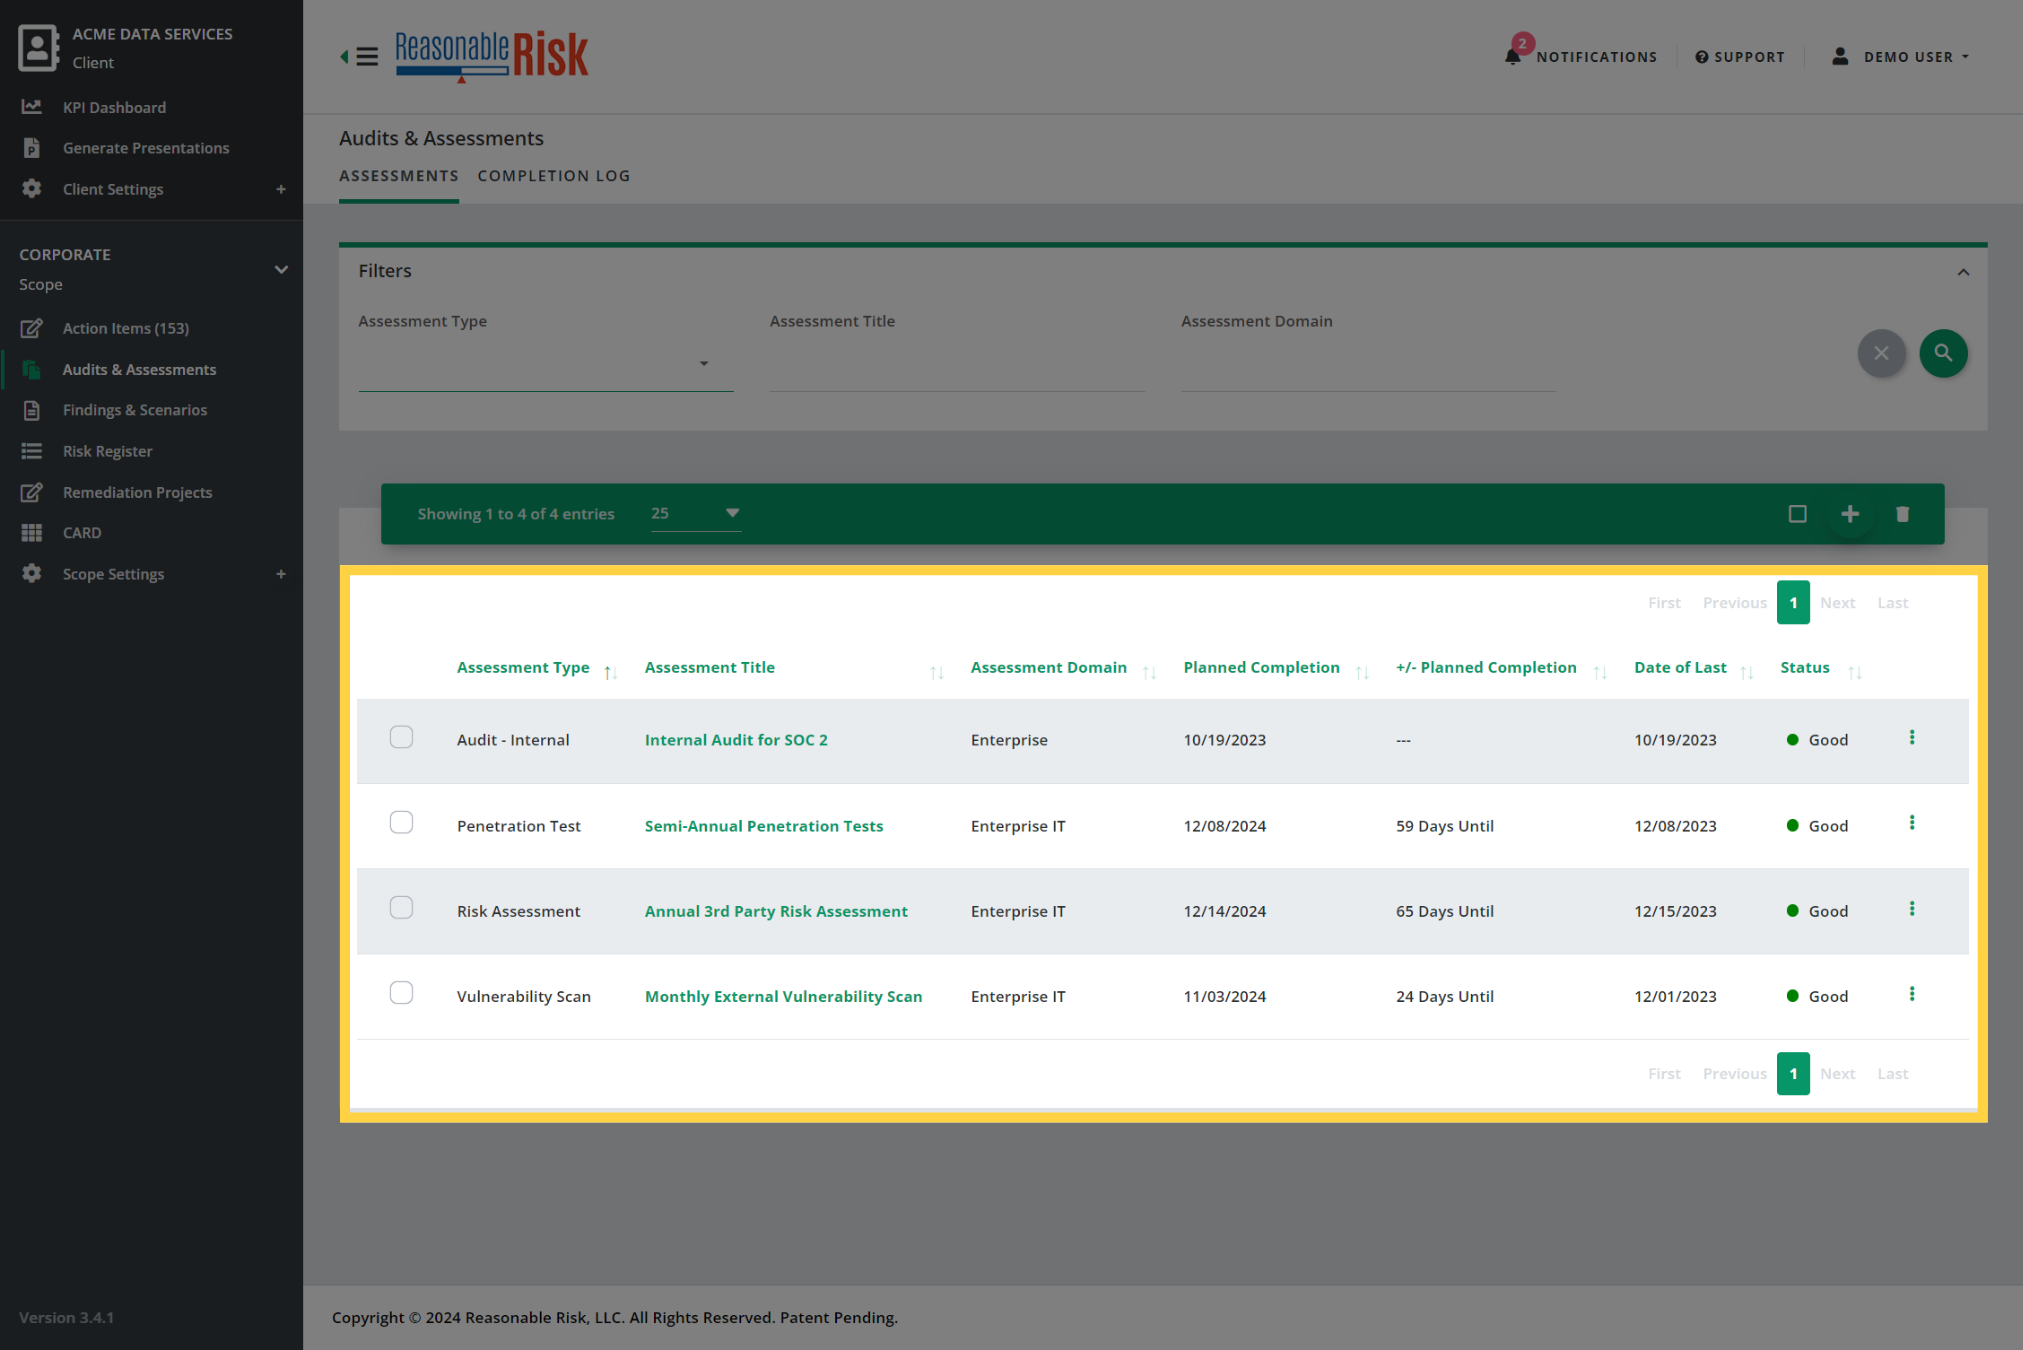
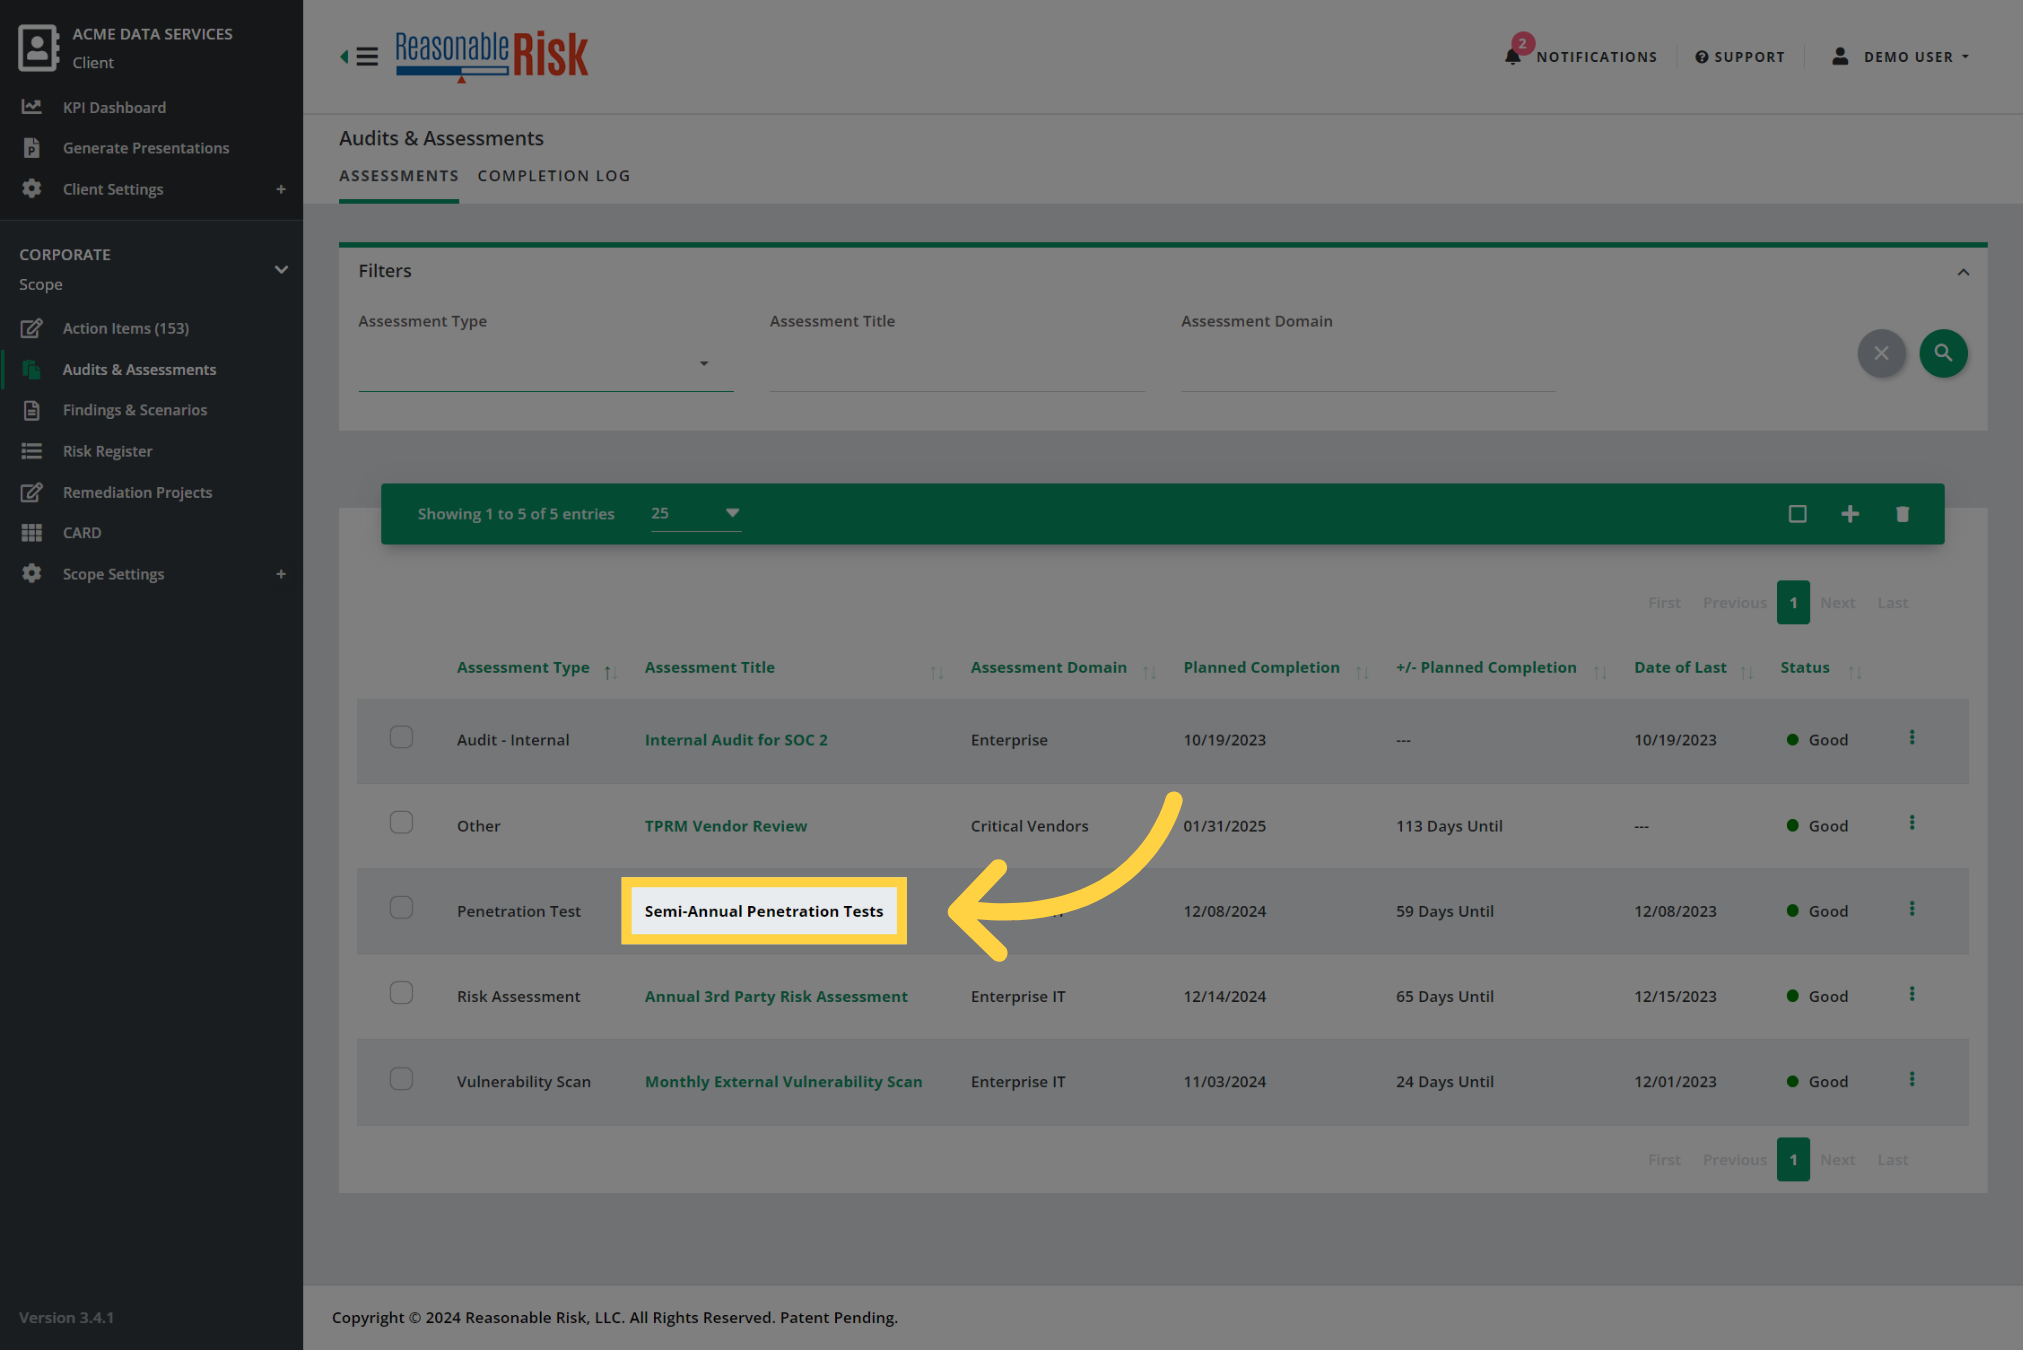
Once you have entered the Audits & Assessments module, you will be presented with a list of the existing records and a set of module specific filters.
The filters available for Audits & Assessments allow you to limit the list by "Assessment Type", "Assessment Title", and "Assessment Domain".

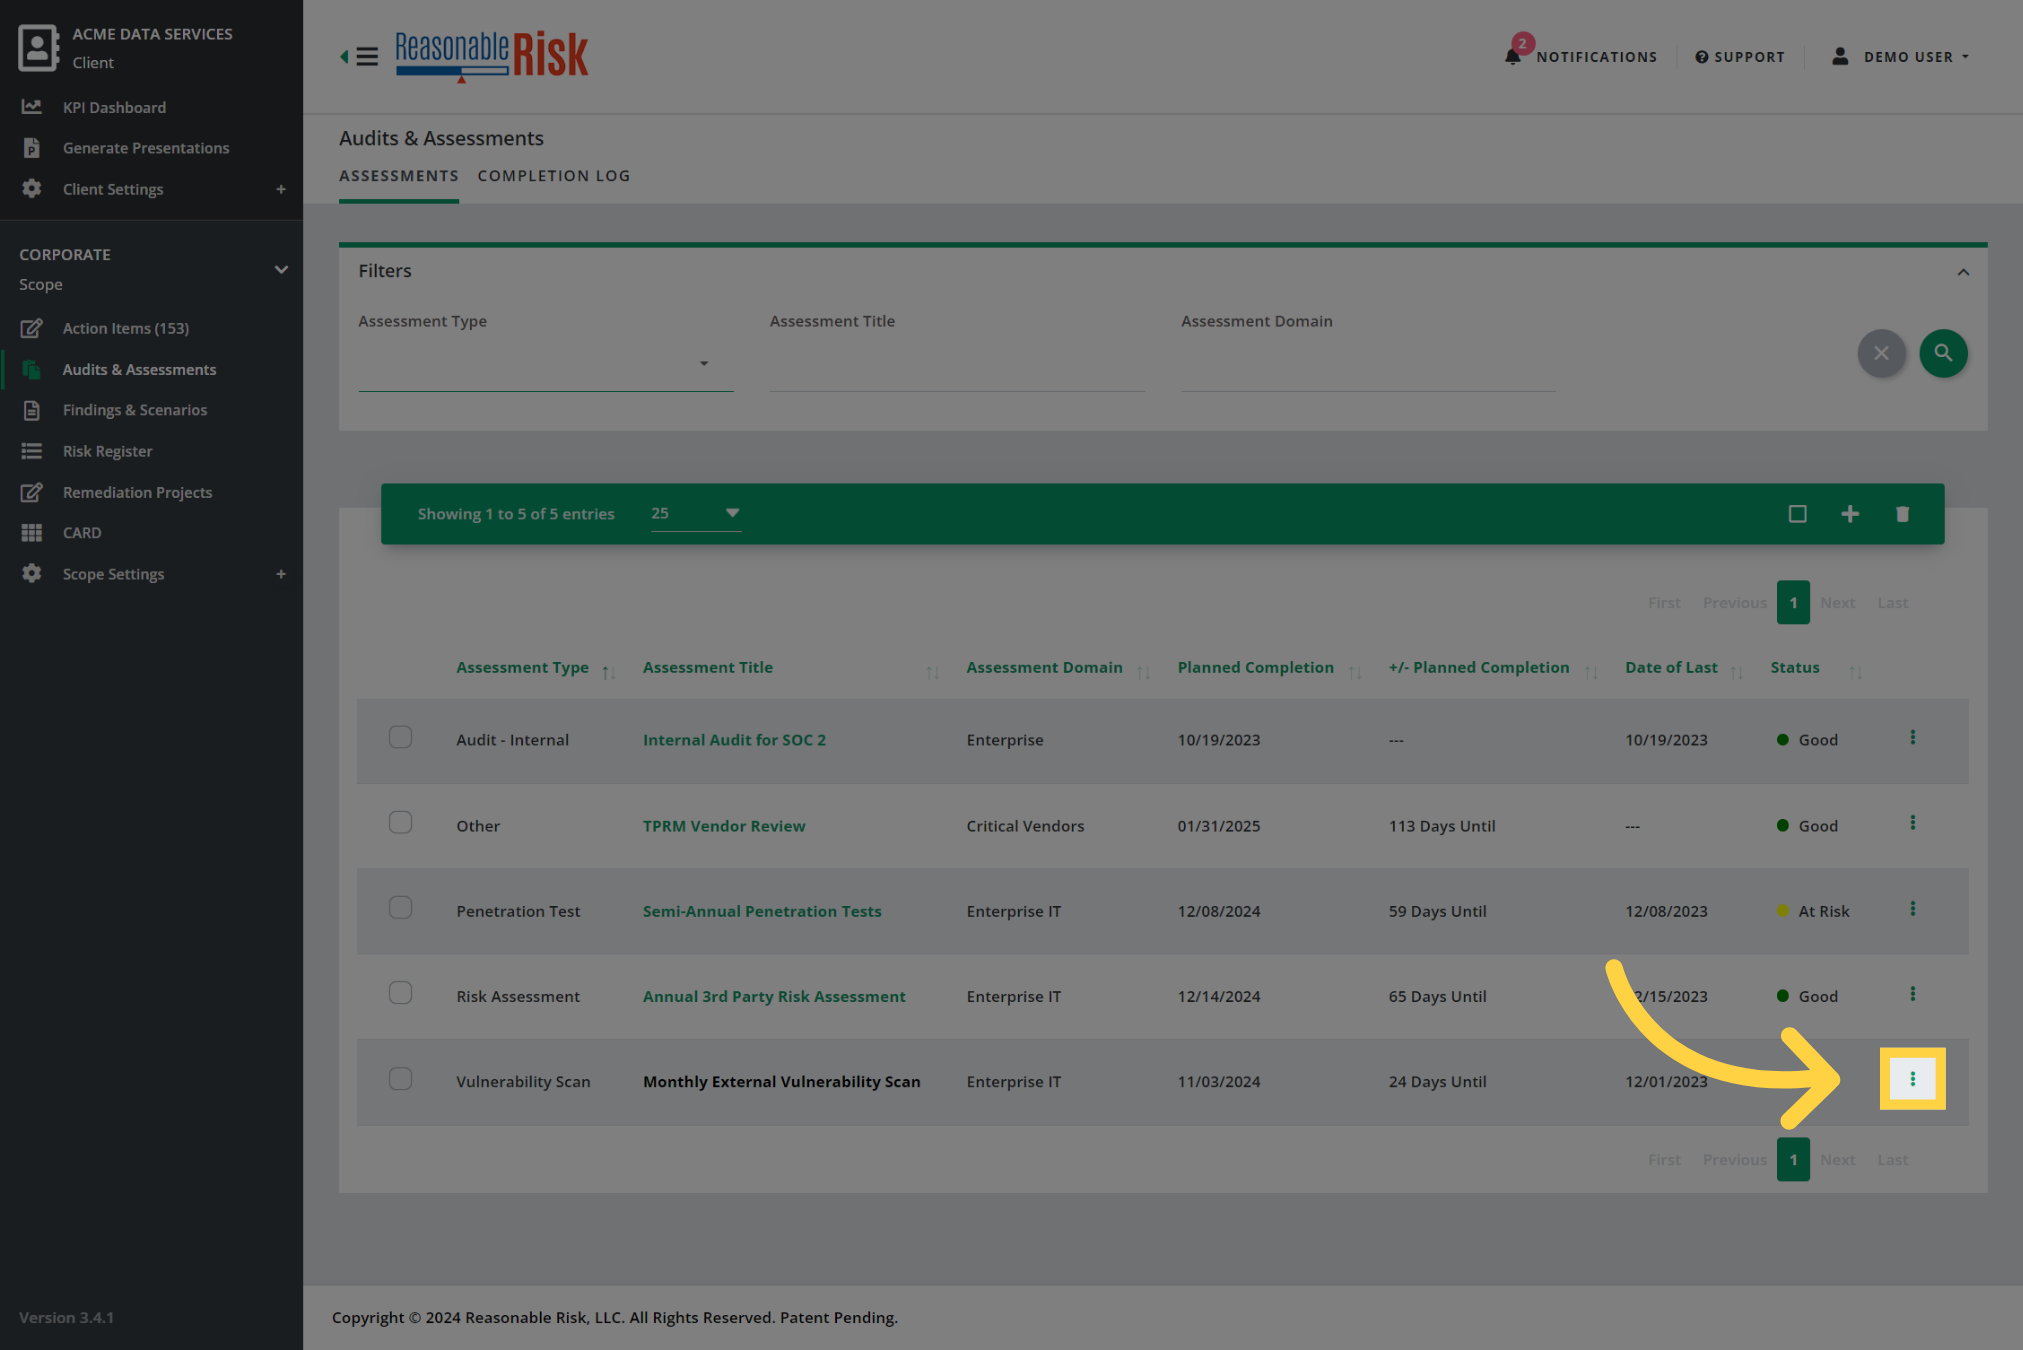
4. Audits & Assessments list
In the list, you can sort and filter the existing Audits & Assessments, check on variance from planned completion, and review the current status.
You can use the three dots menu to add completion dates, that process will be described later in this guide.
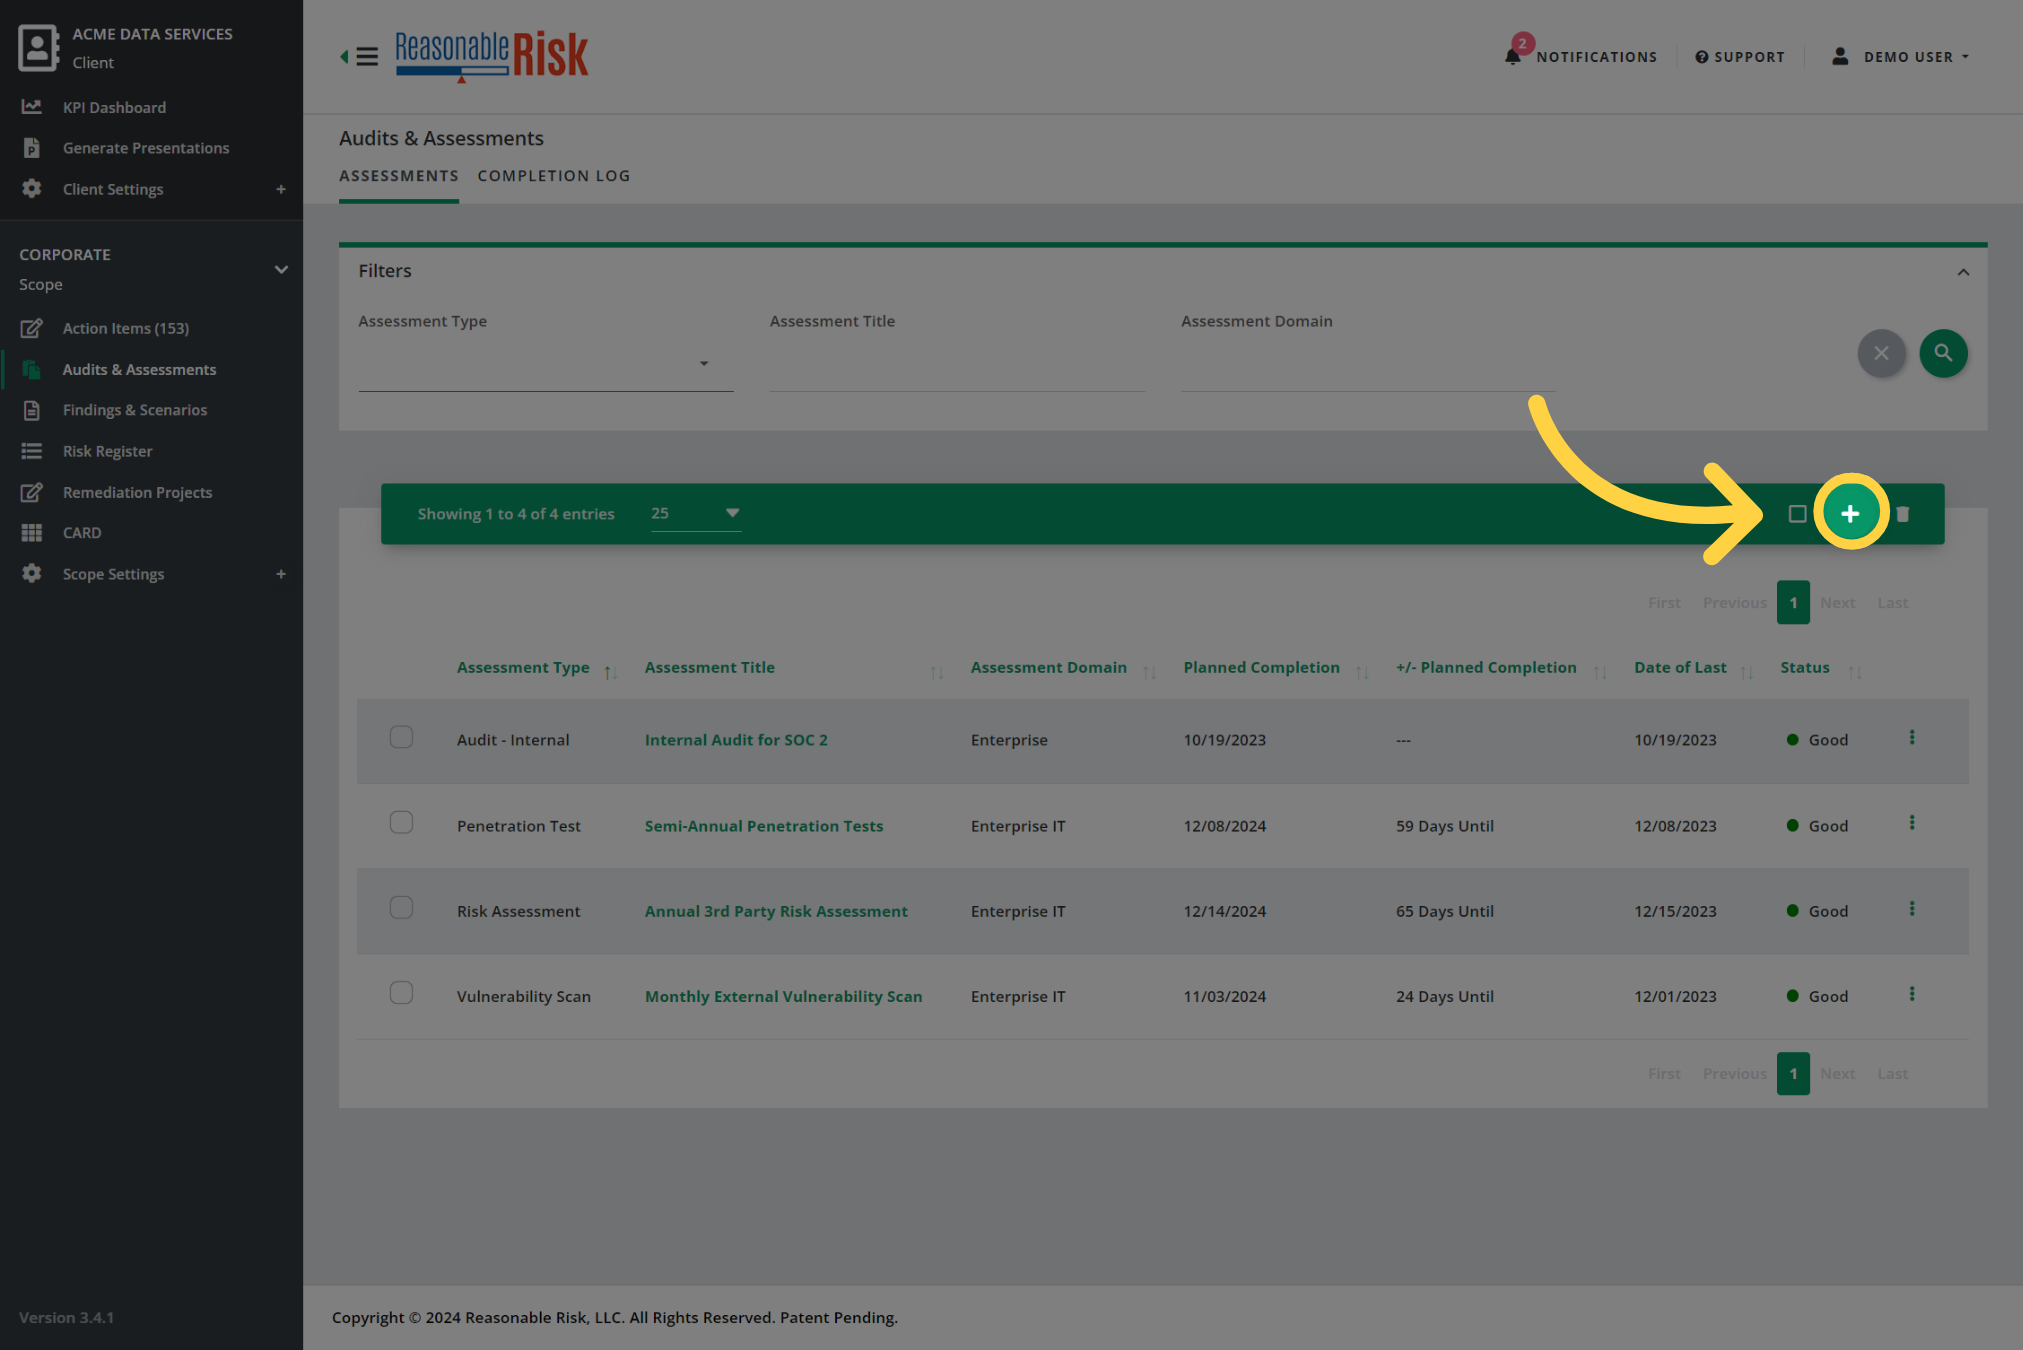
5. Add a new record
You can also make updates and edits to existing records, or add a new one. Let's click the "Add" button in the Activity Bar to create a new record.
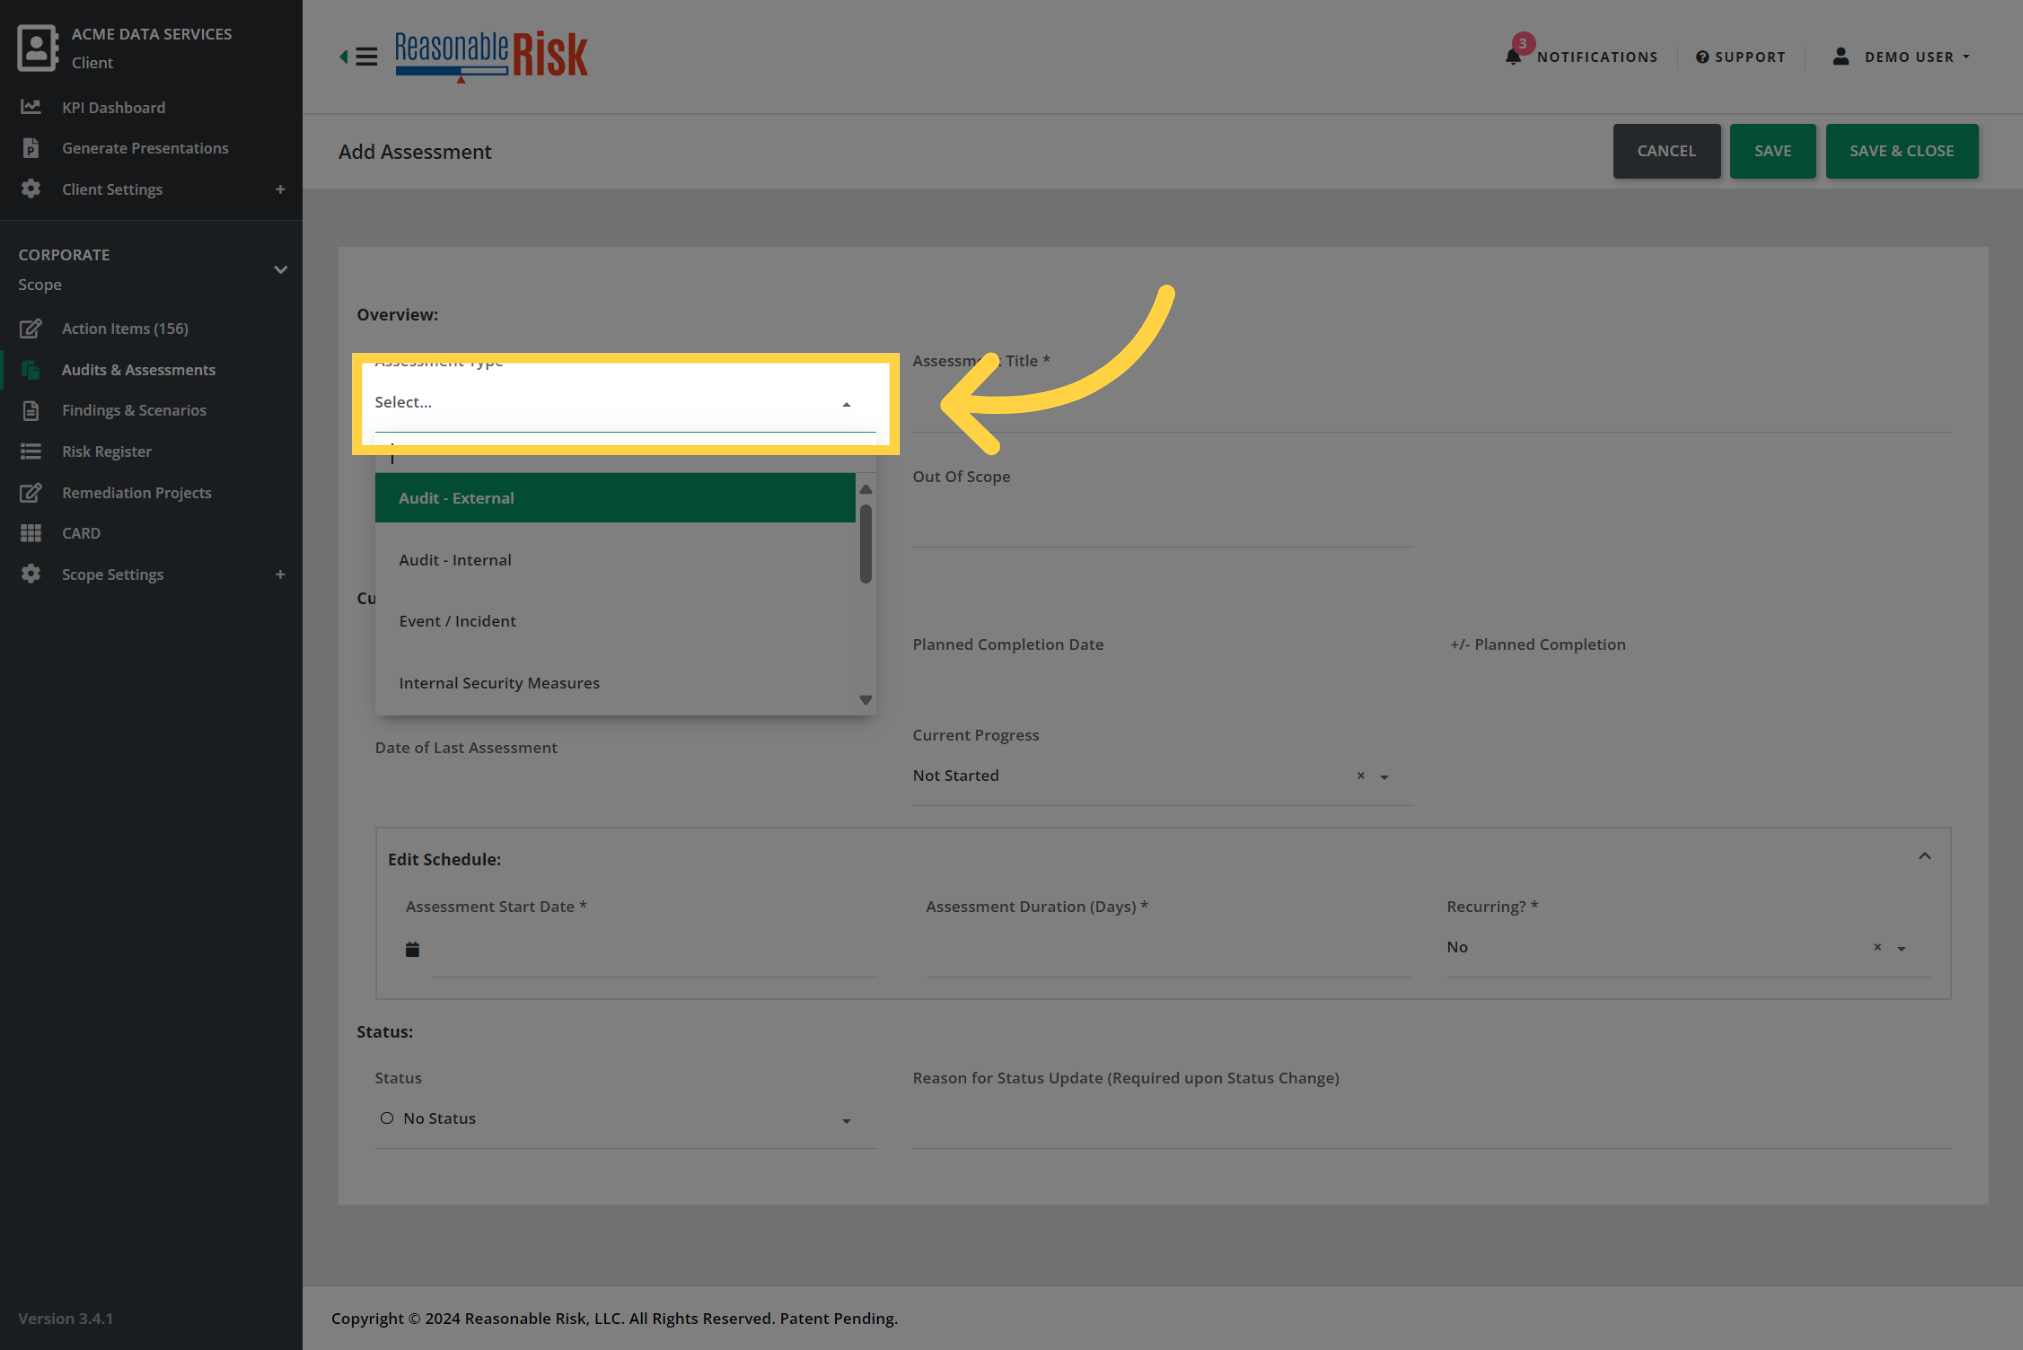
6. Choose an "Assessment Type"
Start out creating your new item by selecting an Assessment Type. You may choose from options like Internal or External Audits, Penetration Tests, Risk Assessments, and many others.
There is no functionality within the Reasonable Risk application associated with the different Assessment Types, it is simply a way for you to categorize your information.
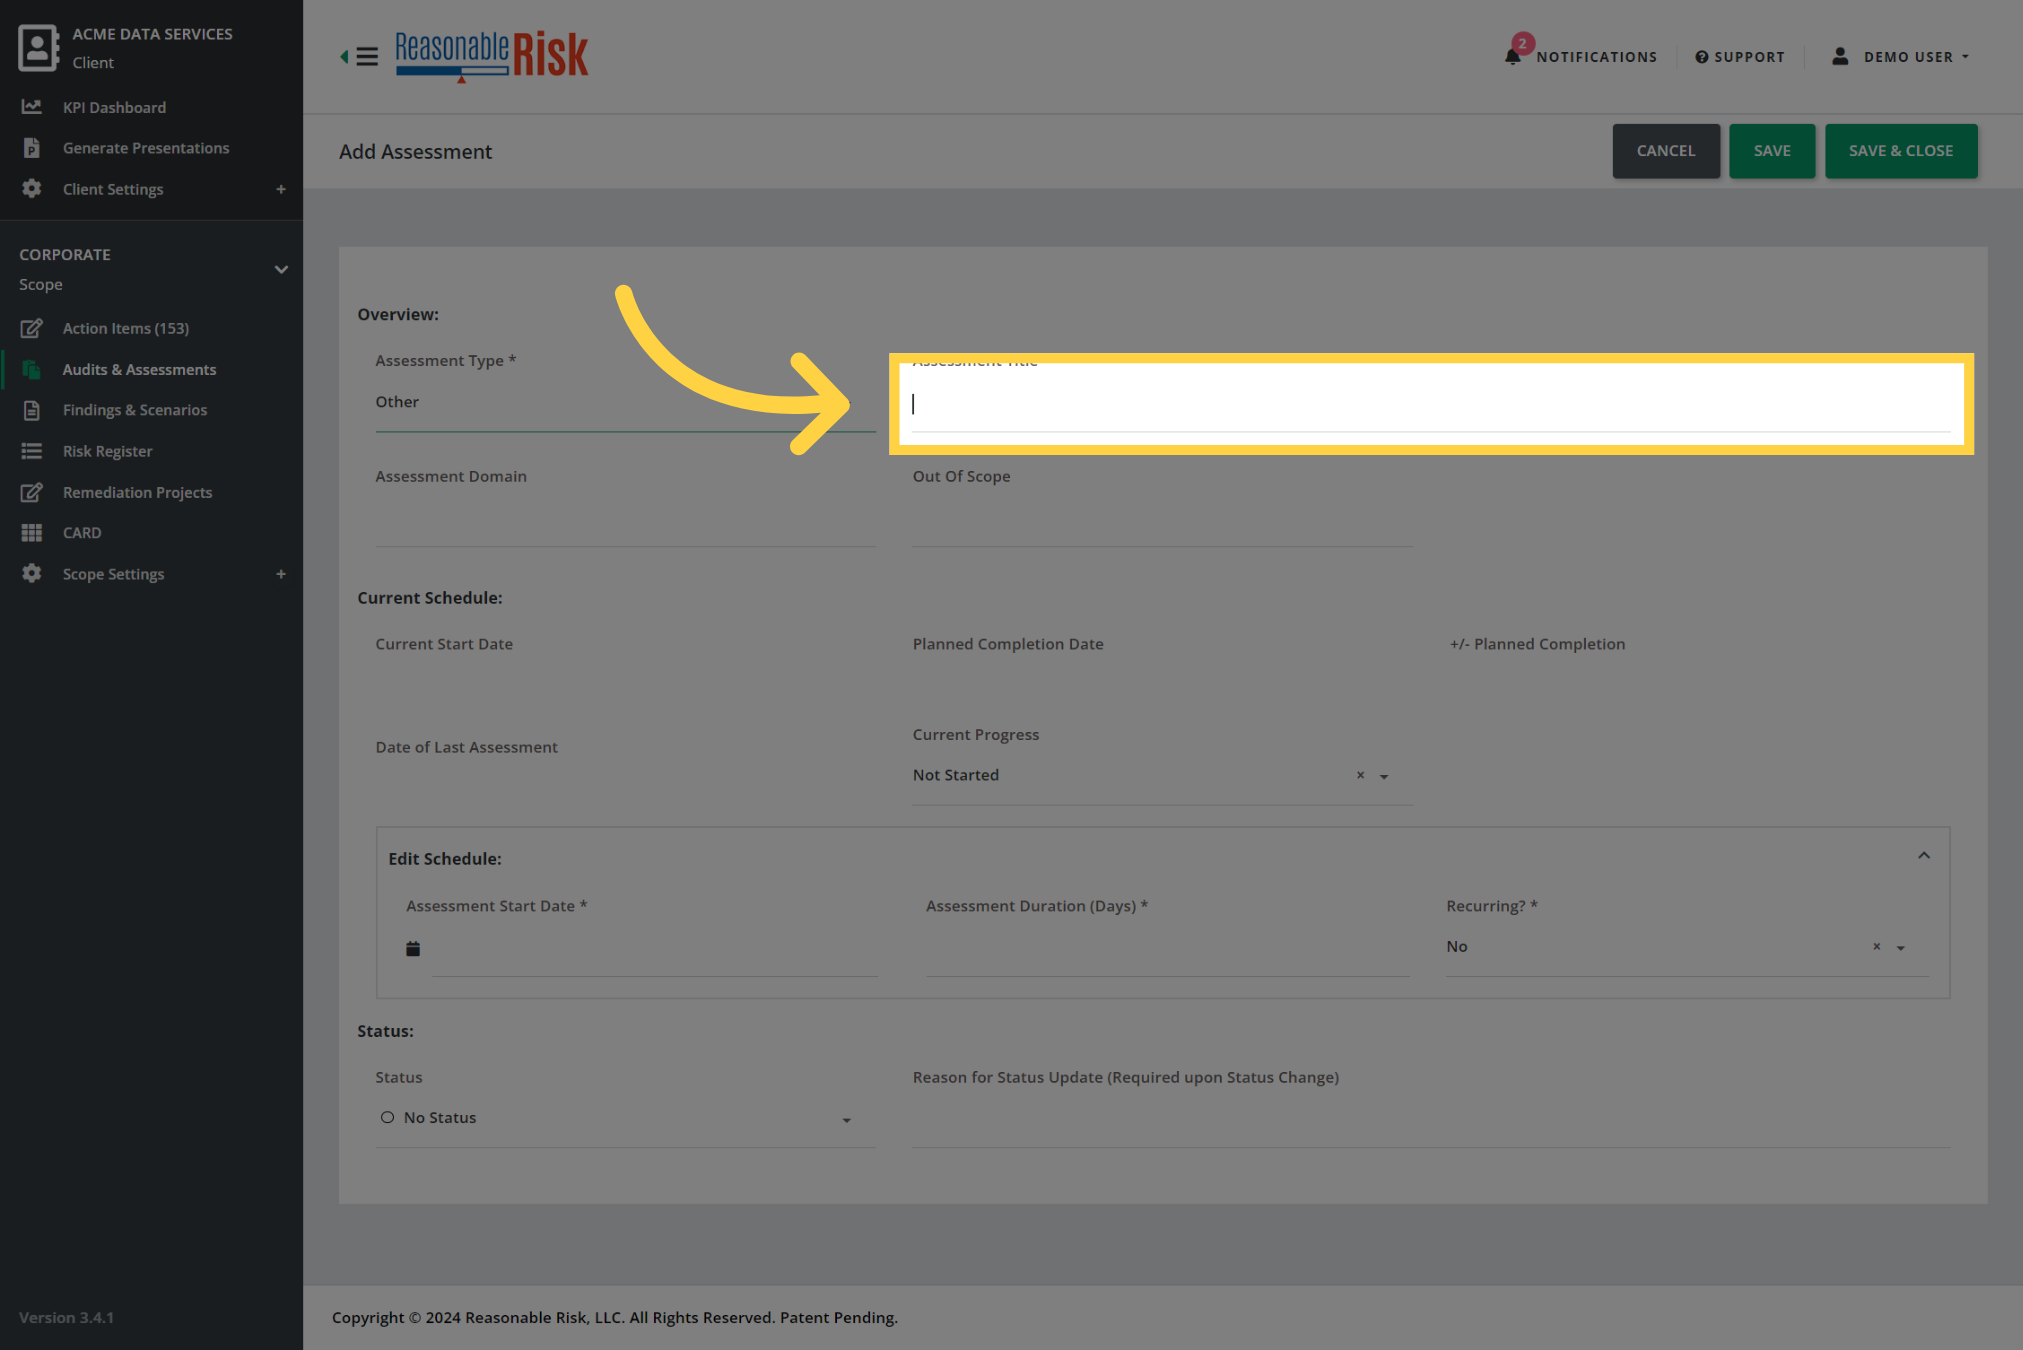
7. Create an "Assessment Title"
In the "Assessment Title" field, provide a unique title for the item you are creating.
If you are creating a recurring item, you may wish to include a reference to the frequency in this title, such as "Semi-annual Penetration Test".
8. Additional Information
The "Assessment Domain" and "Out of Scope" fields are available for informational purposes only.
These fields allow you to provide additional details about the item you are creating, allowing you to differentiate one from another if you have multiple items of the same type.

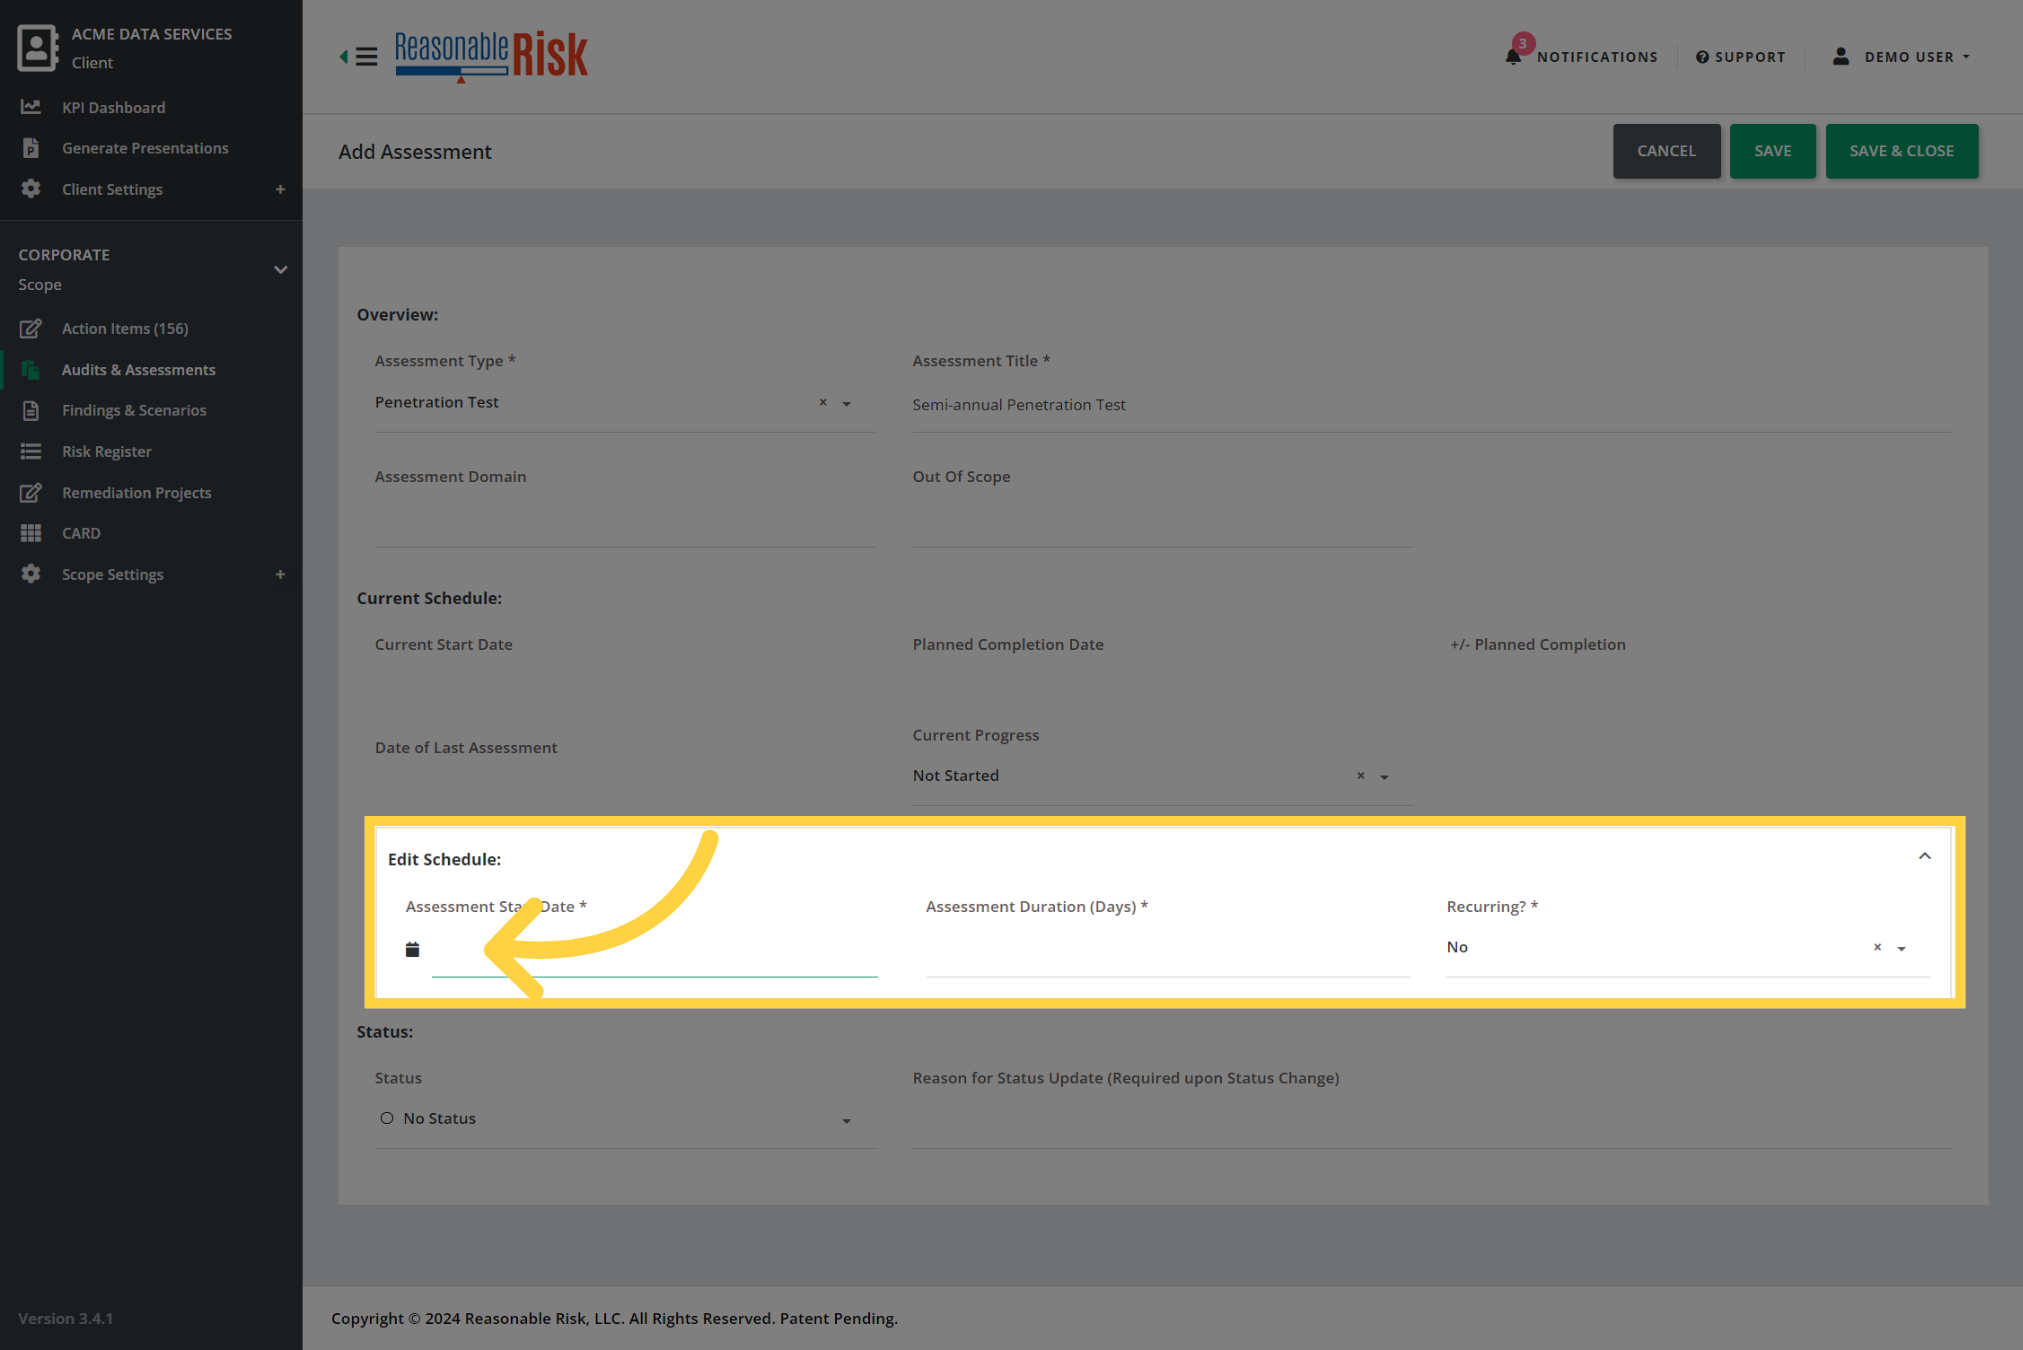
9. Define Schedule
Now, move to the "Edit Schedule" section of the form. Here, in the "Assessment Start Date" field, you will select the date you plan to begin the assessment you are creating. Next, you will define the duration of the item in the "Assessment Duration" field as a number of days.
Finally, you will identify if this item is recurring or not.
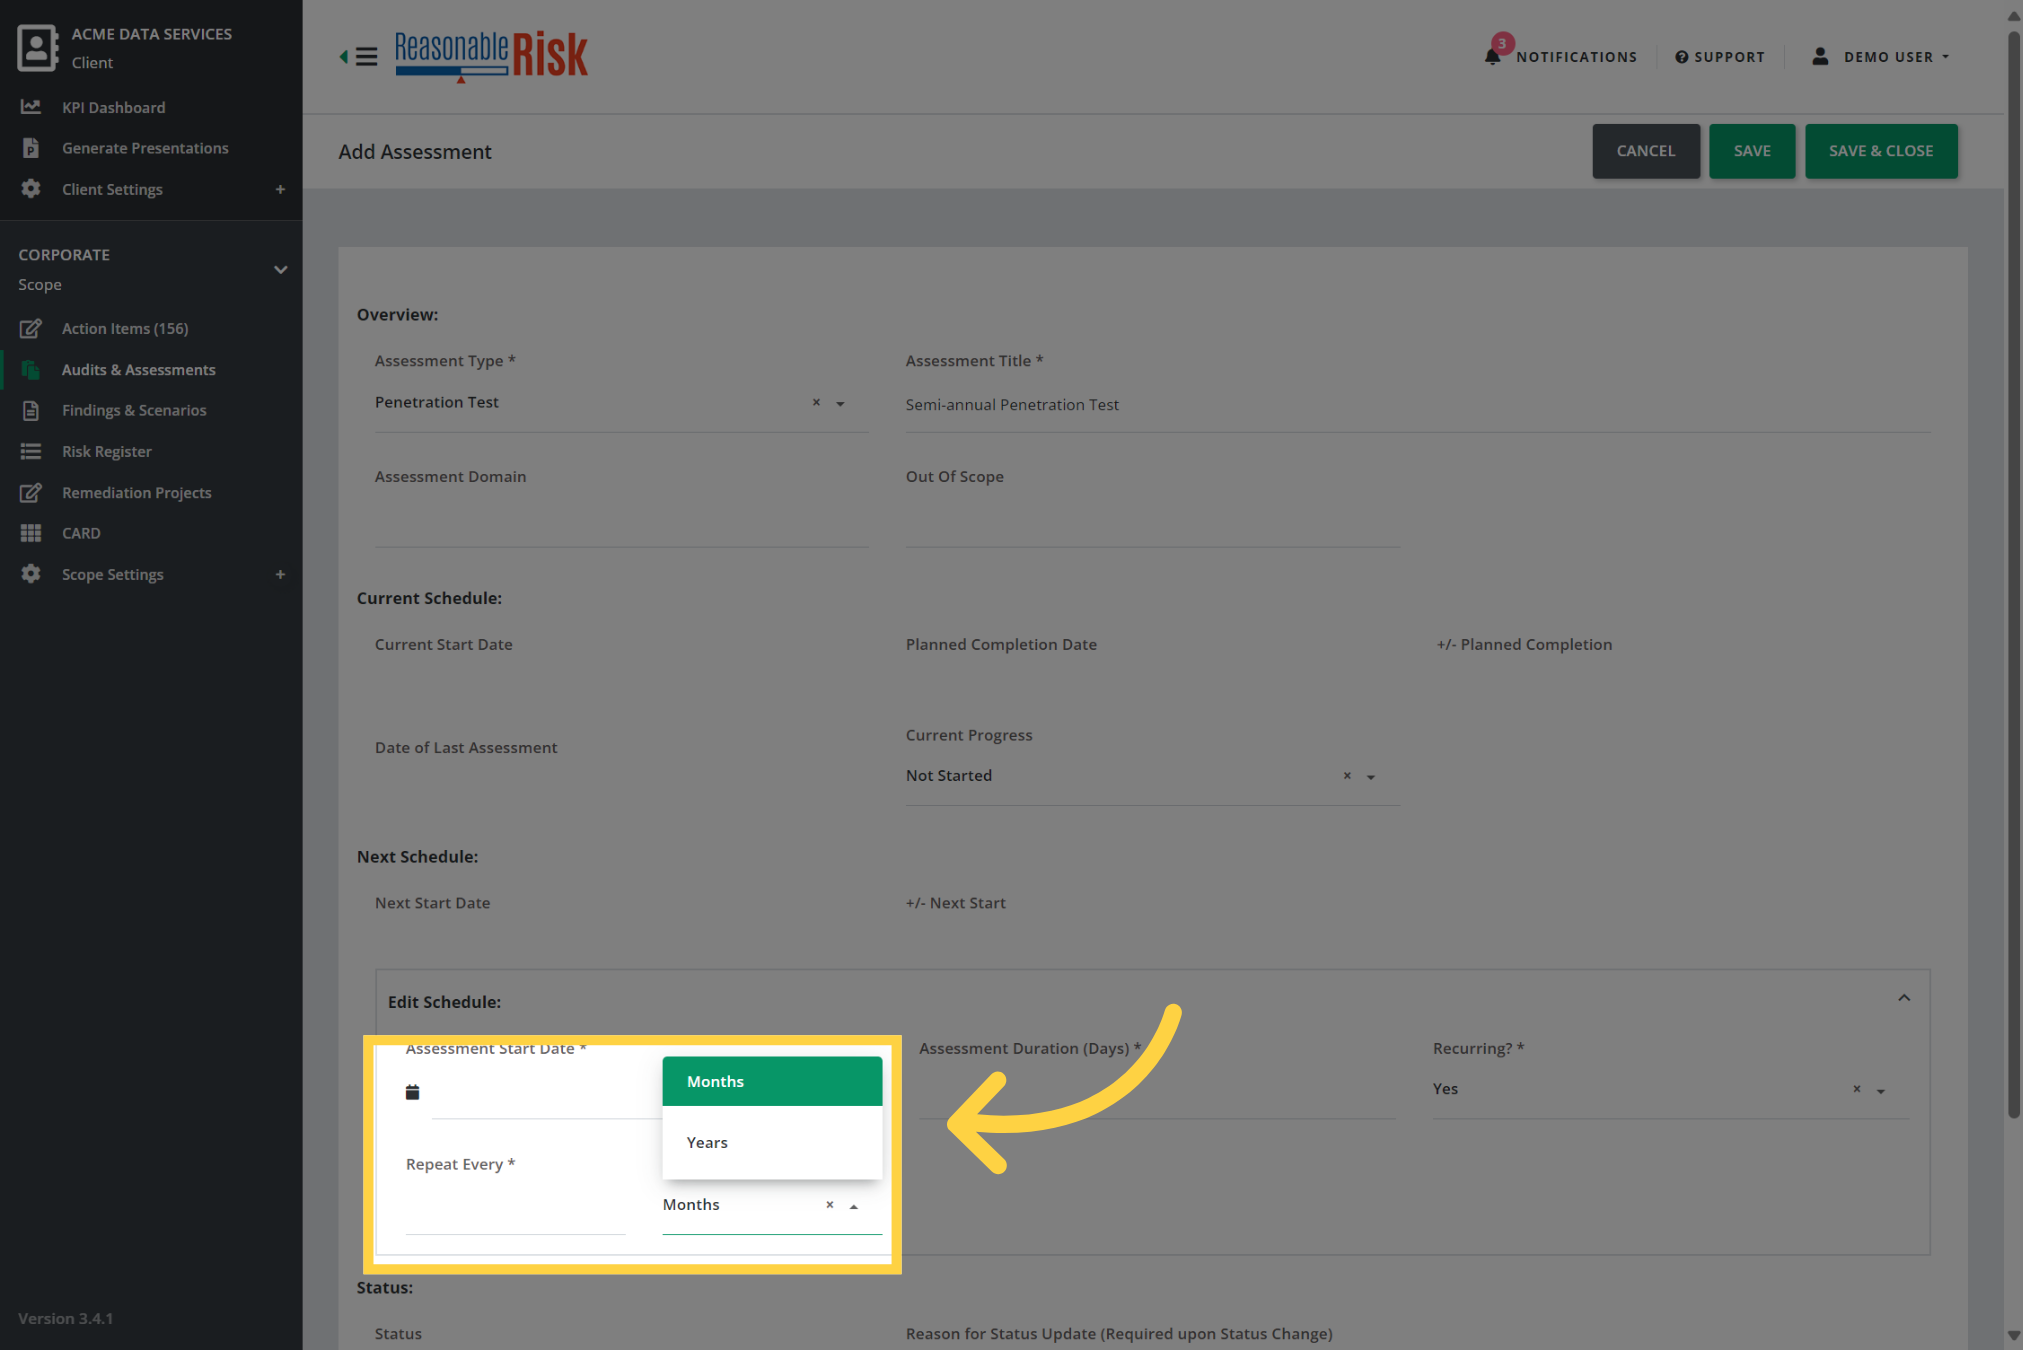
10. Define Frequency
If you select "Yes" for the "Recurring" field, you will also need to define the frequency for the assessment.
You must choose a frequency of "months" or "years" and you will also need to specify how many cycles of that frequency are expected. As an example, for a semi-annual frequency, we would select "months" and enter 6 in the "Repeat Every" field.
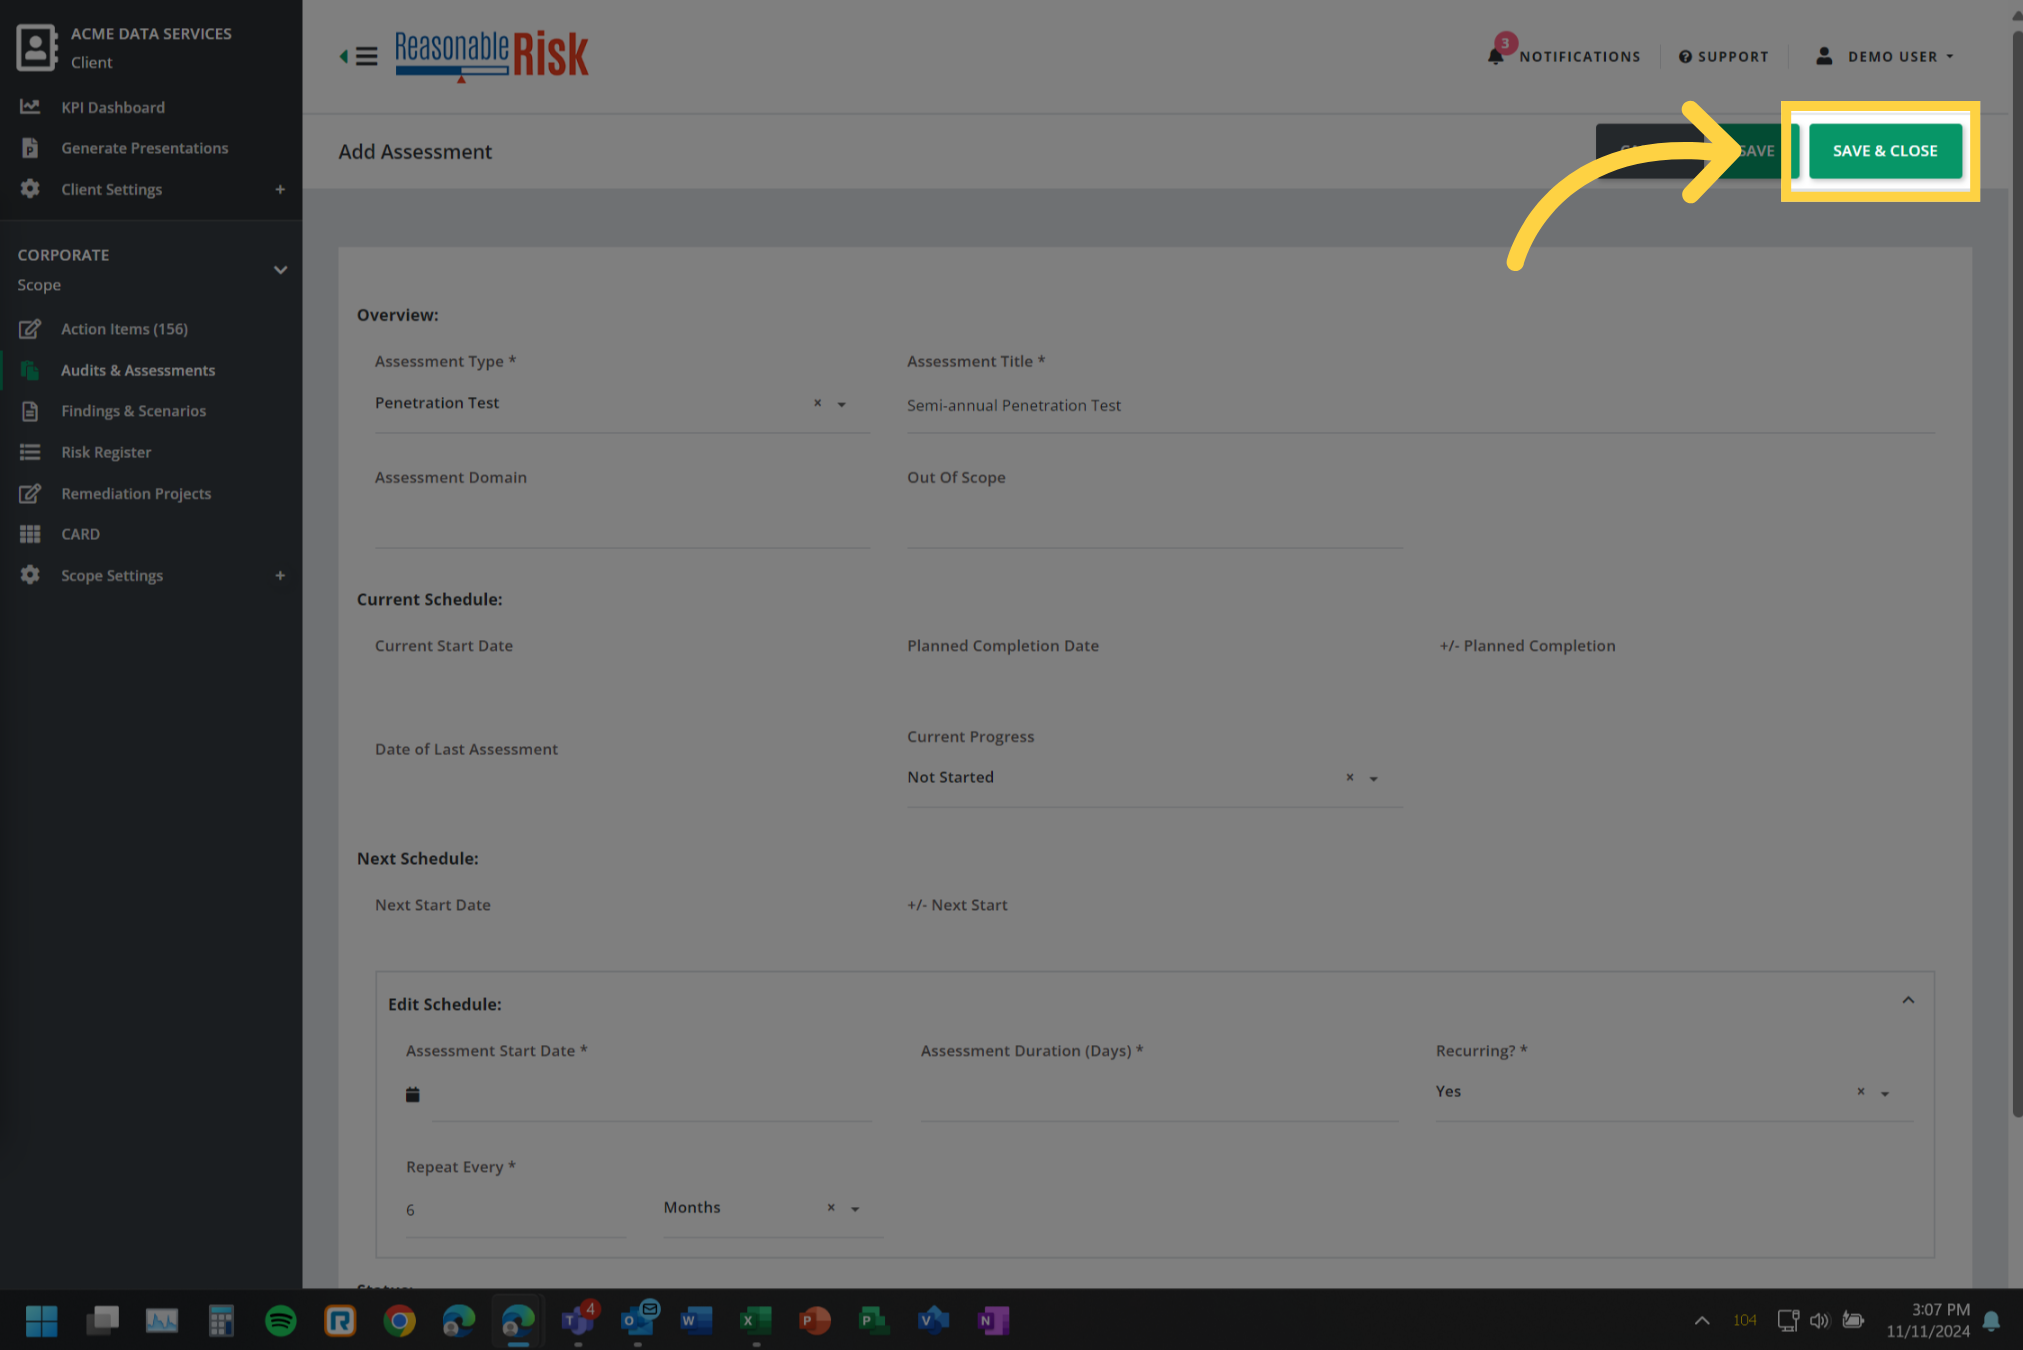
11. Click "Save & Close"
Once all of your changes have been made, you must scroll to the top of the page and click on "Save & Close".

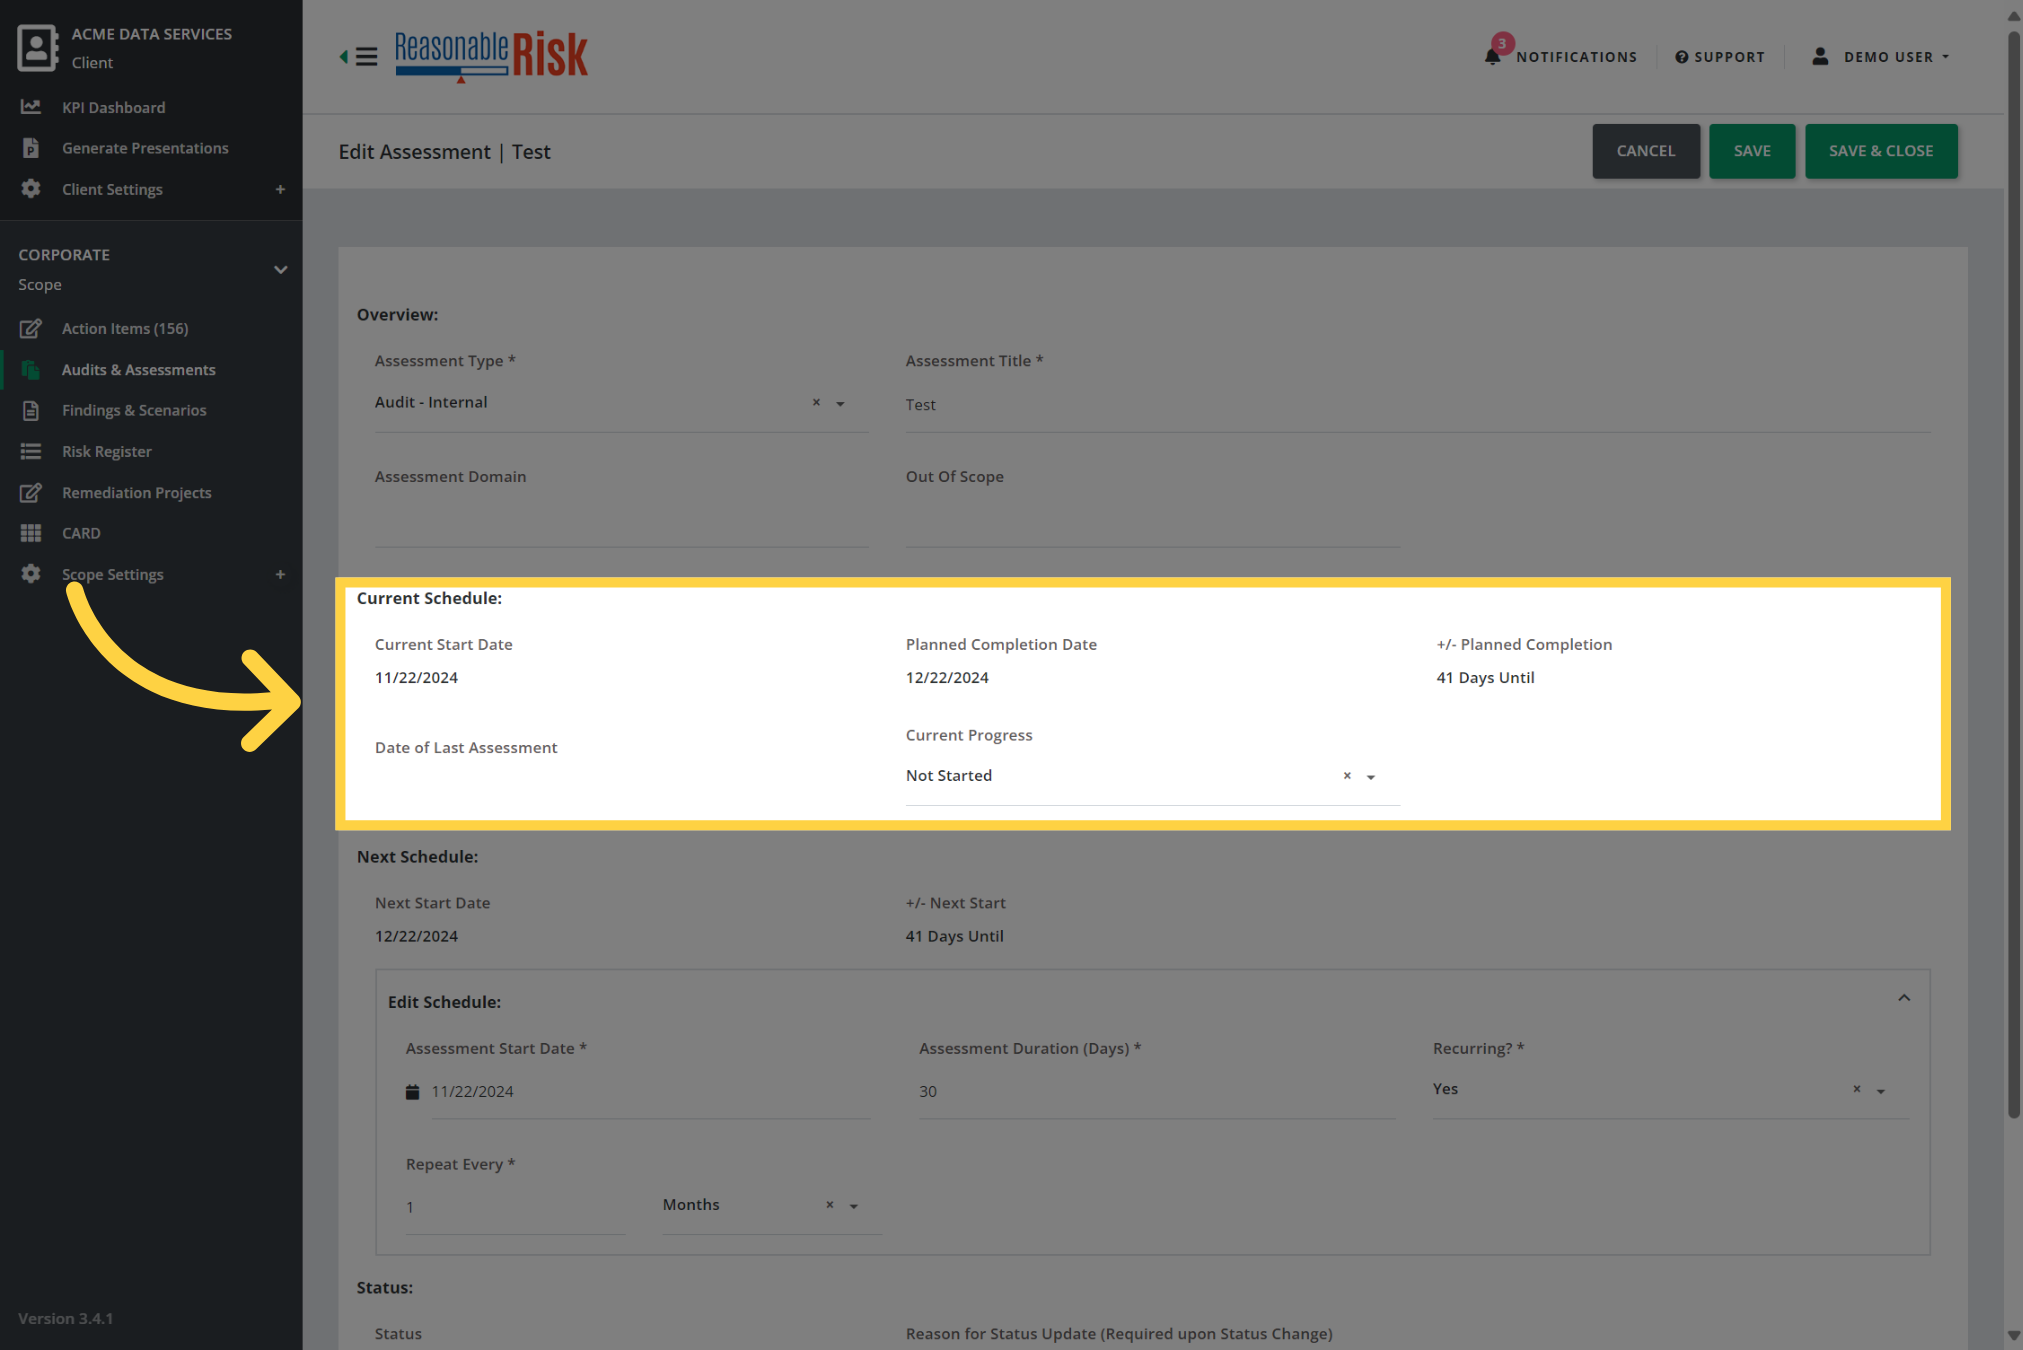
12. Update an Audit/Assessment
To edit or update an existing item, click on the "Assessment Title" from the list. This will allow you to update the "Current Progress" of the item as well as the "Status".
13. Review and Update Current Schedule
The Current Schedule section of the item allows you to see the timing of the next planned interval and allows you to indicate the current progress of the item.
The "Current Progress" field allows you to indicate if the current cycle is "Not Started," "In Progress," or "Complete". In this section, you will see a "Date of Last Assessment" field, this field is populated using the three dots menu from the Audits & Assessments list and will be described later in this guide.
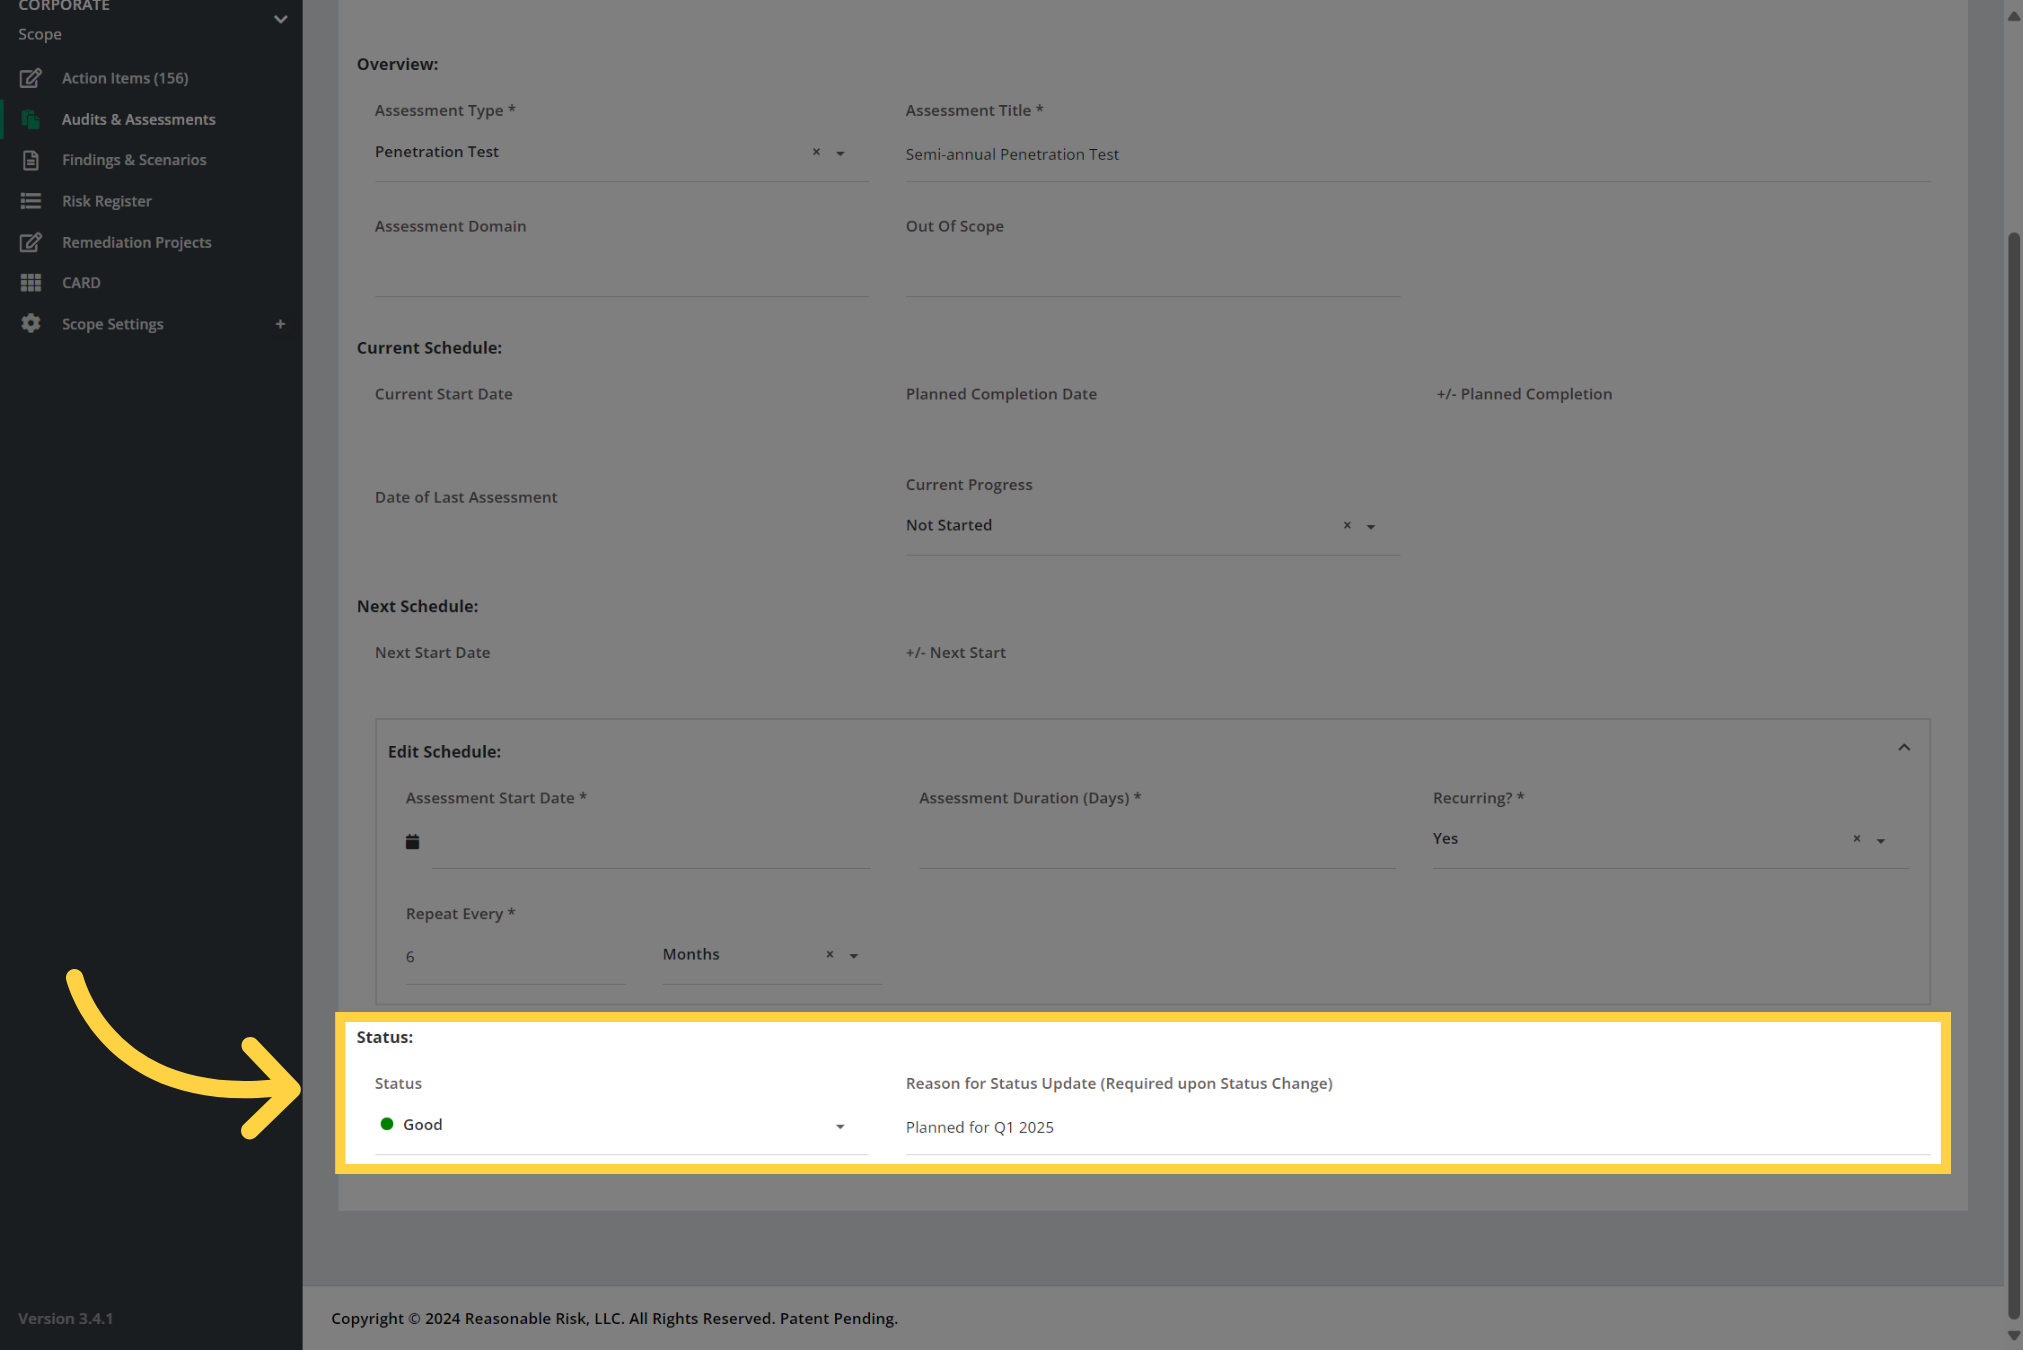
14. Update Status
Take care to make sure you update the status for the item you are working on. Select from "Good," "At Risk," or "Issue" and enter a "Reason for Status Update" in the available fields.
15. Click "Save & Close"
Once all of your changes have been made, you must scroll to the top of the page and click on "Save & Close".
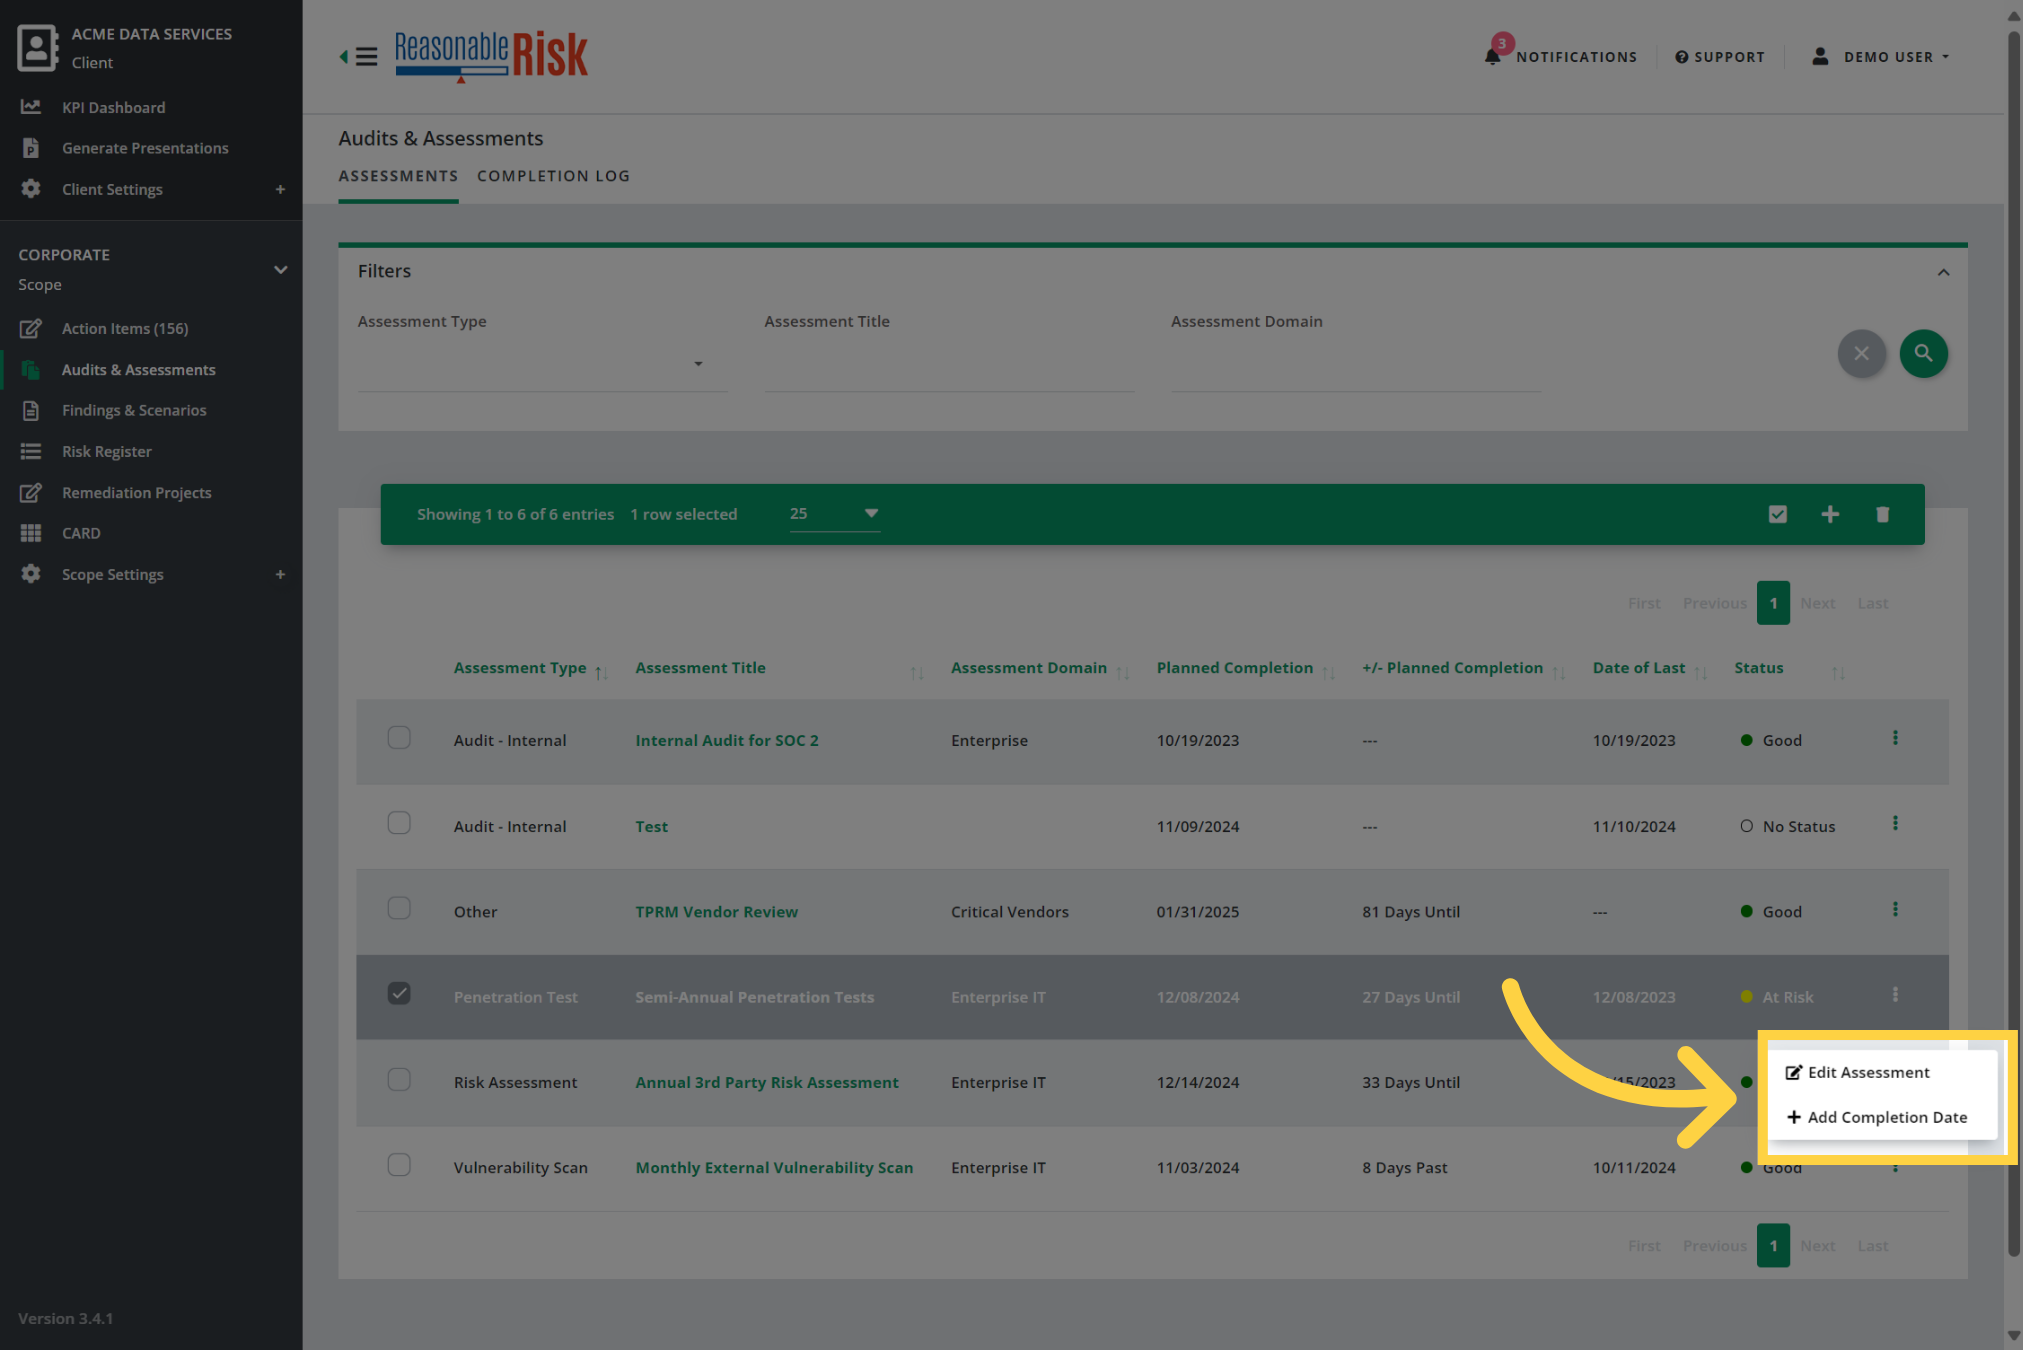
16. Complete an Assessment
When a cycle of an assessment has been completed, you must go to that item and mark the completed date. Start by selecting the three dots menu for the item.
17. Click "Add Completion Date"
In the three dots menu, select "Add Completion Date".
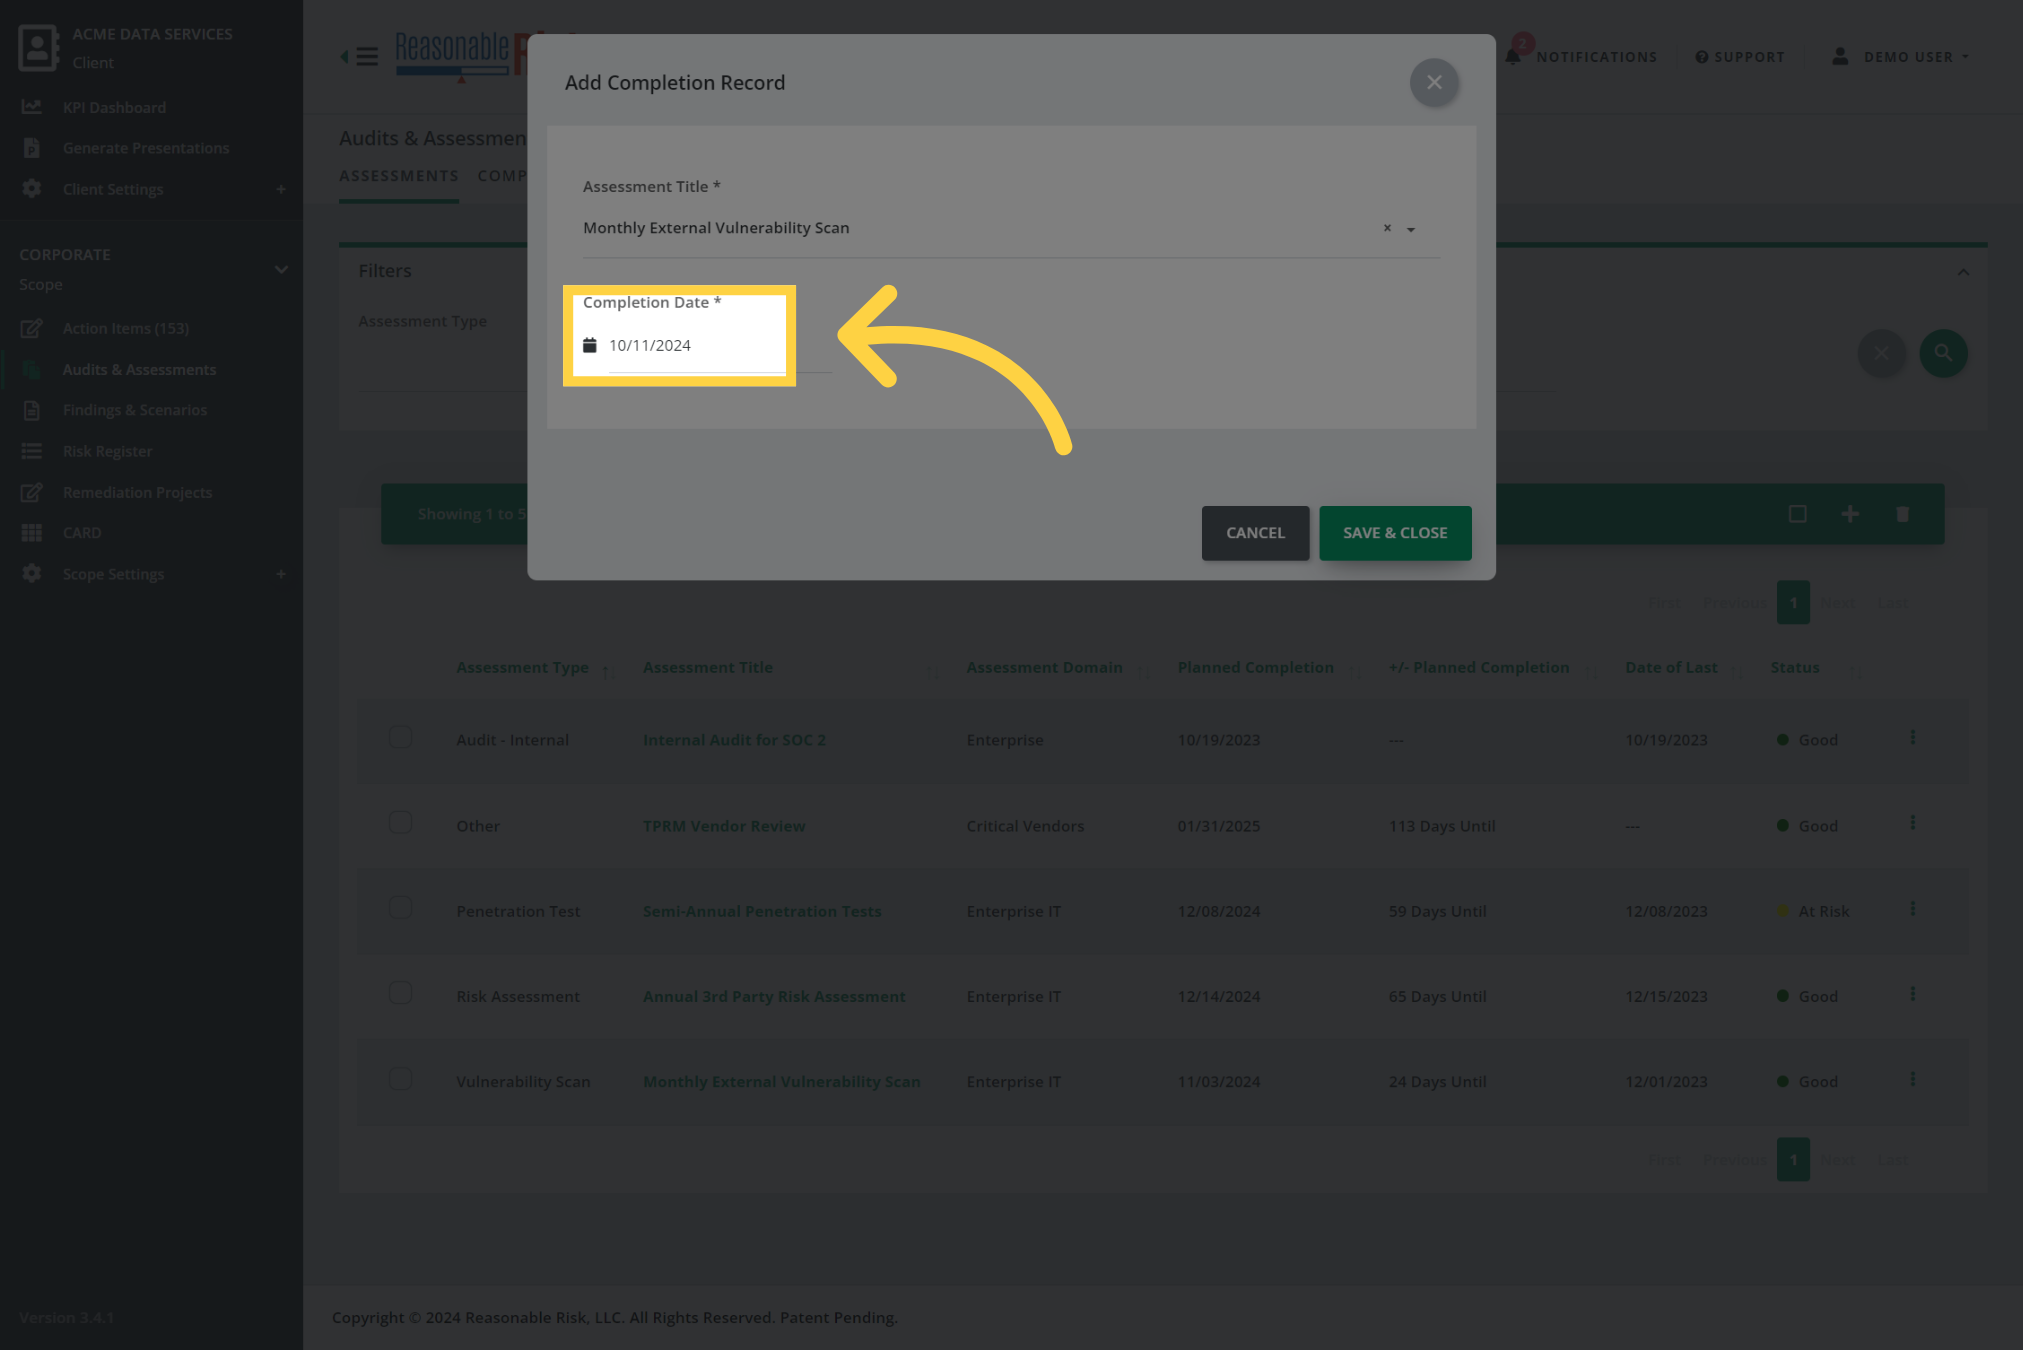
18. Enter the "Completion Date"
Enter the "Completion Date".
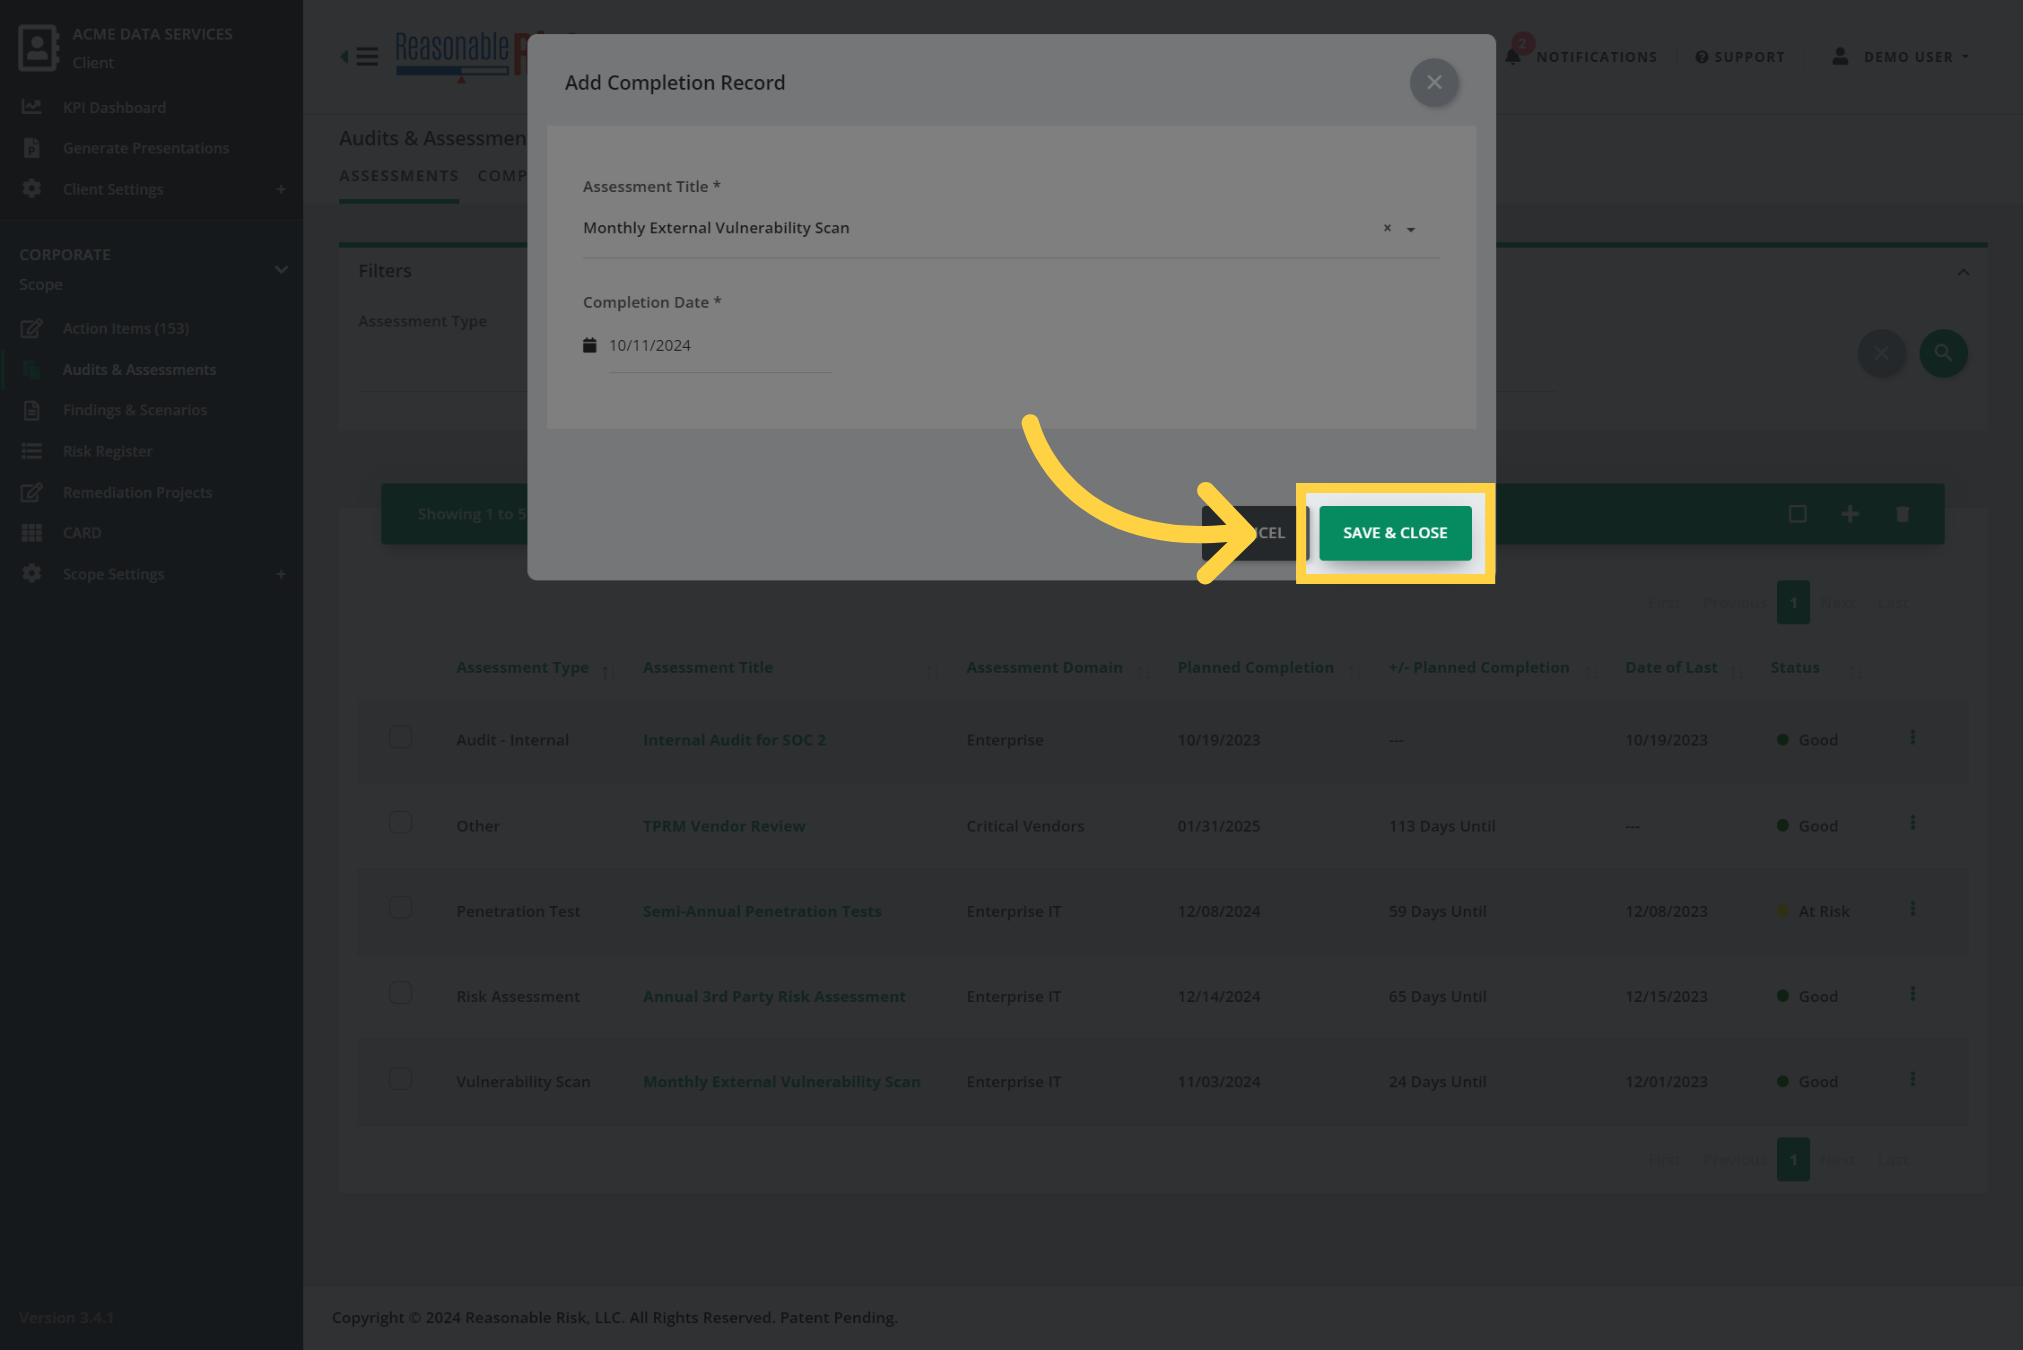
19. Click "Save & Close"
Save changes and close the window.
20. Viewing the "Completion Log"
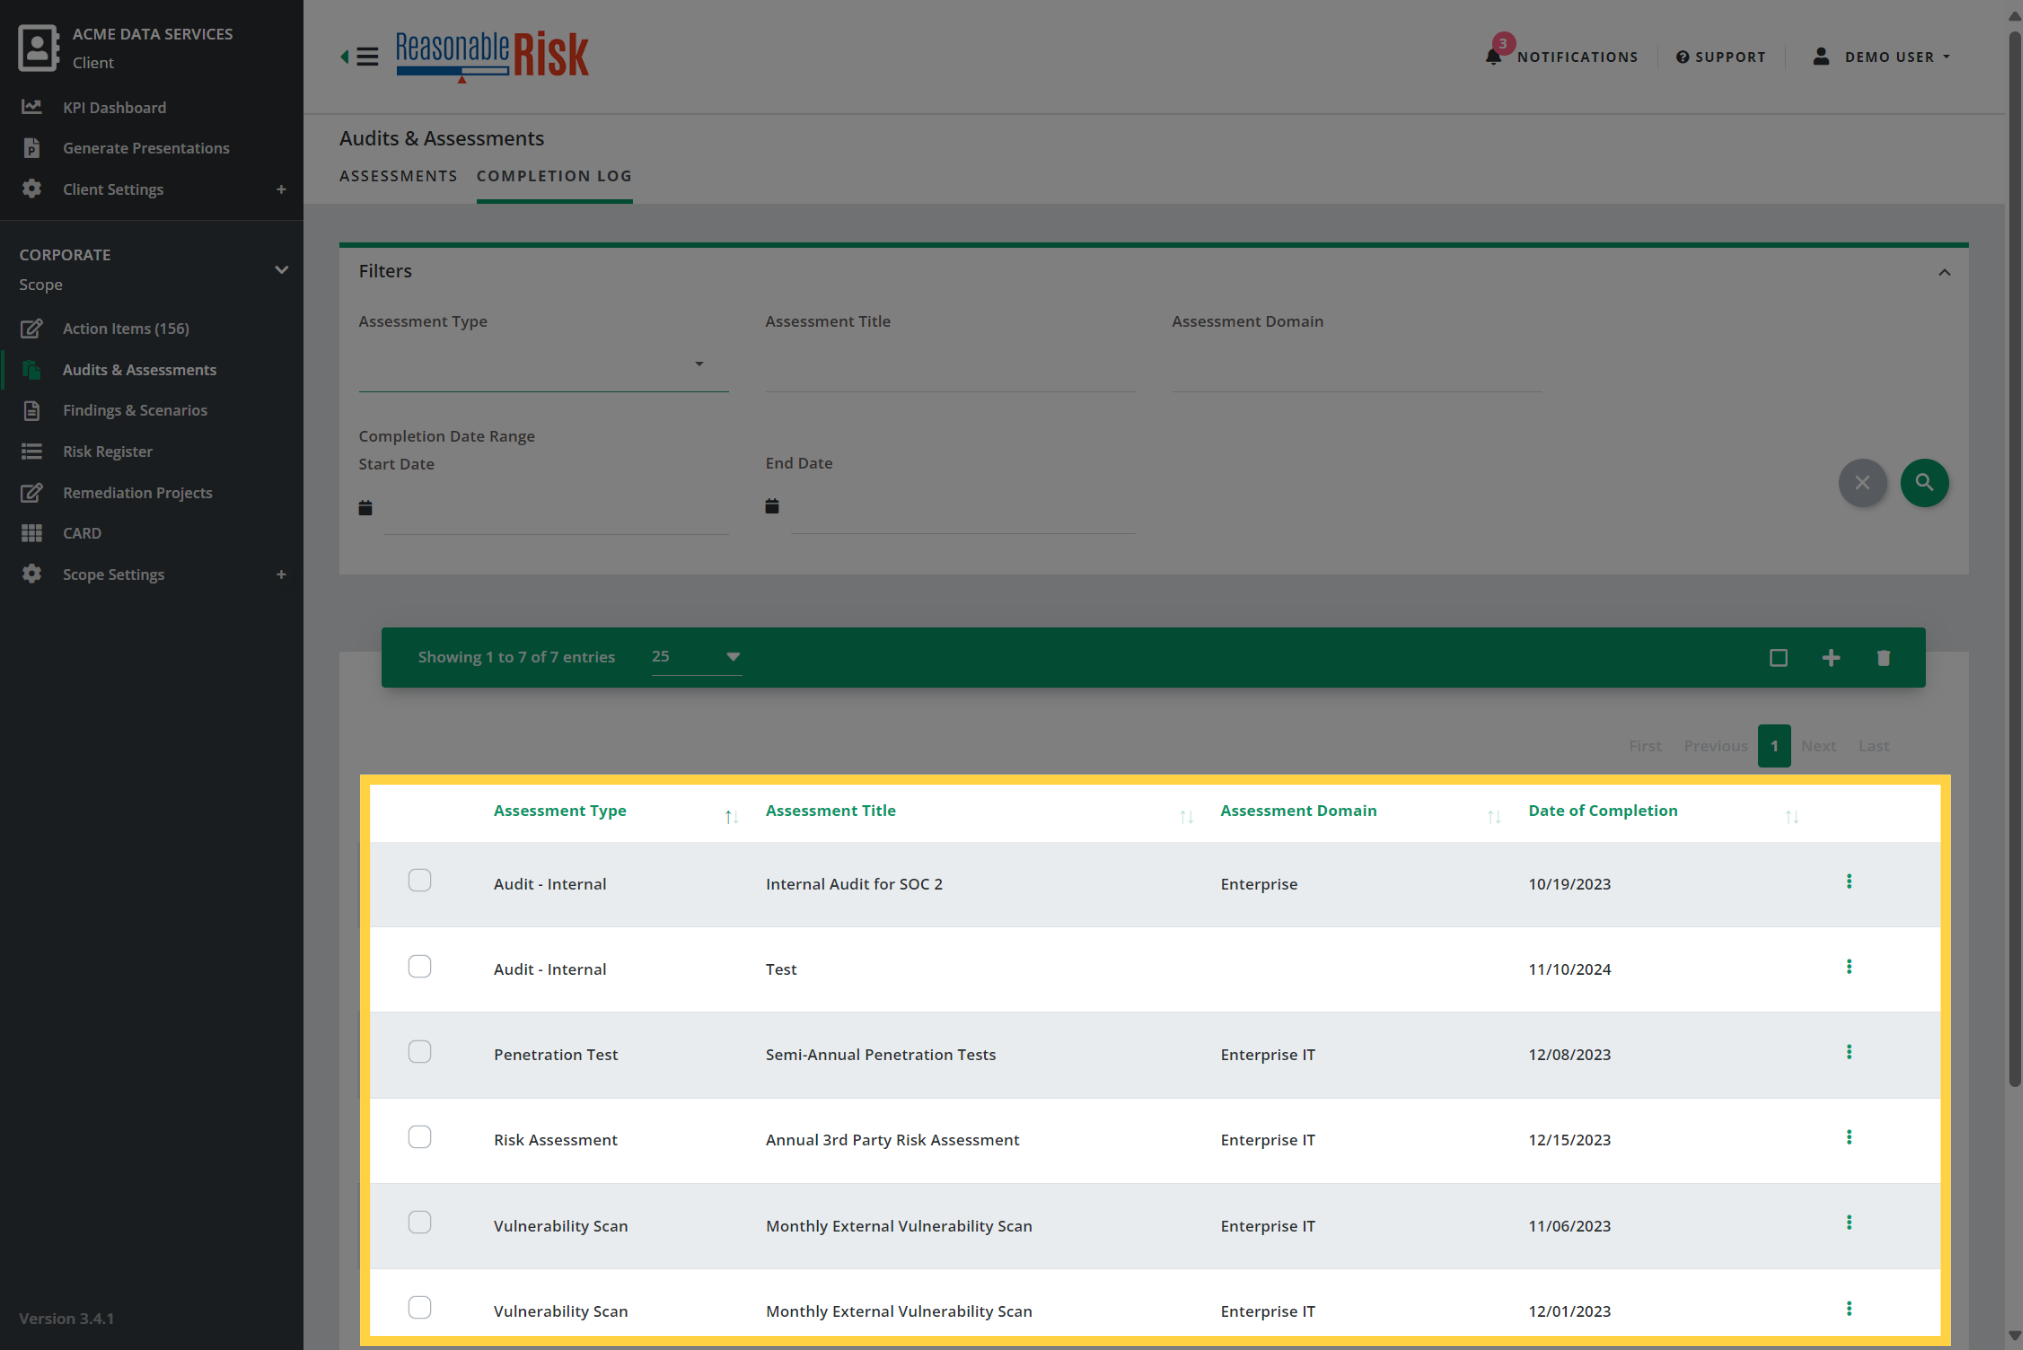
Selecting the "Completion Log" tab of the Audits & Assessments module allows you to see the completion history for each item in the Audits & Assessments module.
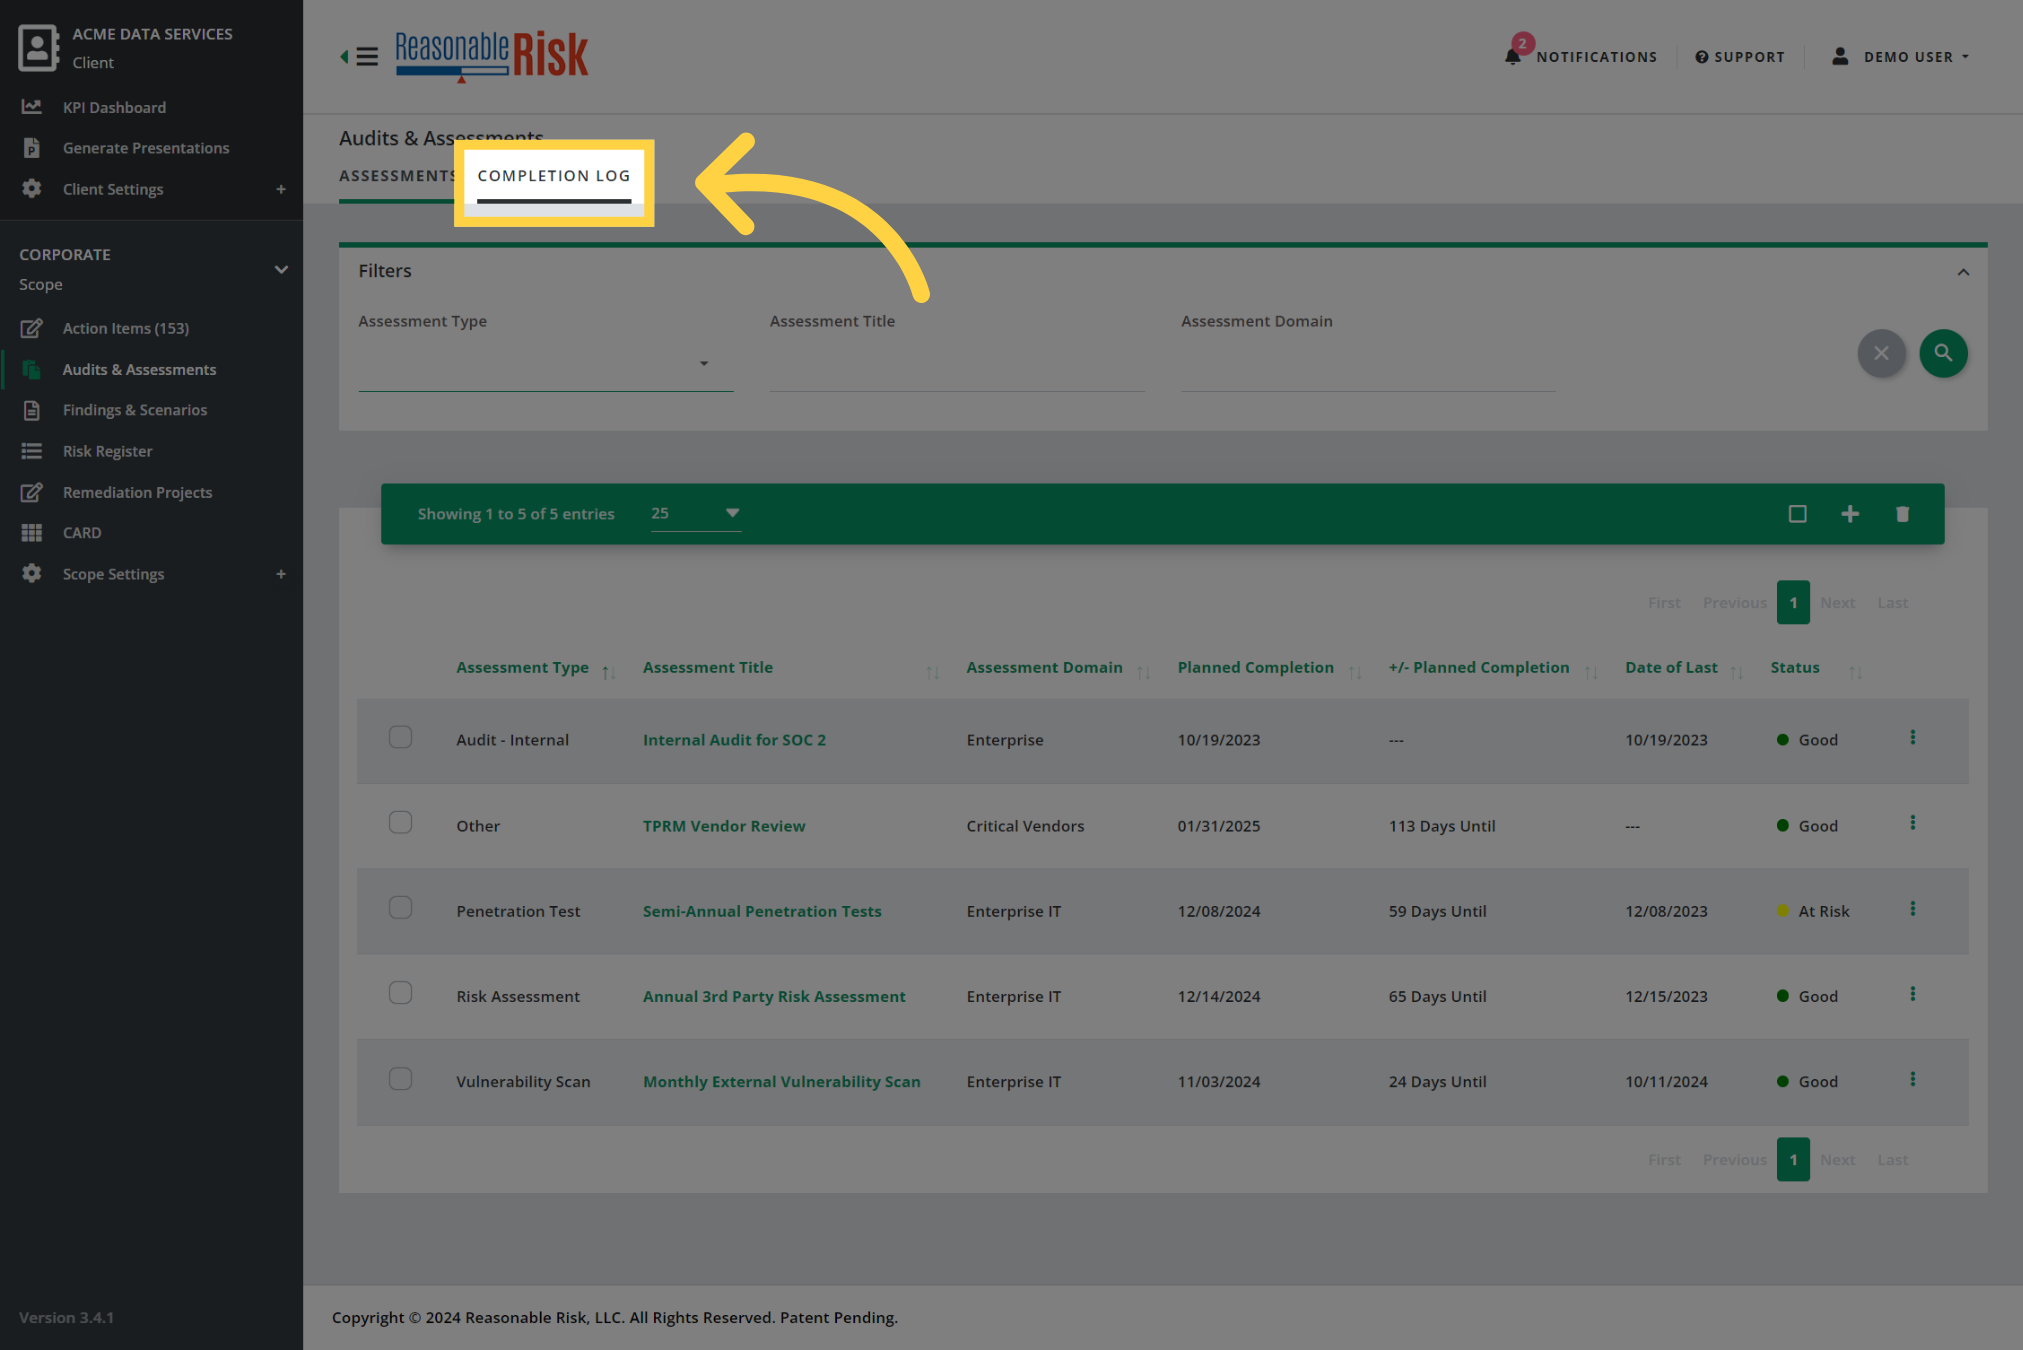
21. Click "Completion Log"
Each instance of an item is listed in this view after a Completion Date has been added. You may use the three dots menu to modify the Completion Date if necessary.
22. Executive Reporting
The current status of each item in the Audits & Assessments module is included in the "Plan - Audits & Assessments" section of the Executive Summary presentation. Here, you will see the details about each item, including the "Planned Completion" date, the number of days until the next cycle should be completed, the "Date of Last Assessment" and the status values for the item.

Comments
0 comments
Please sign in to leave a comment.